Google Sheets is a powerful cloud-based spreadsheet tool that lets you do nearly everything you could do in Microsoft Excel. But the real power of Google Sheets is the Google Scripting feature that comes with it.
Google Apps scripting is a background scripting tool that works not only in Google Sheets but also Google Docs, Gmail, Google Analytics, and nearly every other Google cloud service. It lets you automate those individual apps, and integrate each of those apps with each other.

In this article you’ll learn how to get started with Google Apps scripting, creating a basic script in Google Sheets to read and write cell data, and the most effective advanced Google Sheets script functions.
Contents
How to Create a Google Apps Script
You can get started right now creating your first Google Apps script from inside Google Sheets.
To do this, select Tools from the menu, then Script Editor.
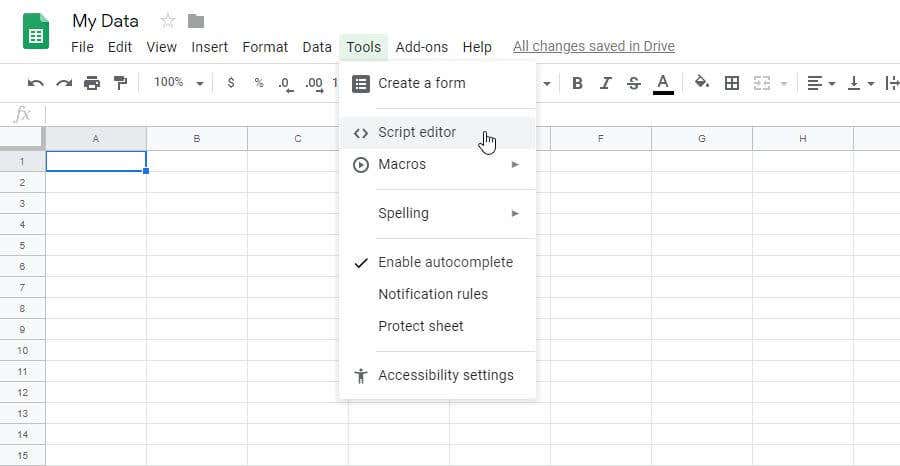
This opens the script editor window and defaults to a function called myfunction(). This is where you can create and test your Google Script.
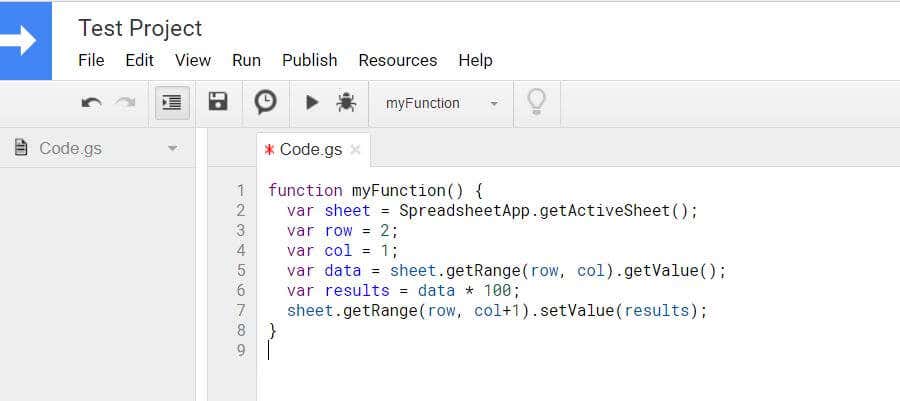
To give it a shot, try creating a Google Sheets script function that will read data from one cell, perform a calculation on it, and output the data amount to another cell.
The function to get data from a cell is the getRange() and getValue() functions. You can identify the cell by row and column. So if you have a value in row 2 and column 1 (the A column), the first part of your script will look like this:
function myFunction() {
   var sheet = SpreadsheetApp.getActiveSheet();
   var row = 2;
   var col = 1;
   var data = sheet.getRange(row, col).getValue();
}
This stores the value from that cell in the data variable. You can perform a calculation on the data, and then write that data to another cell. So the last part of this function will be:
   var results = data * 100;
   sheet.getRange(row, col+1).setValue(results);
}
When you’re done writing your function, select the disk icon to save.
The first time you run a new Google Sheets script function like this (by selecting the run icon), you’ll need to provide Authorization for the script to run on your Google Account.
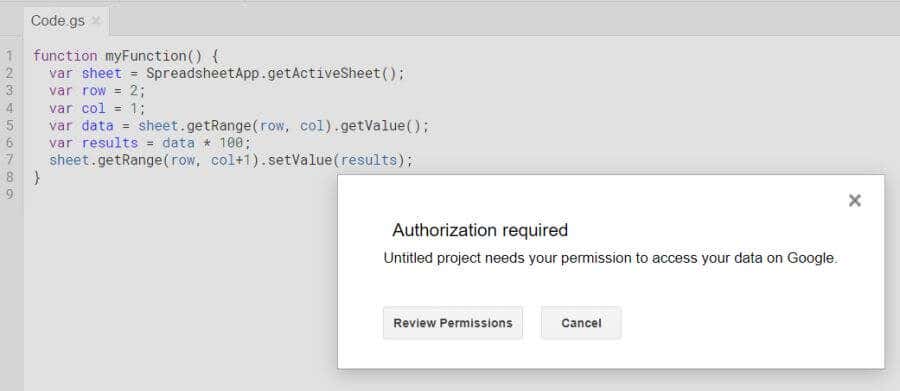
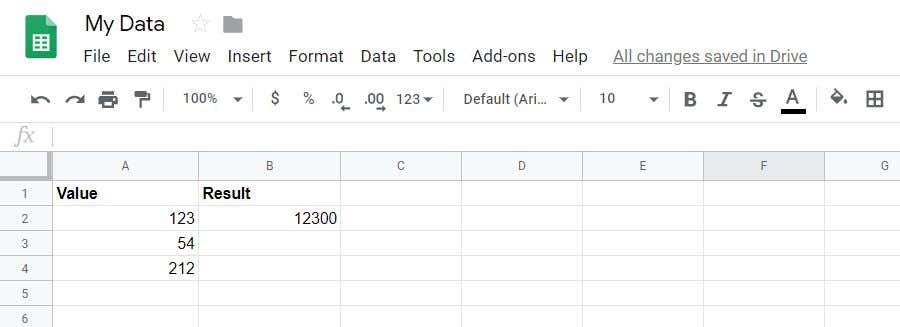
Allow permissions to continue. Once your script runs, you’ll see that the script wrote the calculation results to the target cell.
Now that you know how to write a basic Google Apps script function, let’s take a look at some more advanced functions.
Use getValues To Load Arrays
You can take the concept of doing calculations on data in your spreadsheet with scripting to a new level by using arrays. If you load a variable in Google Apps script using getValues, the variable will be an array that can load multiple values from the sheet.
function myFunction() {
   var sheet = SpreadsheetApp.getActiveSheet();
   var data = sheet.getDataRange().getValues();
The data variable is a multi-dimensional array that holds all of the data from the sheet. To perform a calculation on the data, you use a for loop. The counter of the for loop will work through each row, and the column remains constant, based on the column where you want to pull the data.
In our example spreadsheet, you can perform calculations on the three rows of data as follows.
for (var i = 1; i < data.length; i++) {
   var result = data[i][0] * 100;
   sheet.getRange(i+1, 2).setValue(result);
   }
}
Save and run this script just as you did above. You’ll see that all of the results are filled into column 2 in your spreadsheet.
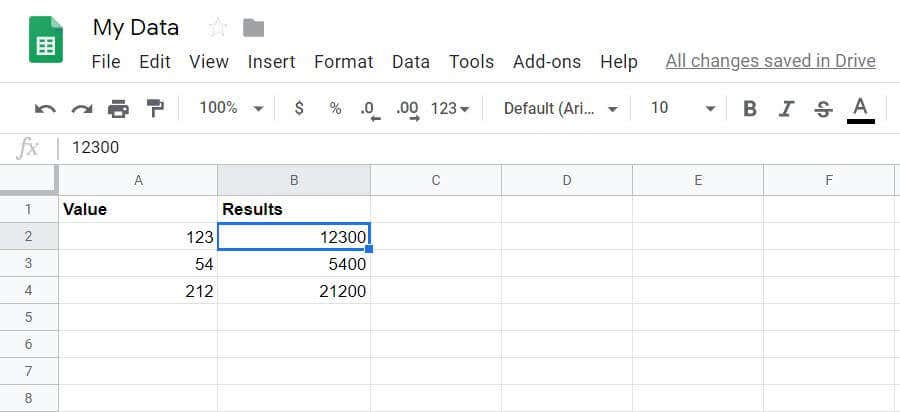
You’ll notice that referencing a cell and row in an array variable is different than with a getRange function.
data[i][0] refers to the array dimensions where the first dimension is the row and the second is the column. Both of these start at zero.
getRange(i+1, 2) refers to the second row when i=1 (since row 1 is the header), and 2 is the second column where the results are stored.
Use appendRow To Write Results
What if you have a spreadsheet where you want to write data into a new row instead of a new column?
This is easy to do with the appendRow function. This function won’t bother any existing data in the sheet. It’ll just append a new row to the existing sheet.
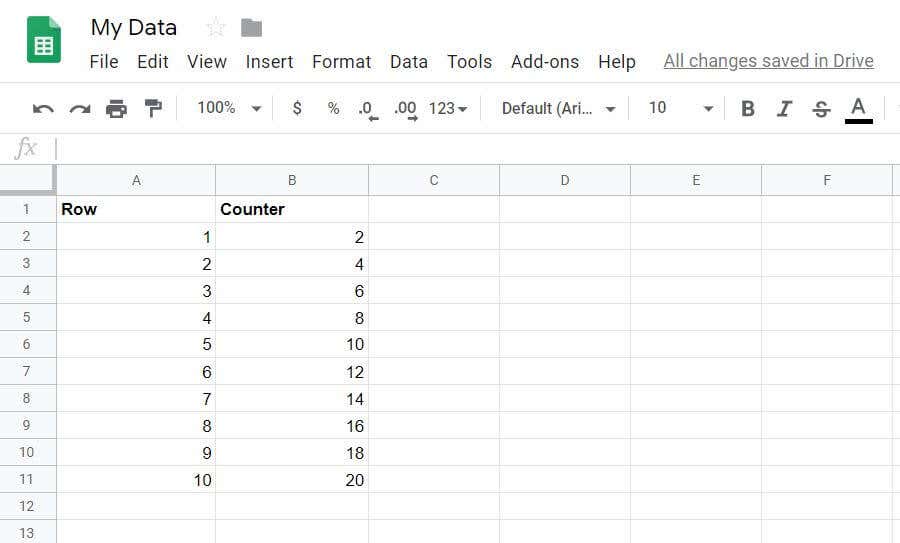
As an example, make a function that will count from 1 to 10 and show a counter with multiples of 2 in a Counter column.
This function would look like this:
function myFunction() {
   var sheet = SpreadsheetApp.getActiveSheet();

   for (var i = 1; i<11; i++) {
      var result = i * 2;
     sheet.appendRow([i,result]);
   }
}
Here are the results when you run this function.
Process RSS Feeds With URLFetchApp
You could combine the previous Google Sheets script function and the URLFetchApp to pull the RSS feed from any website, and write a row to a spreadsheet for every article recently published to that website.
This is basically a DIY method to create your own RSS feed reader spreadsheet!
The script to do this isn’t too complicated either.
function myFunction() {
   var sheet = SpreadsheetApp.getActiveSheet();
   var item, date, title, link, desc;
   var txt = UrlFetchApp.fetch("https://www.topsecretwriters.com/rss").getContentText();
   var doc = Xml.parse(txt, false);

   title = doc.getElement().getElement("channel").getElement("title").getText();
   var items = doc.getElement().getElement("channel").getElements("item");

// Parsing single items in the RSS Feed

for (var i in items) {
   item  = items[i];
   title = item.getElement("title").getText();
   link  = item.getElement("link").getText();
   date  = item.getElement("pubDate").getText();
   desc  = item.getElement("description").getText();

   sheet.appendRow([title,link,date,desc]);
}
}
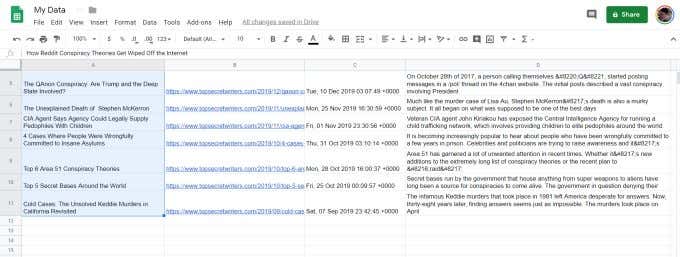
As you can see, Xml.parse pulls each item out of the RSS feed and separates each line into the title, link, date and description.
Using the appendRow function, you can put these items into appropriate columns for every single item in the RSS feed.
The output in your sheet will look something like this:
Instead of embedding the RSS feed URL into the script, you could have a field in your sheet with the URL, and then have multiple sheets – one for every website you want to monitor.
Concatenate Strings and Add a Carriage Return
You could take the RSS spreadsheet a step further by adding some text manipulation functions, and then use email functions to send yourself an email with a summary of all new posts in the site’s RSS feed.
To do this, under the script you created in the previous section, you’ll want to add some scripting that will extract all of the information in the spreadsheet.
You’ll want to build the subject line and the email text body by parsing together all of the information from the same “items” array that you used to write the RSS data to the spreadsheet.
To do this, initialize the subject and message by placing the following lines before the “items” For loop.
var subject = ‘Latest 10 articles published at mysite.com’
var message = ‘’
Then, at the end of the “items” for loop (right after the appendRow function), add the following line.
message = message + title + 'n' + link + 'n' + date + 'n' + desc + 'n' + 'n n';
The “+” symbol will concatenate all four items together followed by “n” for a carriage return after each line. At the end of each title data block, you’ll want two carriage returns for a nicely formatted email body.
Once all rows are processed, the “body” variable holds the entire email message string. Now you’re ready to send the email!
How To Send Email In Google Apps Script
The next section of your Google Script will be to send the “subject” and the “body” via email. Doing this in Google Script is very easy.
var emailAddress = [email protected];
MailApp.sendEmail(emailAddress, subject, message);
The MailApp is a very convenient class inside of Google Apps scripts that gives you access to your Google Account’s email service to send or receive emails. Thanks to this, the single line with the sendEmail function lets you send any email with just the email address, subject line, and body text.
This is what the resulting email will look like.
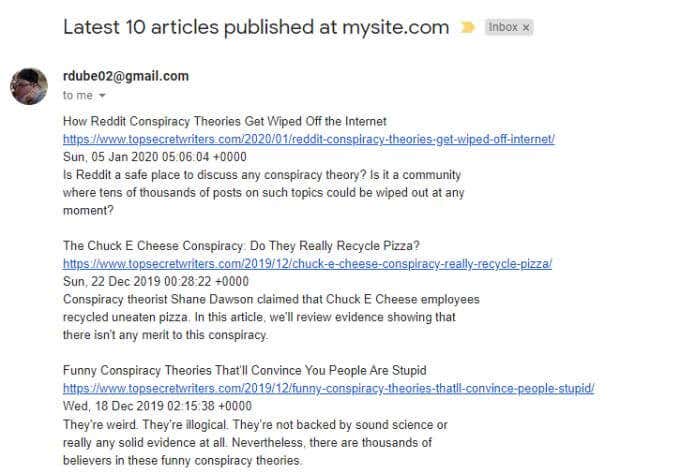
Combining the ability to extract a website’s RSS feed, store it in a Google Sheet, and send it to yourself with URL links included, makes it very convenient to follow the latest content for any website.
This is just one example of the power that’s available in Google Apps scripts to automate actions and integrate multiple cloud services.


