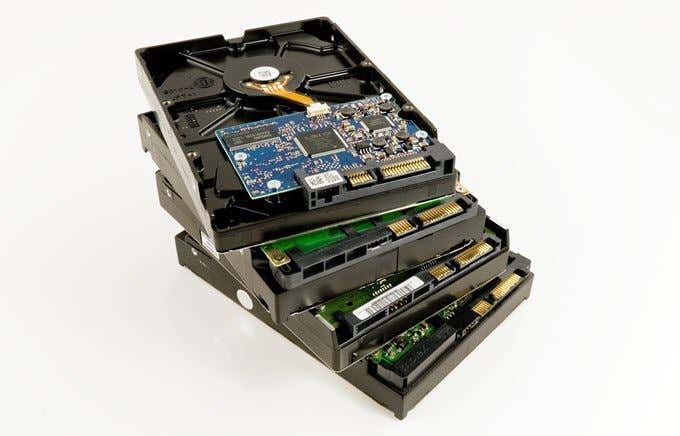
When your computer runs low on physical storage, its speed, performance and ability to maintain system integrity will be affected. A poorly managed hard drive can leave you with little space to install significant updates and will generally degrade the user experience over time.
In this article, we will discuss several ways to create more disk space in Windows 10.

- Empty the Recycle Bin
- Delete Unwanted Apps and Programs
- Enable Storage Sense
- Use Cloud Storage
- Disk Cleanup
- Disable Hibernation
- Delete Temporary Files
Contents
Empty The Recycle Bin
Deleting items from your computer such as photos, videos, and documents don’t remove them from your hard drive. They are moved to the Recycle Bin instead and continue to take up space on your hard drive. Emptying the Recycle Bin will create more disk space.
- Type Recycle Bin in the search bar to locate the app and open it.
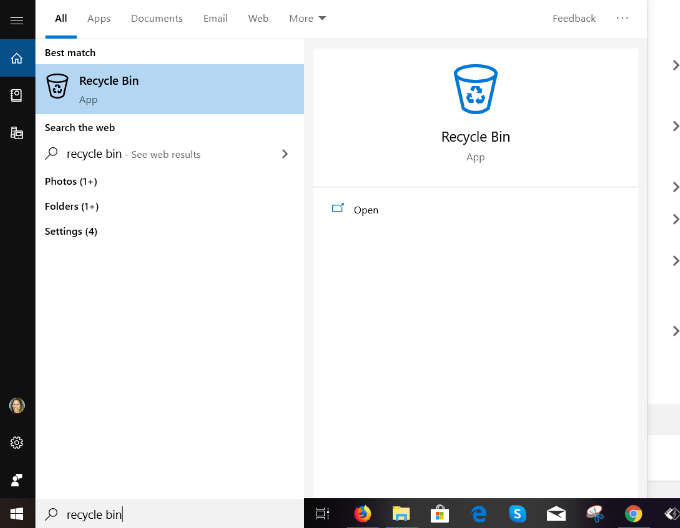
- Click Open to go to the Manage section of the app. Scroll through the items before deleting them to make sure you didn’t delete something you need.
- If you find a file that was mistakenly deleted, click on it and choose Restore. The selected item will be removed from the Recycle Bin.

- When you click Empty Recycle Bin, a pop-up will ask: Are you sure you want to permanently delete all of these items?

- Click Yes to reclaim valuable disk space.
Delete Unwanted Apps & Programs
Windows 10 comes with pre-installed apps and games that take up space on your hard drive. Some of them take up a substantial amount of space. So if you aren’t using them you can delete them by:
- Navigating to Settings, Apps, then Apps & features
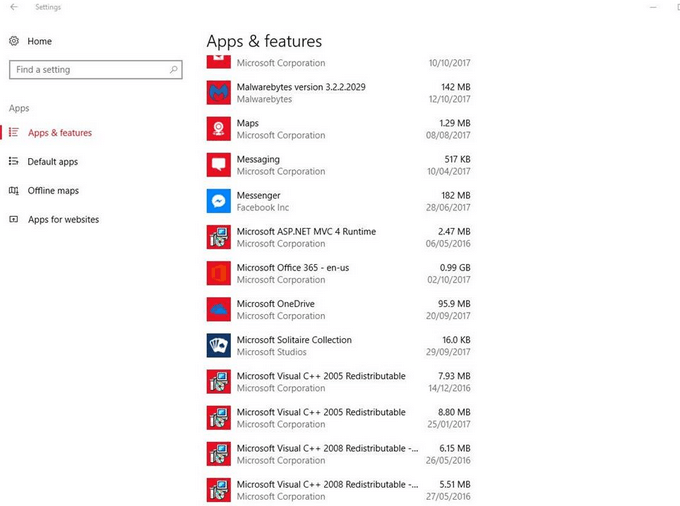
- Choose the games and apps you don’t use or want and then click UNINSTALL.

Enable Storage Sense
Windows 10 comes with a feature called Storage Sense that monitors your computer and automatically removes different types of files that are usually temporary.
You can configure the settings by following the steps below:
- Open Windows 10 Settings by searching for Settings or holding down the Windows key and hitting “i”
- Click on System and then Storage
- Turn Storage Sense to On
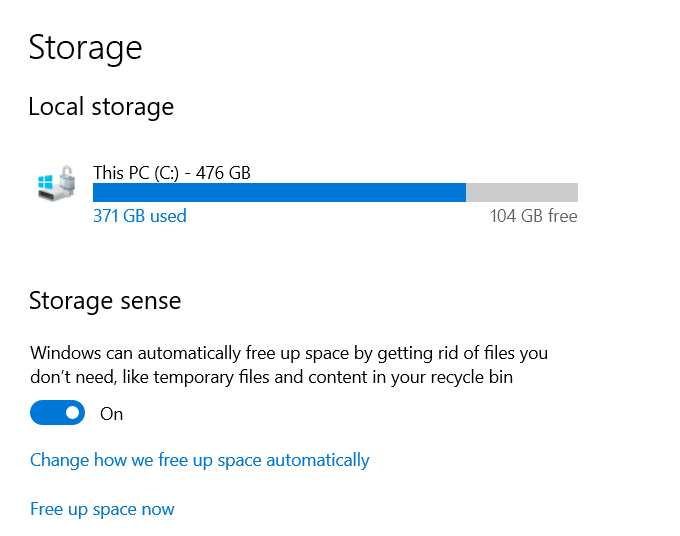
Once you activate Storage Sense, you can set it to delete temporary files and dehydrate OneDrive files automatically. Dehydrated Microsoft OneDrive files are the ones that haven’t been used for a specific period. The default is 30 days.
Windows removes local copies and replaces them with placeholder icons. When you click on an icon, it will take you to the file in the cloud, thereby letting you create more disk space on your hard drive.
By default, Storage Sense uses this process only when the disk space on your system is low.
To enable Storage Sense:
- Click on Change how we free up space automatically
- Set Run Storage Sense to During Low Free Disk Space
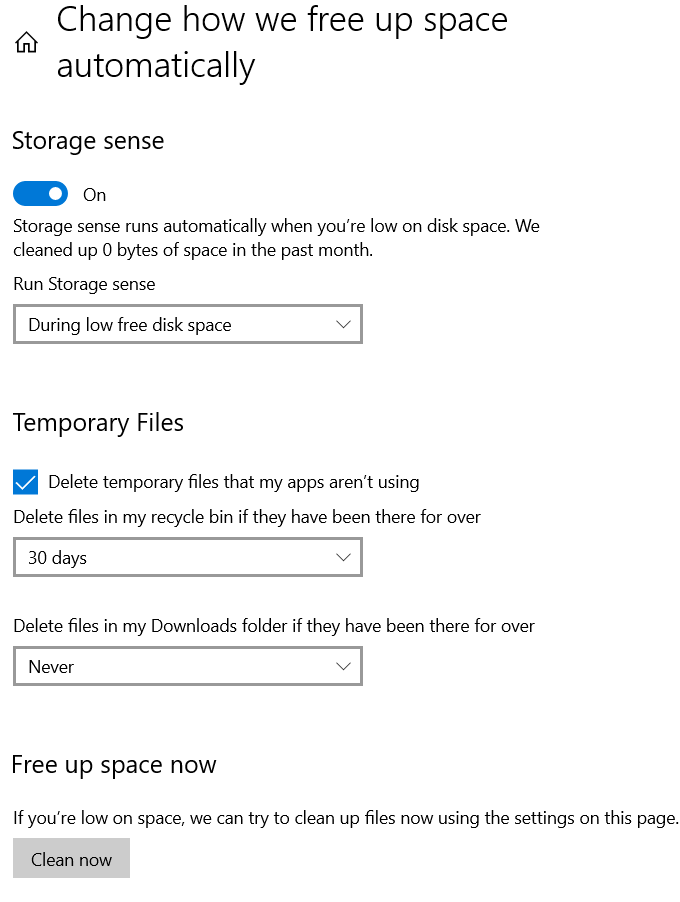
- Scroll down to Locally Available Cloud Content.
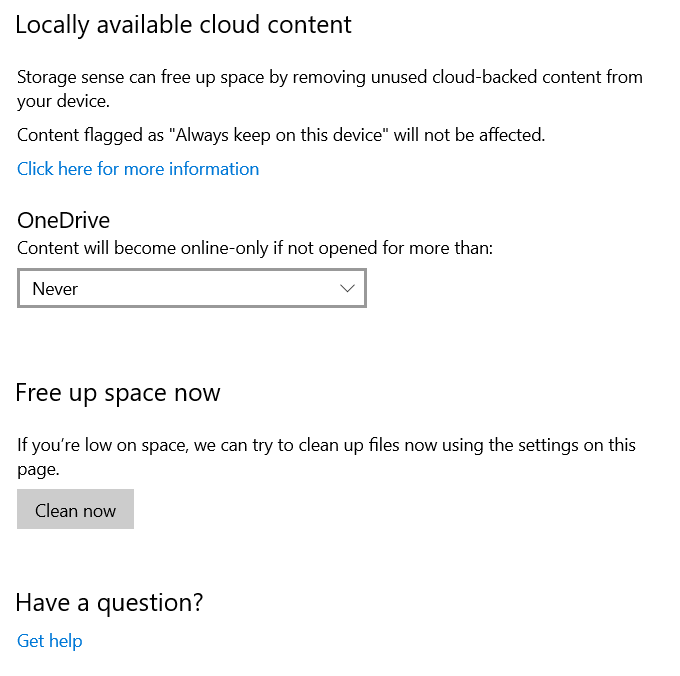
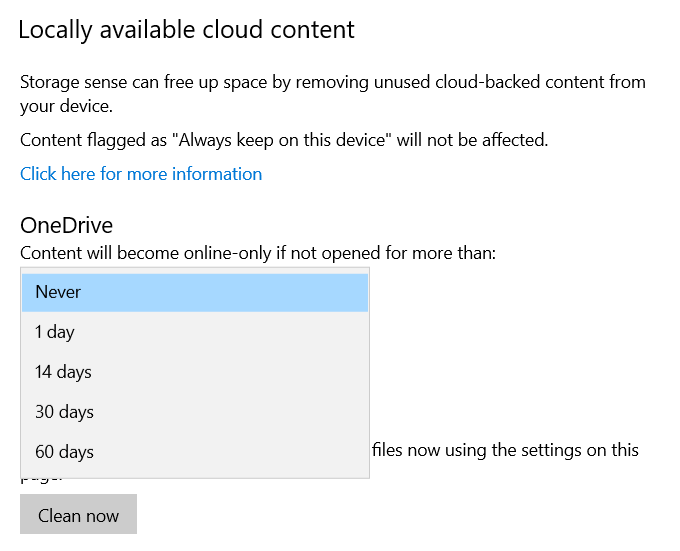
Look for the drop-down menu under OneDrive and choose how often you want to dehydrate files. Choose from:
- Never
- 1 day
- 14 days
- 30 days
- 60 days
Click Clean now to enable Windows 10 to create more disk space on your hard drive by getting rid of clutter.
Use Cloud Storage
If you are using cloud storage to save your photos and files and keeping a copy of them on your hard drive, you are double-storing. You may not wish to keep copies of everything you have on your computer and on the cloud.
Instead, you can choose which folders you want to download and save to your computer any time you need access.
To save space using OneDrive:
- Right-click on the cloud icon and choose Settings.
- Choose folders to sync from the Account tab.
- Select the folders you want to save to your computer.
- Uncheck any files or folders you want to leave on the cloud storage only and not download.
- When done, click OK.
- All files and folders that you did not check will be removed from your hard drive and give you more space.
- You will have access at any time to these folders online from your OneDrive account as long as you have Internet access.
Disk Cleanup
Windows Disk Cleanup is a built-in utility that helps you delete data you don’t need such as temporary files. The steps below outline how you use Disk Cleanup:
- Type Disk Cleanup in the search bar.
- Put a checkmark next to the drive you want to clean up and click OK.

Windows runs a scan on your computer and lets you know how much space you can save if you run Disk Cleanup.
See the screenshot above where it says: Total amount of disk space you gain: 336 MB. Scroll down to the Files to delete row and put a check in the box in front of the types of files you would like to delete. Then click OK.
Disable Hibernation
Windows 10 has a feature called Hibernation as an option to use when leaving your computer. It will save a session you are working on when you shut down so that you can pick up right where you left off when you are ready.
However, this process writes the data currently in memory onto your hard drive and takes up space. It’s a convenient tool, but if you are running low on space, you can disable Hibernation by:
- Typing Command Prompt into the search bar.
- Click on Run as administrator.

- Type the command below to disable Hibernation and then press Enter.
powercfg /hibernate off
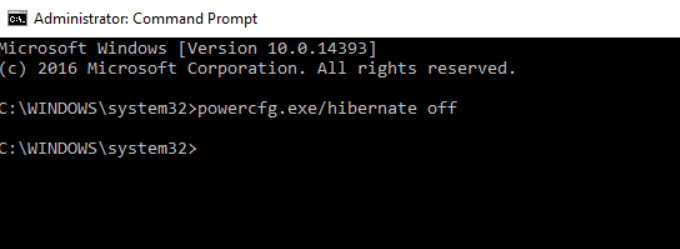
With hibernation disabled, you will no longer be able to put your computer to hibernate mode, but you will increase your storage space.
You can revert at any time by typing the following as an administrator at the Command Prompt:
powercfg /hibernate on command
Delete Temporary Files
Windows uses the TEMP folder to store folders and files created by some third-party software programs and Windows services. Temporary files take up a lot of space on your computer. If you ran Disk Cleanup, it will have removed the temporary files.
- To remove them manually, type %temp% in the search bar and click on File folder.
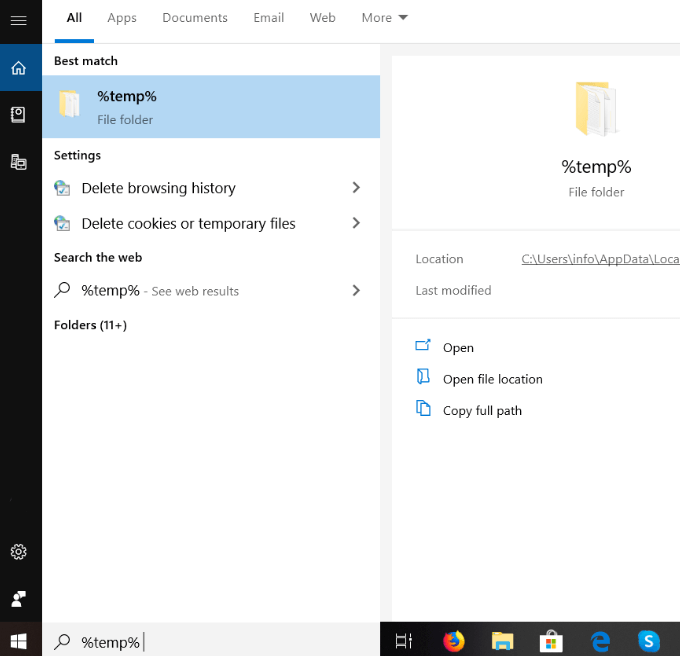
- Highlight all the temporary files, right-click on your mouse and then click Delete.
Use some of the suggested methods described above to clean up your hard drive and create more disk space. From removing temporary files to utilizing cloud storage, you can keep your system running smoothly and save more space for programs and processes.

