Want to install gThumb on Ubuntu 18.04 and above?
Chances are you might. This useful open source photo manager (and more) continues to issue new releases regularly, something I wasn’t aware of until recently.
In this post you’ll learn how to install gThumb on Ubuntu 18.04 LTS and above, and learn some of the reasons why people prefer this particular photography tool over others, like Shotwell.
But first, some history…
gThumb Image App

If you’ve tried any version of Ubuntu since 2010 you’ll know that the distro comes with the Shotwell photo manager by default.
But this wasn’t always the case.
Ubuntu used to come with F-Spot (although the application’s use of mono was controversial). It later switched to Shotwell citing its lighter system resource use (and as this was in the era of Netbooks, being lighter was a considerable boon).
With other photo manager apps standing in the spotlight little ol’ gThumb fell a little out of focus, subsisting on mentions in blog “alternatives” lists alongside Fotoxx and other part-forgotten tools.
But 18 years on from its first release and I’m pleased to say that gThumb is still here and still being updated — distro default or not!
The latest stable version of gThumb is gThumb 3.8.3, released in December 2019. This update improvemes the look and feel of menus in the header bar, and adds better handling of the compressed .webp image format.
gThumb Features
Wikipedia describes gThumb as a “free and open-source image viewer and organizer with options to edit images” and that description isn’t wrong, but It is a little light.
This app is a lot of different things, all rolled in to one:
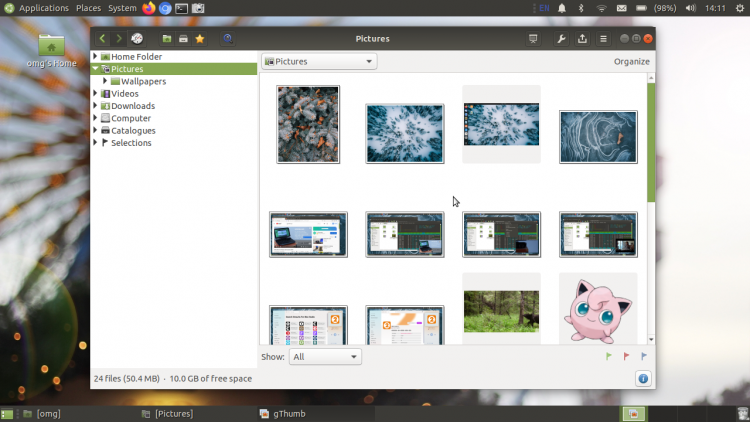
- Image browser (lets you browse photos on your file system)
- Photo manager (lets you group/order/sort images)
- Image viewer (lets you look at and learn more about images)
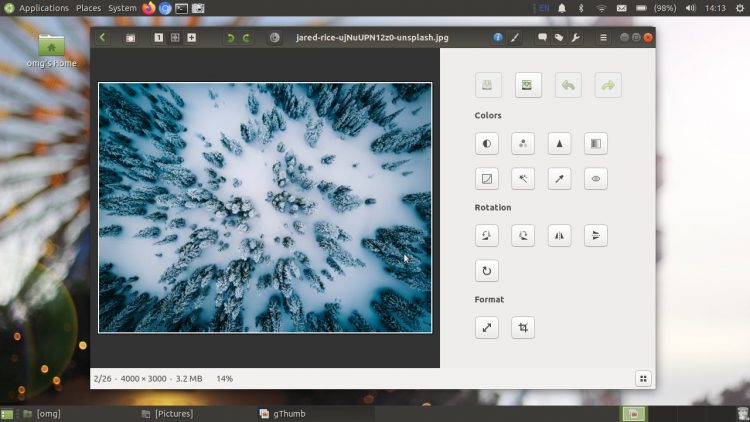
- Image Editor (apply various filters, crop, colour tweaks, etc)
What’s great about gThumb (and somewhat similar to Shotwell) is that you can pick and choose which of these features you use.

Not into organising your photos with tags and comments? Don’t use them. You can still browse, edit and view your images without being super organisational about it!
The image editing tools available in gThumb are also very well rounded. The image viewer GUI could use some work as the tool icons are very small, not labelled, and the layout wastes a lot of space.
But overall gThumb does offer more image editing tools than Shotwell and the newer GNOME Photos client.
Key gThumb features at a glance:
- Image browser, viewer, organiser and editor
- Supports all common image formats, including
.webp - Plays animated
.gifs - Lets you tag images and/or arrange into folders
- Displays checkerboard background for transparent images
- Image editing tools include colour, crop, and resize
- Batch image conversion
- Photo import tool
- Support for plugins
All said, gThumb integrates very well with the modern Ubuntu desktop thanks to its use of CSD (aka header bars). And you can easily set it as the default image viewer app should no-frills Eye of GNOME not meet your needs.
Install gThumb on Ubuntu
An older version of gThumb is available to install on Ubuntu and Ubuntu-based distribution like Linux Mint and Zorin OS, direct from the repo:
To install the latest version of gThumb on Ubuntu 18.04 LTS and above you will need to add Dariusz Duma’s photography PPA to your software sources.
Dariusz’s PPA contains a number of different apps, not just gThumb. For this reason I recommend that you remove the PPA after you install gThumb, and hold off updating any other apps until you have done so.
To add the PPA to your software sources you need to open a new Terminal window (ctrl + alt + t) and run the following command:
sudo add-apt-repository ppa:dhor/myway
Next, to install gThumb on Ubuntu run this command:
sudo apt update && sudo apt install gthumb
The above steps will also work on Ubuntu-based distributions like elementaryOS, Peppermint OS, Zorin OS, Linux Mint, Regolith Linux, and others.
Once Gthumb is installed go ahead and remove the PPA from your system. This will prevent other software in this PPA from being installed or upgraded too:
sudo add-apt-repository --remove ppa:dhor/myway
Finally, get started with gThumb! Launch it from your distribution’s app launcher or app menu of choice. The rest is easy to figure out from there!
What’s your go-to photo software on Linux? Share it below!
Apps
How To
gthumb
Image Editors
photography tools
shotwell


