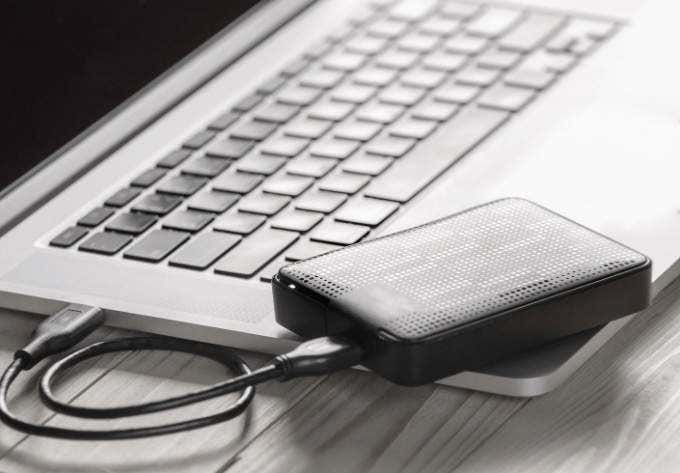
Recently, several colleagues have complained that they can’t eject external hard drives on their Windows computers. There are several reasons for this, including outdated or malfunctioning USB drivers that are preventing the removal of the drive, or other processes accessing the contents of the drive.
You could choose to unplug the drive without closing the applications reading from it first, but this risks possible data corruption. You could use a data recovery tool to repair and recover the corrupted files, but there’s no guarantee that this will work.
To ensure your external hard drive’s safety and integrity, it’s advisable to remove your drive only after closing any processes that are using it.

Contents
- 1 Can’t Eject External Hard Drive on Windows 10? Try These Fixes
- 1.0.1 Quick Fixes to Try
- 1.0.2 1. Use the Windows Hardware and Devices Troubleshooter
- 1.0.3 2. Use the Run Command Window to Eject Your External Hard Drive
- 1.0.4 3. Use Disk Manager to Eject the External Hard Drive
- 1.0.5 4. Close Running Tasks or Processes
- 1.0.6 5. Update Your PC’s USB Drivers
- 1.0.7 6. Use Device Manager to Eject the External Hard Drive
- 1.0.8 7. Use a Third-Party Utility to Eject the Hard Drive
- 2 Eject Your External Hard Drive Safely
Can’t Eject External Hard Drive on Windows 10? Try These Fixes
If you’ve tried closing applications that have been accessing files on the external hard drive and you still can’t eject the drive, here are some resolutions that may help.
Quick Fixes to Try
- Close all programs including your antivirus and try to remove the drive again.
- If you have Norton System Works on your PC, it comes with the Norton Protected Recycle Bin. This disables the Safely Remove Hardware option so it won’t work when you’re trying to eject the drive.
- If you manage to eject the drive, try plugging it into a different PC and ejecting it using the Safely Remove Hardware icon. If it works on the other system, the issue probably lies with your computer system.
- Turn off Windows Indexing Service. If enabled, you may not be able to eject the external hard drive because the service can cause Windows to constantly access the drive.
- Restart your system to resolve any glitches in the system that could affect the process of ejecting a drive on your PC. When the system boots up again, no apps should be accessing the drive, so you can try to eject it again and see if it works.
- Lastly, you could try booting in Safe Mode and see if you can eject the drive without any issues. If you can, that means a startup program is accessing the drive immediately upon loading Windows. You’ll have to try a clean boot to determine which program is the culprit.
1. Use the Windows Hardware and Devices Troubleshooter
The built-in Windows Hardware and Devices Troubleshooter is a tool that helps detect any issues with your PC or other devices connected to it. You can use this tool to detect a problem that could be affecting the removal of your external hard drive.
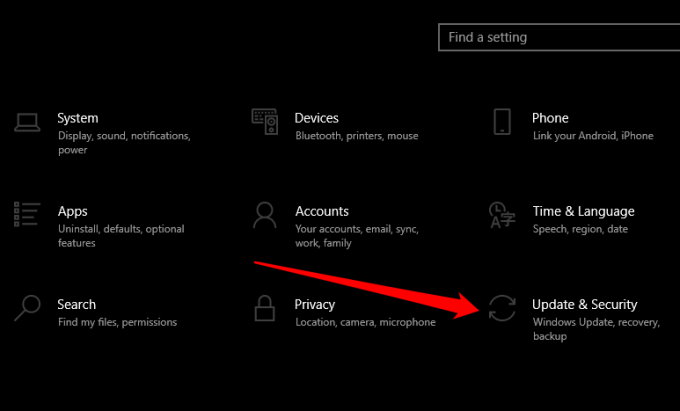
- Select Start > Settings > Update & Security.
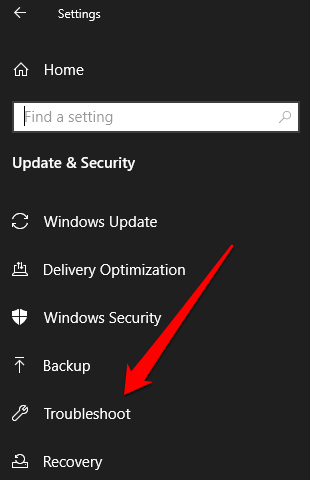
- Next, select Troubleshoot on the left pane.
- Select Additional Troubleshooters and then select your connected devices.
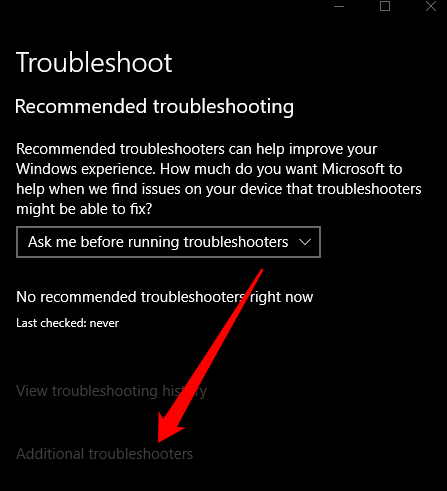
- Select Run the troubleshooter and wait for Windows to detect and find any issues before trying to eject your external hard drive again.
2. Use the Run Command Window to Eject Your External Hard Drive
The Run command window helps you open files, folders or launch programs and access web resources in Windows 10. You can also use the tool to run a command and eject your external hard drive.
- Right-click Start > Run.
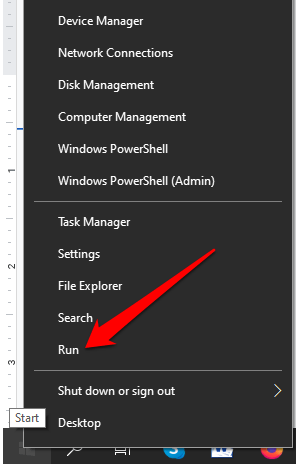
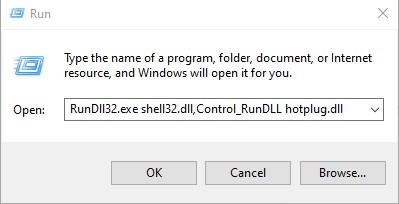
- Next, enter this command in the Run box:
RunDll32.exe shell32.dll,Control_RunDLL hotplug.dll and press Enter.
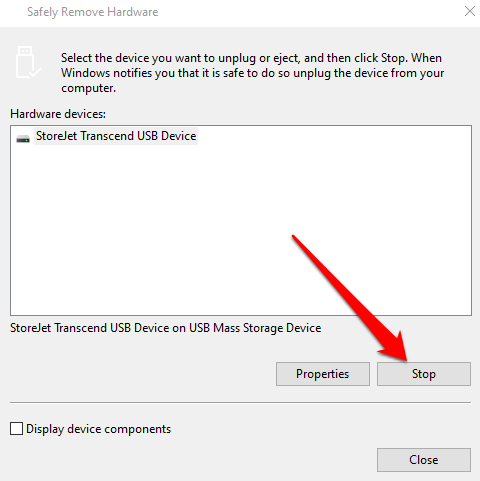
- Select your external hard drive in the Safely Remove Hardware dialog box and then press Stop.
3. Use Disk Manager to Eject the External Hard Drive
Disk Manager is another built-in tool in Windows 10 that helps you manage all drives connected to your PC. If the Windows Hardware and Devices Troubleshooter didn’t help, try using Disk Manager and see if it can fix the issue.
- Select Start, type Disk Management in the search box and press Enter.
- Find your external hard drive in the Disk management window.
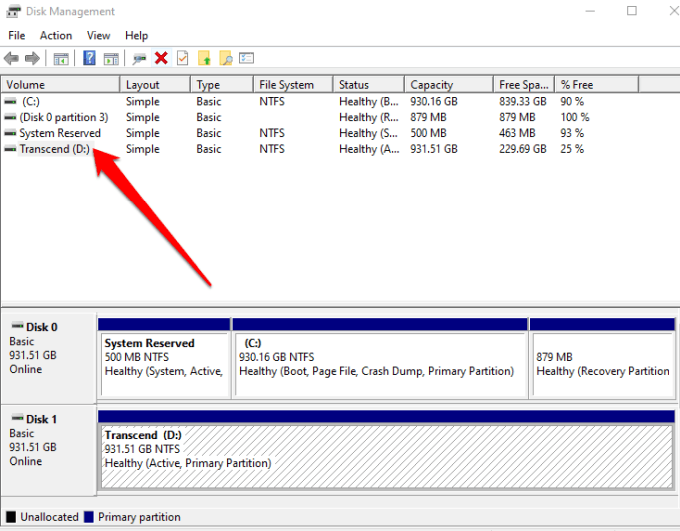
- Right-click on the drive and select Eject. Once you do this, your external hard drive will appear as offline, but if you want to use the drive again, you can change its status to online in the Disk management tool.
4. Close Running Tasks or Processes
If you still can’t eject your external hard drive, use the Task Manager to close any suspicious tasks running on Windows.
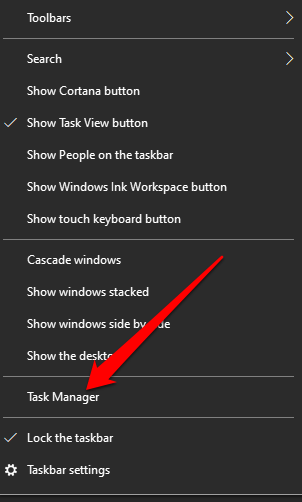
- Open Task Manager by right-clicking the Taskbar and selecting Task Manager. Alternatively, you can press CTRL+ALT+DELETE keyboard shortcut and select Task Manager to open it.
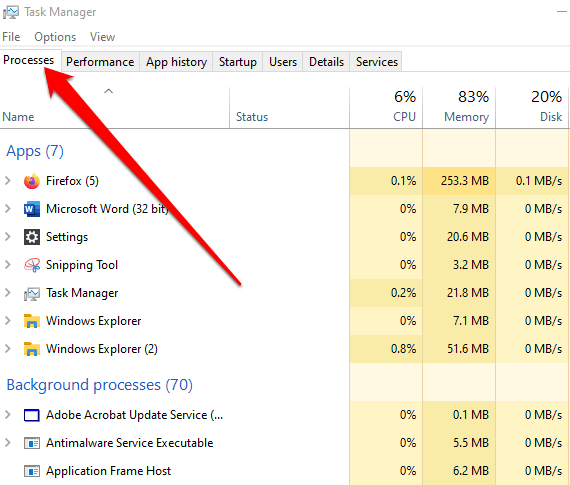
- Select the Processes tab to see all the running processes.
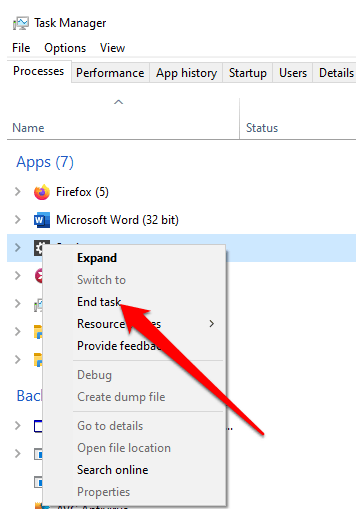
- Right-click any suspicious looking program or process running on your PC, select End task to close it and then try to eject your external hard drive again.
5. Update Your PC’s USB Drivers
Outdated, obsolete or incorrect USB drivers on your PC can also affect your ability to eject your drive from the computer. To resolve this, you can update the USB drivers to ensure you have the latest version for your device and then try ejecting the drive again.
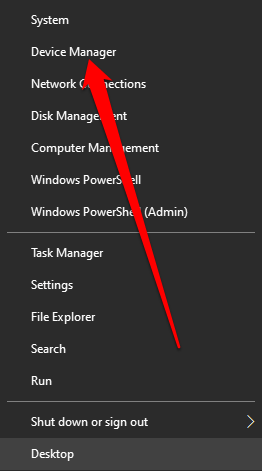
- Right-click Start > Device Manager.
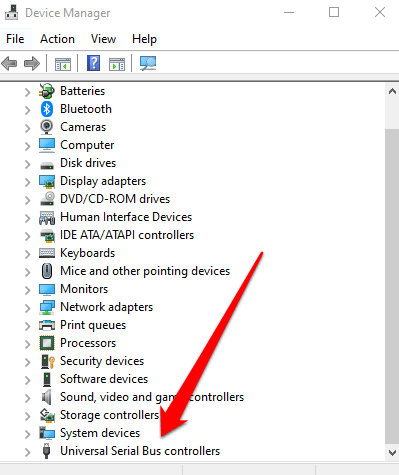
- Select the Universal Serial Bus Controllers list to expand it and then check if there’s a yellow exclamation mark next to any of the entries.
- If you find an entry with the yellow exclamation mark, right-click the entry and select Update drive software.
If you don’t find any marks next to any of the entries, uninstall the driver and then reboot your PC. This way, Windows will automatically install the correct and latest version of the USB driver, and you can try ejecting the drive again.
6. Use Device Manager to Eject the External Hard Drive
The Device Manager in Windows 10 is an essential utility that helps you configure or troubleshoot hardware and devices on your computer.
If you can’t eject external hardware drives on Windows using the above methods, you can try ejecting it in Device Manager.
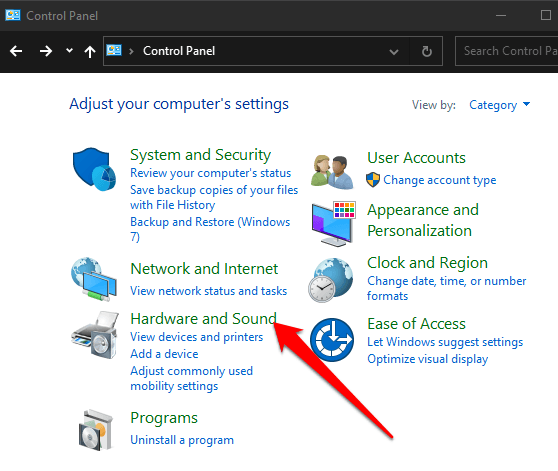
- Right-click Start > Control Panel and select Hardware and Sound.
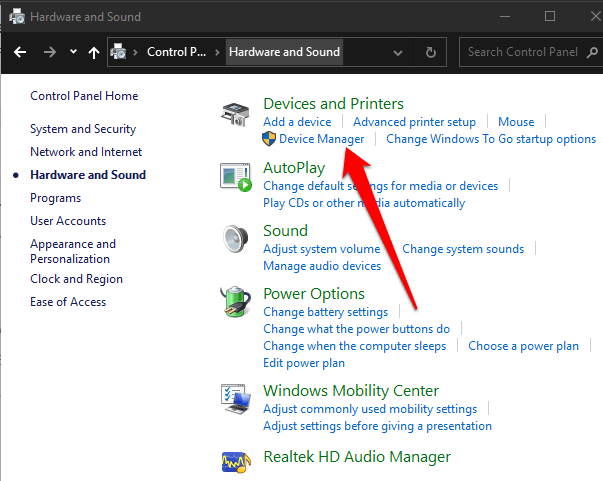
- Next, select Device Manager.
- Select Disk Drives to see all the storage devices plugged in to your computer.
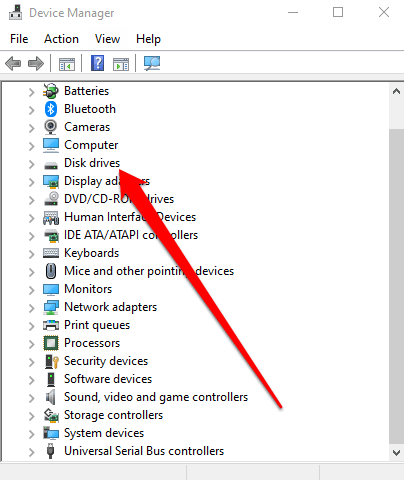
- Right-click on the external hard drive you want to remove, and select Uninstall device.
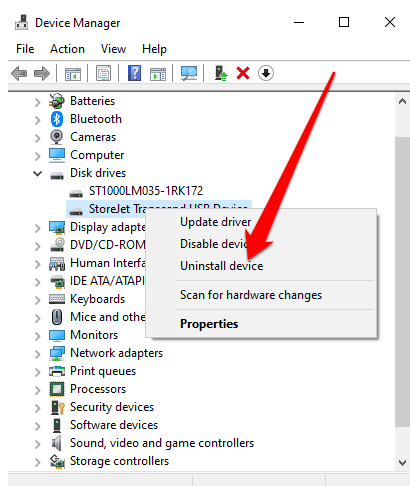
Wait for the process to complete and then unplug your external hard drive.
7. Use a Third-Party Utility to Eject the Hard Drive
If nothing else works, you can try a third-party utility to help you eject your external hard drive.
One of the free utilities you can use is Process Explorer, an advanced process management utility that gives details about active processes running on your PC. Such details include the open or loaded handles and DLL processes on your system so you can search for them online in case you’re not sure what they do.
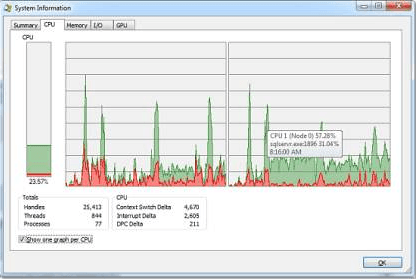
To use Process Explorer, install and run the tool and then select Find, Find Handle or DLL in the menu. Here, you can type the drive letter of your external hard drive and let the tools search for it.
Once you find your drive, right-click on it and select Close Handle.
Eject Your External Hard Drive Safely
We hope you were able to find a helpful solution from all the methods listed in this guide. If you’re still unable to eject your external hard drive, consider backing up your files to a cloud storage service or learn how to transfer large files from one computer to another to prevent any data loss.
If your USB drive is already damaged, turn to our guide on how to recover data from a damaged USB stick for tips on how to recover your files.

