Even though you rarely need to reinstall Windows these days, if you ever do, there are some speed bumps on the road to getting Windows installed. One such error is the “Windows Could Not Be Installed to This Disk” message, but we have some potential fixes to get you past this particular issue.
Also, you may see an additional line in the error message, specifically either “The selected disk is of the GPT partition style” or “The selected disk has an MBR partition table. On EFI systems, Windows can only be installed to GPT disks”. We’ll explain more about what these messages means below.

Contents
UEFI, BIOS, MBT and GPT Conflicts
This error results from a conflict between the type of firmware your computer uses and the partition table standard the hard drive in question has been formatted with.
Older computers use a BIOS (Basic Input Output System) firmware type, which is compatible with the MBR (Master Boot Record) standard for managing partition tables.
Newer computers use the UEFI (Unified Extensible Firmware Interface) firmware type, which can work with both MBR and GPT (GUID Partition Table) drives. However, in the case of MBR drives used with UEFI, the partition must be smaller than 2TB in size. If possible, use GPT-formatted drives with UEFI type computers.
For a more complete explanation of MBT and GPT formatting, check out MBR vs GPT: Which Format Is Better for an SSD Drive? However, now that you know this common cause of the error, let’s look at the options available to resolve the problem.
Switch Between UEFi and Legacy BIOS Modes
While most modern computers use the UEFI firmware type, many still offer a “legacy BIOS” or “legacy boot” mode to resolve compatibility issues.
Your issue may actually be due to the incorrect mode being toggled on. If your drive is formatted using the more modern GPT standard and you boot up in legacy boot mode, Windows won’t work with that drive. That’s when you’ll get the “The selected disk is of the GPT partition style”. This means you either need to convert the disk to MBR format or change the boot settings in your BIOS to UEFI.
If you’re getting the other message “The selected disk has an MBR partition table”, you need to do the opposite. It means you either need to convert the drive to GPT format or boot your BIOS into legacy mode.
Legacy boot modes aren’t intended as a permanent solution, so if you need to use it in order to access a disk, it’s best to backup data on the MBR partition you want to install Windows to and then convert it to GPT.
How you toggle legacy boot modes on or off depends on your specific computer. You need to access the firmware menu at boot time, which is usually done by pressing a designated key. Look for that information on your motherboard or in your computer’s manual.

Once in the UEFI menu, look for an option to enable legacy BIOS/boot mode and change it to the desired settings. Some computers even have a third mode that supports UEFI and Legacy. So if you see that, pick that option.
Reformatting a Drive With Another Partition Style
Converting a GPT drive to MBR or vice versa will delete all data and partitions from that drive. However, if you want to run your computer in UEFI mode then you need a system drive that uses GPT. We recommend everyone use UEFI if possible since it is much more secure and has several advantages over MBR.

However, if you’re getting this error, it’s probably because your computer only supports legacy BIOS and your drive is formatted with GPT. In this case, you can solve this problem by converting the drive to MBR. Go ahead and have a look at How to Convert a Disk from GPT to MBR.
Again, this is only recommended for systems that do not have UEFI. On UEFI systems you should use the GPT format for your Windows disk.
Getting a Fresh Start During Windows Installation
There’s a robust disk management application built directly into the Windows 10 installation software. During installation you’ll be given the option of deleting all the partitions on the disk and formatting it. Windows will format the drive using the correct settings it needs in order to work.
If you have data on the drive that hasn’t been backed up elsewhere, this is a bad idea. If you aren’t worried about data on the current disk, then this is by far the easiest way to resolve the problem while installing Windows.
If you’re not sure how to reinstall Windows, just read our in-depth guide that goes through three methods to install Windows. In the Windows installation process, when you get to the “Where do you want to install Windows?” dialog, just follow the steps below.
- Select each partition in turn, then select Delete until no partitions are left.
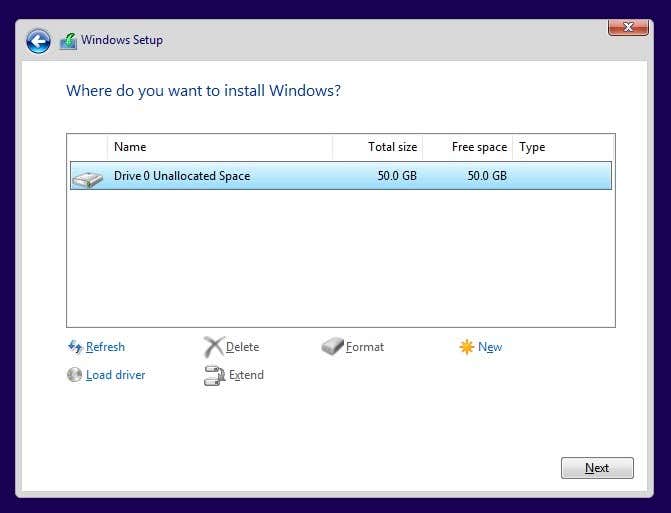
- Select Next and Windows will format the empty space correctly and create the appropriate partitions.
From there the installation can proceed as normal.
Using Third-Party Software To Change Partition Style Without Formatting
There are third-party applications which offer the possibility of converting your partition style without losing any data. This is possible, although what such applications actually do is erase and replace each bit of data on the disk as it reformats the media.
However, if the process is interrupted for any reason you’re likely to end up with a disk that needs reformatting anyway. It’s always a good idea to backup your disk (or at least crucial data) before doing such a conversion.
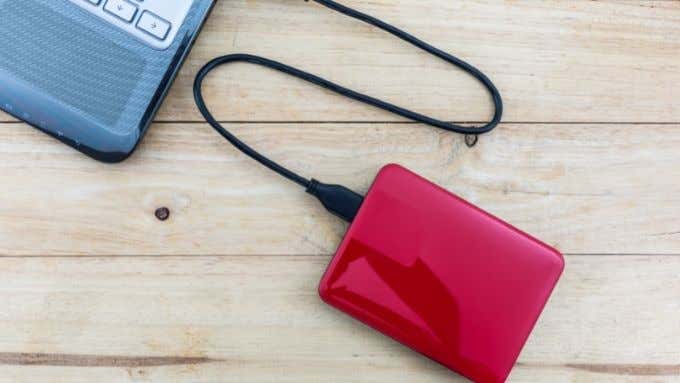
Additionally, you’ll need to do this conversion while running the operating system from a different disk than the one you want to convert, for obvious reasons. That means booting from a live boot disk or using an external disk enclosure with a different computer to get the job done.
Feel free to check out our list of the best free hard drive formatting and partitioning utilities for Windows. Some of these tools will allow you to convert your hard drive partition format without a full reformat.
Getting Windows Installed
Overall, if you get this error message, it’s going to make things a little complicated. This isn’t the easiest error to fix, so take your time and post comments if you have questions. We’re usually pretty good about getting back to people.
Hopefully you can follow this guide and install Windows to your disk without any issues. Remember, backup your data before you do anything to be safe.

