Time matters now more than ever. More people are working from home. But that can make syncing up with your co-workers a little challenging. “I’m on Atlantic time and they’re on Central time, so is their 8 o’clock my 10 o’clock? What happens with Daylight Savings Time?”
No need to Google that anymore. We’re going to show you how to add more desktop clocks to Windows 10 and some tips and tricks with clocks and time.


Contents
Add Desktop Clocks for Windows Clock
Built into Windows is the ability to add 2 more clocks to the clock in your system tray. It’s easy to do!
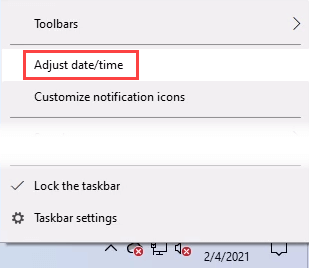
- Right-click on the clock in the system tray.

- Select Adjust date/time.
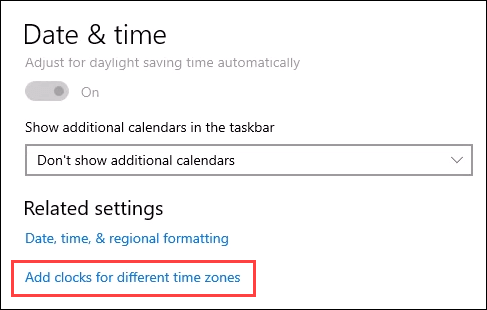
- In the Date & time window, scroll down and select Add clocks for different time zones.
- When the Date and Time window opens, select the Additional Clocks tab.

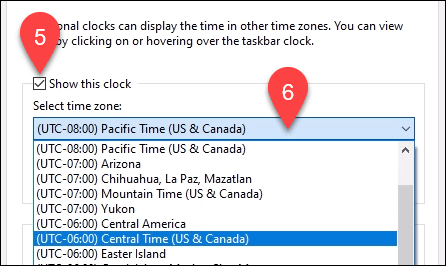
- Put a check-mark in the Show this clock box.
- Use the drop-down box to Select time zone: for the city you want to track.
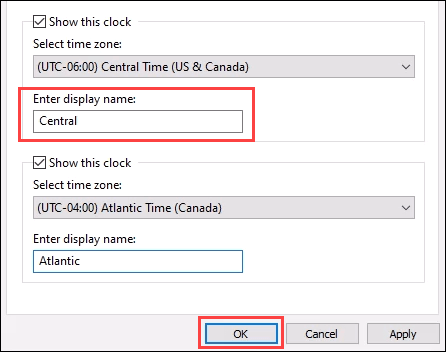
- Enter display name and choose something that will stand out, like Chicago Office. Continue on to add a third clock if you’d like. When done, select the OK button.
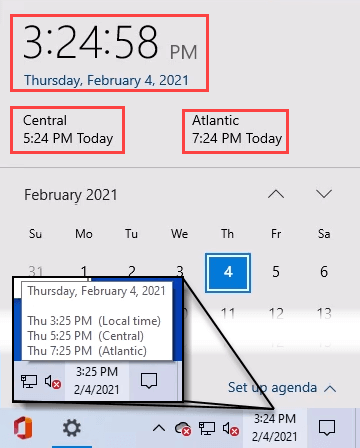
Now you can see all three time zones by hovering over the system clock or selecting it.
Add a World Clock to Windows 10
Two time zones aren’t enough? You’re a go-getter. You need the Microsoft Alarms & Clock app and here’s how to use it.
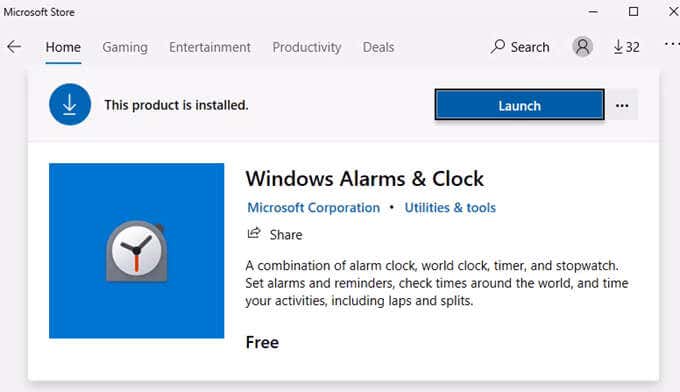
- Windows 10 ships with the Alarms & Clock app already installed. If you don’t have it, Download Windows Alarms & Clock from the Microsoft Store and install it. It’s free!
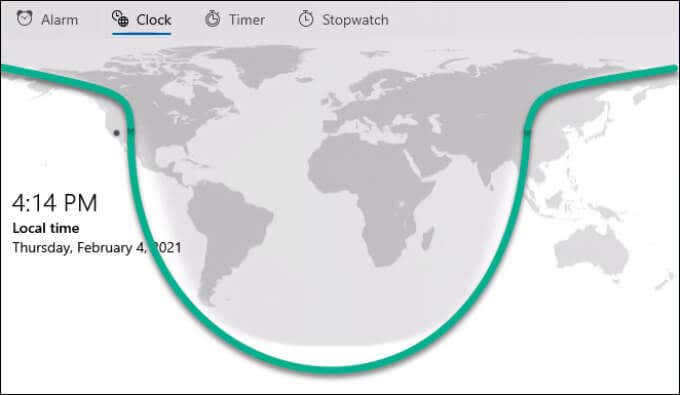
- Open Alarms & Clocks and select the Clock tab.

Notice the shaded area above the green line. This represents the night, which helps visualize the time of day for different locations.
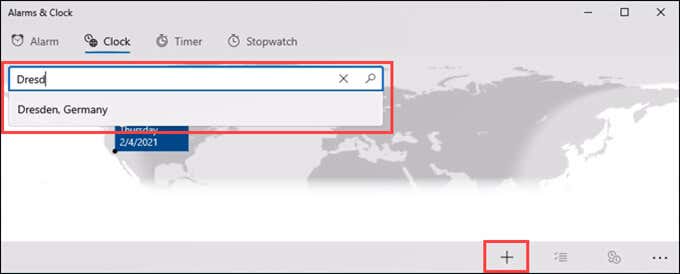
- To add time zone details, select the plus sign icon in the bottom-right corner. A search bar opens. Start typing the name of the city for which we need the time zone. It will narrow the selection down. Select the one that matches. You can add as many as you like.
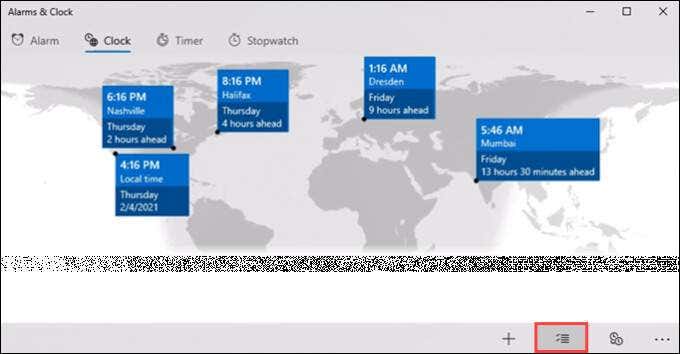
To remove a clock, select the multiple-select icon in the bottom right corner.
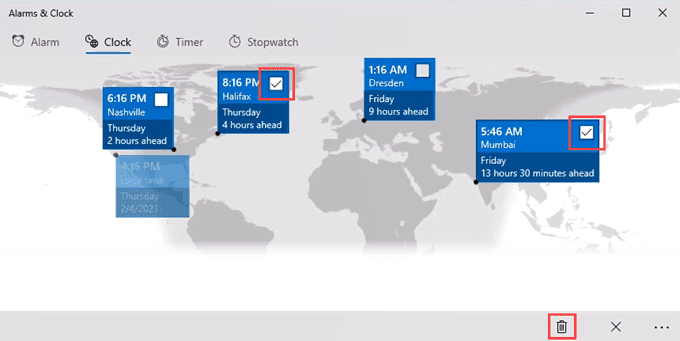
Check the clocks to remove and select the garbage can icon. Those clocks are gone.
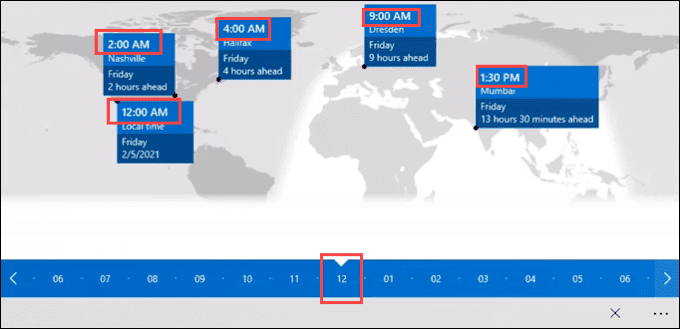
- To convert a local time to the other time zones, select the multi-clock icon in the bottom-right corner.

A time slider appears. The number in the middle of the slider is your local time. Slide the bar left or right to a different hour and watch the time on the other clocks change in sync.
Add a Clock Screensaver to Windows 10
Turn your monitor into a great big clock when you’re not using it. It’s easy and stylish to do. There are many cool screensavers available. Fliqlo is one we recommend. Why? Many clock screensavers are Flash-based and Flash is end-of-life software now. But the new Fliqlo screensaver clock doesn’t use Flash. Plus, it’s free. We’re sure you’ve seen it before.
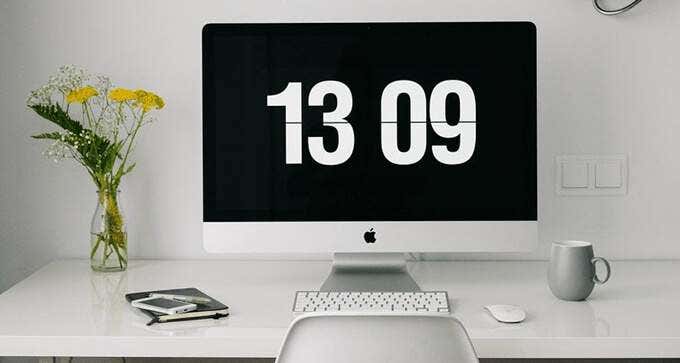
Fliqlo is available for Windows and Mac, but dual-screen support is only available on the Mac version.
Add an Android Widget Style Clock to Windows
If you like widgets for your phone, you’ll like widgets in your Windows. Microsoft had widgets built-in prior to Windows 10 called Desktop Gadgets. Microsoft removed them because of security concerns. So other developers swooped in.
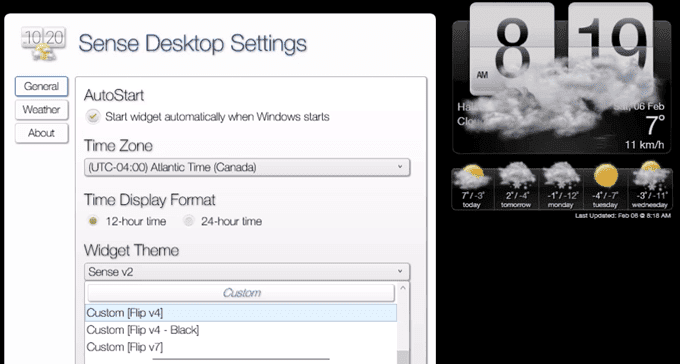
We like Sense Desktop, an app from the Microsoft Store. It can show the time, temperature, and weather forecast in one convenient widget. Plus, there are about a dozen themes, so you will find one you like. It’s not free, but is 99 cents too much?
Get the Most Accurate Time in Windows 10
You need to be on time every day, and so does your computer for it to work best. For example, if you’re getting certificate errors in your web browser, having the wrong time on your computer could be the cause. You can make the clock synchronize with a time server.

Time servers are computers whose sole job is to keep perfect time and share it with the world. They keep perfect time by being synchronized to an atomic clock. Atomic clocks are expensive, so governments and large companies maintain most of them.
Fortunately, Windows 10 defaults to Microsoft’s time server. But you can connect to other time servers. You’ll need Administrator rights to do this.
- Open Control Panel and select Clock and Region.
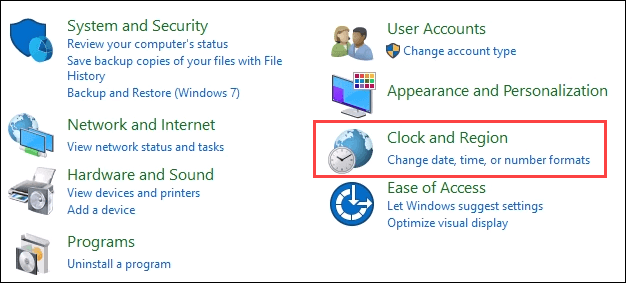
- In the new window, select Set the time and date.

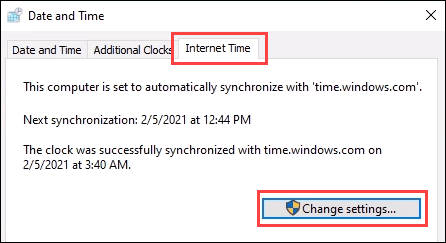
- In the Date and Time window, go to the Internet Time tab, then select Change settings…. You’ll need Administrator rights to do this.
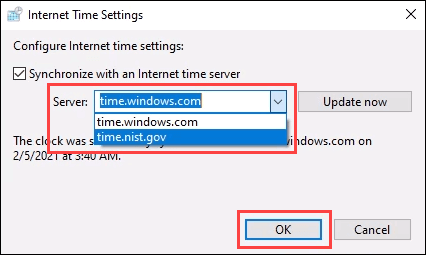
- The Microsoft and NIST time servers are in the drop-down box. Select the one you want and select OK to set it. NIST is the National Institute of Science and Technology in the US.
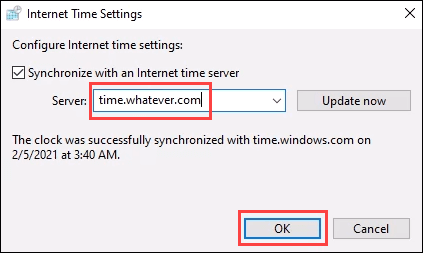
You can also type in another time server address if you’d like. Once it’s entered, select OK to set it.
It’s About Time
If time is money, then with all your new clocks you should make it rain! Do you have a favorite desktop clock tip or trick? A cool time screensaver or widget? Let us know in the comments.

