Your Windows 10 computer saves your downloaded files in a certain folder on your hard drive. If you want, you can change this default download location on your Windows 10 PC to any other folder you like.
There are many reasons you may want to change the default downloads folder on your computer. Maybe you want to keep your downloaded files on a certain partition? Or maybe you’re starting a new download task and you want all those files saved in a certain folder?


There are various ways to change the default download location in Windows 10.
Contents
Change Default Download Location Using File Explorer
One way to change the default download location is to use the File Explorer utility.
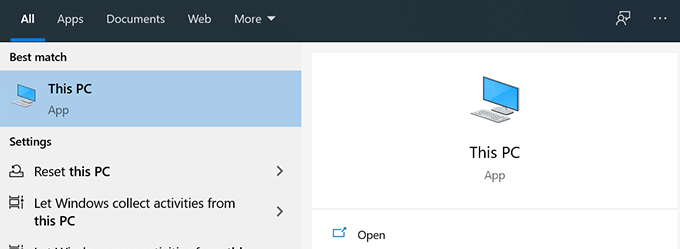
- Use Cortana search to search for This PC and open it.
- Navigate to the drive where you want to make a default downloads folder.
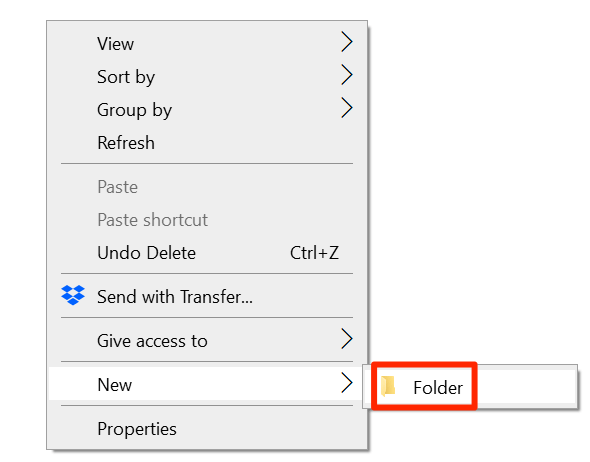
- Once you’re in your chosen drive, right-click any blank space and choose New followed by Folder.
- Enter a name for your new downloads folder. This is where your future downloaded files will be available.
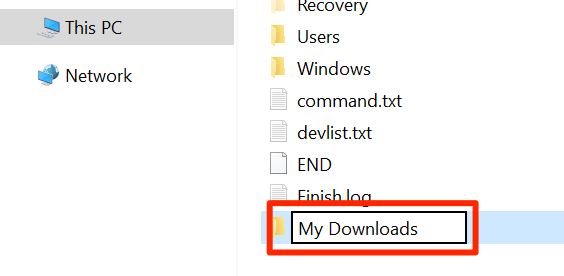
- Head to the root folder in This PC so you can see the Downloads folder.
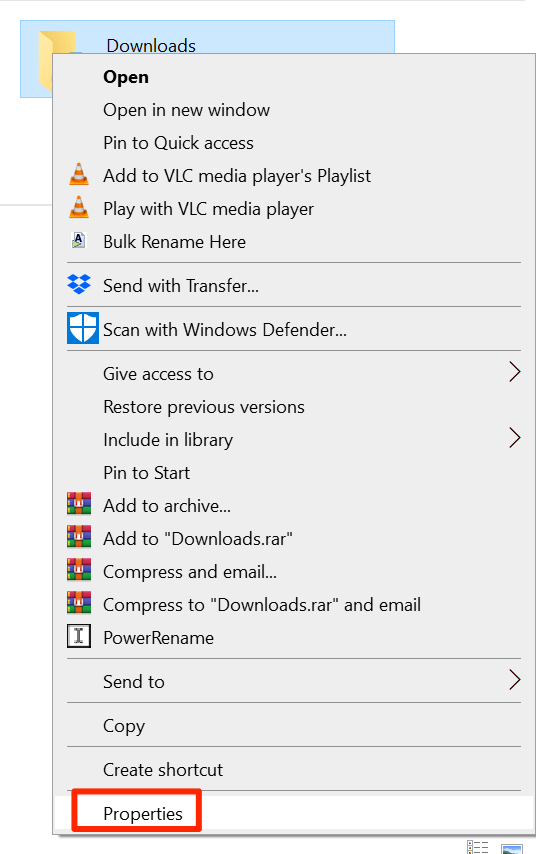
- Right-click the Downloads folder and select Properties.
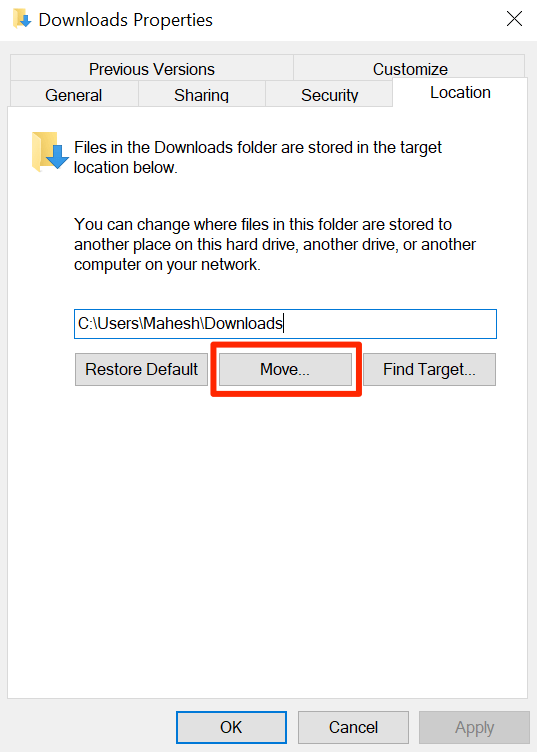
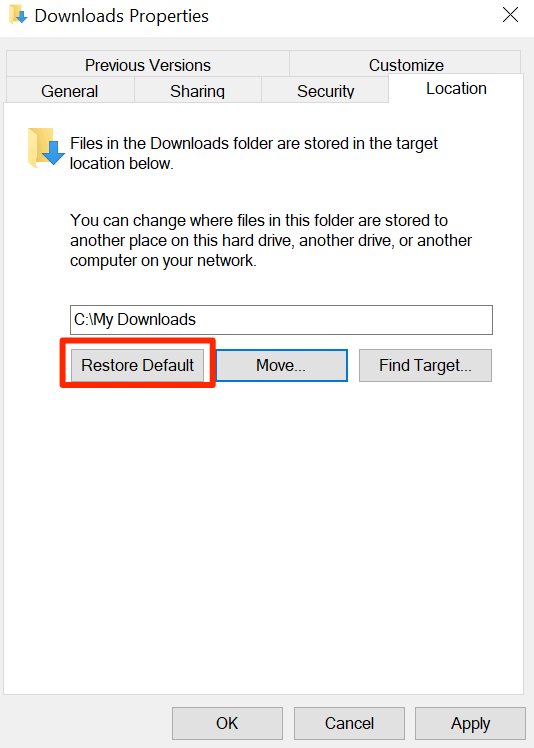
- On the following screen, click the tab that says Location.
- In the Location tab, you’ll see the current path to your downloads folder. To change this folder, click the button that says Move.
- Your computer will let you select the new default downloads folder. Navigate to the drive where you created the new folder and select it.
- Click Apply followed by OK to use your newly selected folder as the default downloads location.
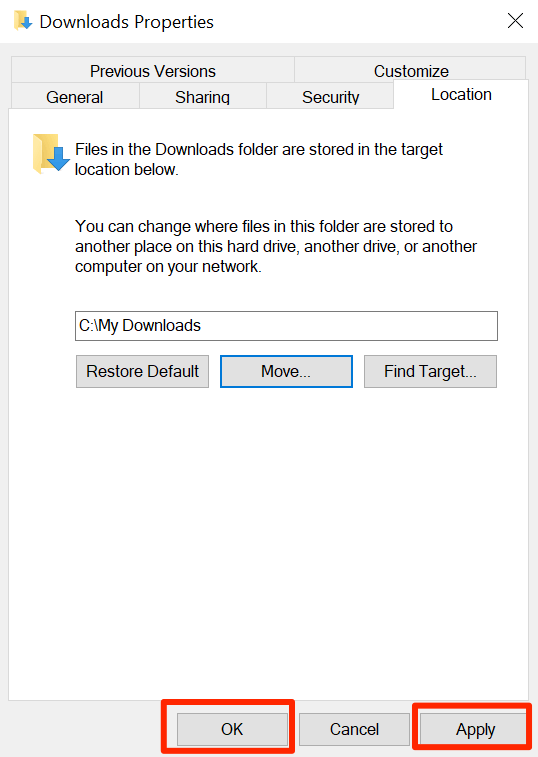
- If you ever want to revert back to the old downloads folder, click the Restore Default button and it’ll reset your settings.
Change Default Download Location Using Registry Editor
Windows Registry Editor lets you tweak many settings on your machine. This includes changing the default downloads location on your Windows 10 PC. You only need to edit one value in the registry and your chosen folder will become the new default downloads location.
- Create a new folder that you want to use as the default downloads folder. This could be anywhere on your computer or even on your connected drives.
- Open your newly created folder with File Explorer.
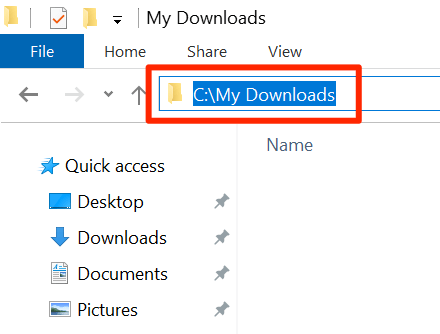
- You need to copy the path to your new downloads folder. Click the address bar, highlight the full path, and press Ctrl + C on your keyboard to copy the path.
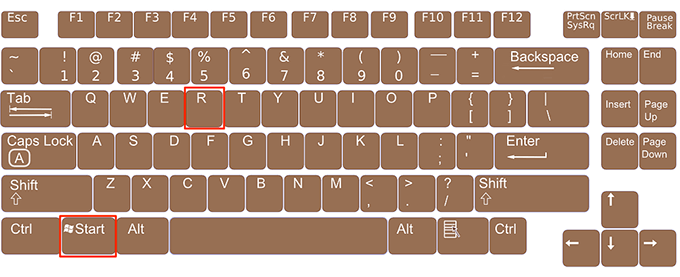
- Press the Windows + R keys at the same time to open the Run box.
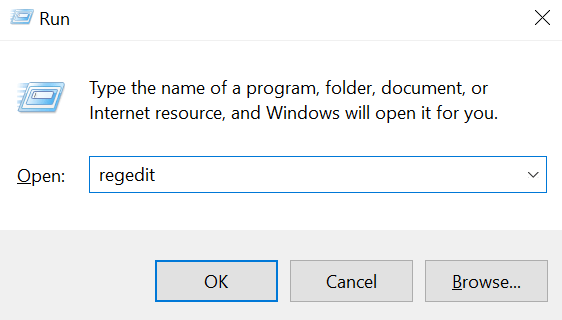
- Type the following into the Run box and press Enter. This’ll open the Registry Editor.
regedit
- When the Registry Editor opens, navigate to the following path.
HKEY_CURRENT_USERSSoftwareMicrosoftWindowsCurrentVersionExplorerUser Shell Folders
- On the right-hand side pane, you’ll see several registry values that you can tweak. Find the entry that has %USERPROFILE%Downloads in its Data column and double-click it.

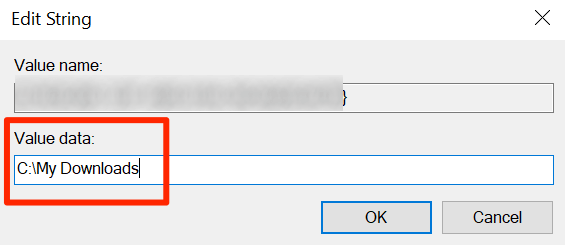
- Put your cursor in the Value data box, remove the existing content from the box, and press Ctrl + V to paste the path to your new downloads folder location. Then click OK to save changes.
- Reboot your computer.
Change Default Download Location For Various File Types
There’s a feature in Windows 10 that lets you choose different drives for saving different types of files. With this feature, you can change where your computer saves your apps, documents, music, and so on.
You don’t get to choose the specific folder, though. You can only choose the drive where your new content is to be saved.
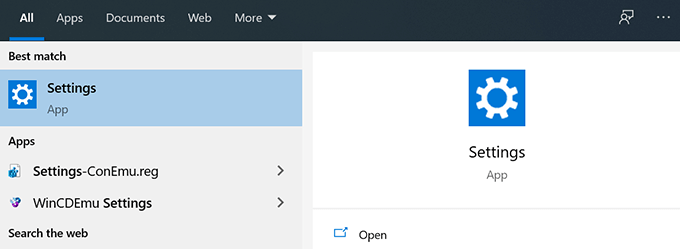
- Open the Start Menu, search for Settings, and open it.
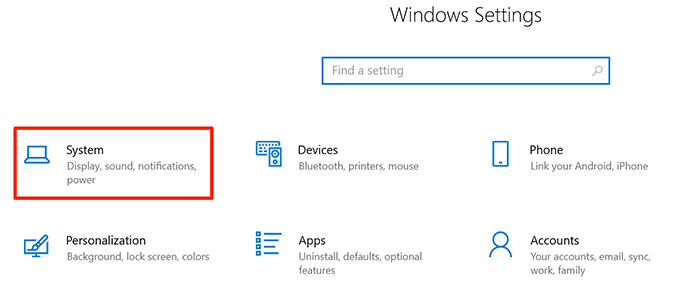
- Select the option that says System on the following screen.
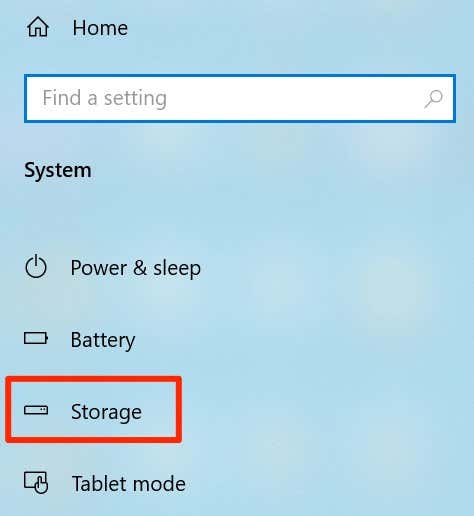
- Click Storage from the options available in the left sidebar.
- You’ll see your storage information on the right-hand side pane. Scroll down and click the option that says Change where new content is saved.
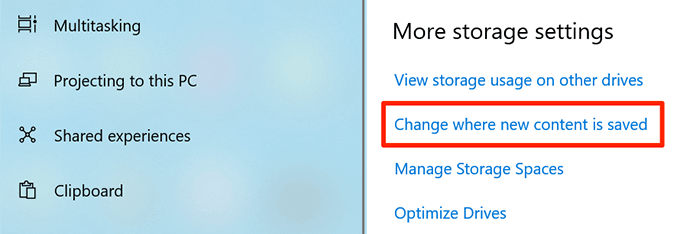
- On the following screen, you’ll see what content is saved where by default. To change the default downloads drive for a specific content type, click the dropdown menu next to the file type and choose your preferred drive.
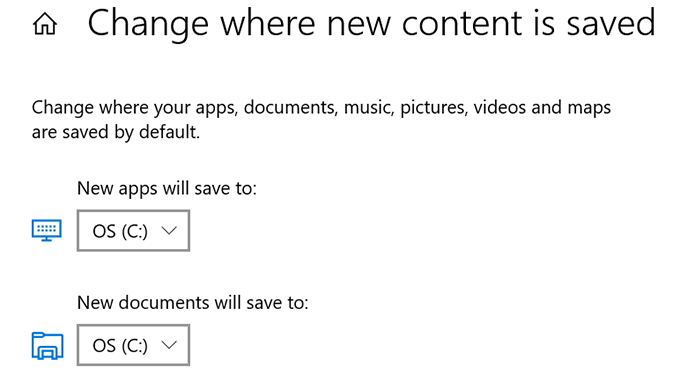
You can change the default downloads location for the following items with this feature.
- Apps
- Documents
- Music
- Photos
- Videos
- Movies
- TV shows
- Offline maps
Change Default Download Location In Microsoft Edge
You can change the default downloads location in Microsoft Edge on your computer so that your future downloads are saved in your selected folder.
Changing this setting only applies to this browser. Your other browsers will continue to save your files where they did before.
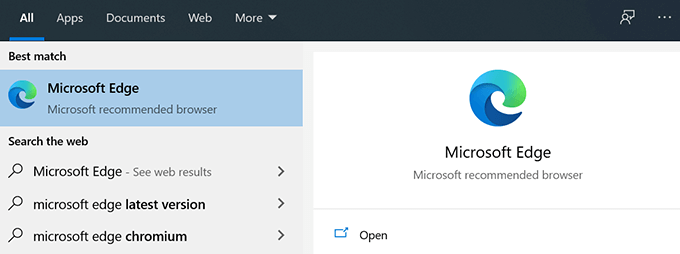
- Open the Start Menu, search for Microsoft Edge, and launch it.
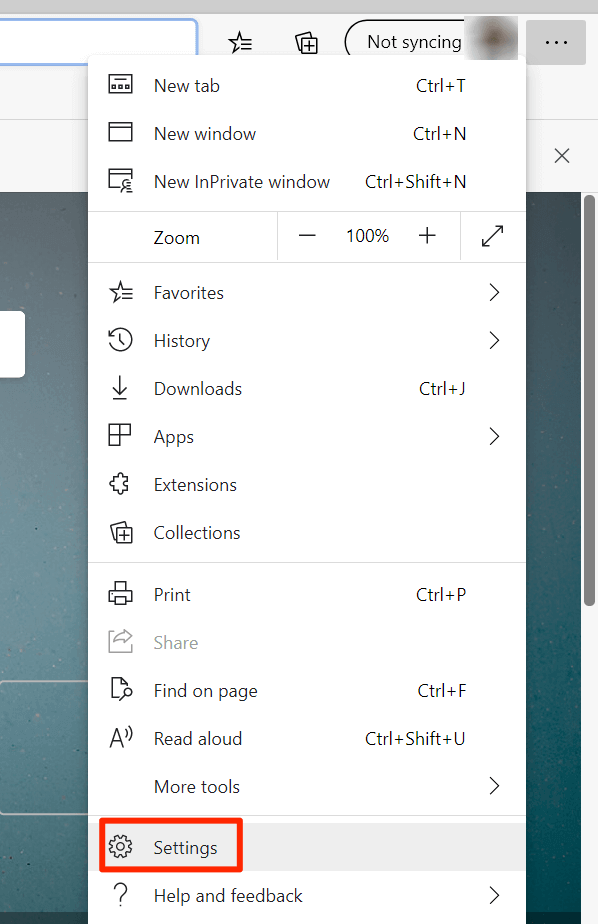
- Click the three-dots at the top-right corner of your browser and select the option that says Settings.
- You’ll see several options in the left sidebar on your screen. Find the option that says Downloads and click it. This option will let you modify your downloads settings.
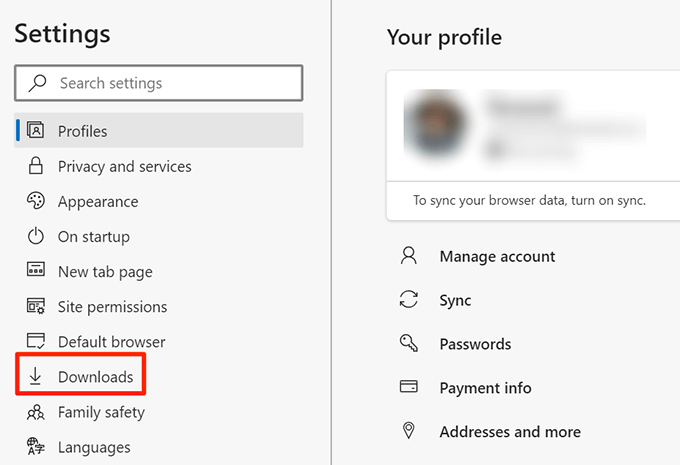
- On the right-hand side pane, you’ll see an item that says Location. This is currently where Edge saves your files. To change the default downloads folder, click the Change button.

- File Explorer will open, letting you select your new folder as the default downloads folder. Click the folder and choose Select Folder.
- If you want Microsoft Edge to ask where to save the file each time it downloads something, enable the toggle for Ask where to save each file before downloading.

If you use a download manager to download files, you need to head into the settings of your download manager app and change the default downloads location. Many apps don’t use the default Windows downloads folder as their downloads location.
Did you ever have to change the default downloads location on your Windows 10 PC? What method did you use to do that? We’d like to know in the comments below.


