Windows 10 has the Standard user account and the Administrator account, each with different privileges to use a device and applications.
An administrator account offers complete system control with privileges such as access to all files on the device. You can also modify other user accounts and change them to Standard or Administrator, install software and hardware, change security settings, and execute elevated tasks.
However, if you got locked out of your computer, forgot your administrator password, or your admin rights were accidentally revoked, you can’t make any changes on the device.


The Standard user account on the other hand is more restrictive. Standard users can work with apps and change settings that won’t affect other user accounts. Unlike administrators, Standard users cannot install new apps. Plus, if they have to execute an elevated task, they’ll need administrative credentials to complete it.
There are different reasons why you may want to change the administrator on Windows 10. For example, if you’re handing over the device to someone else, or you want to add someone else as an administrator and become a Standard user yourself. Windows 10 includes different ways for you to change the administrator, which we’ll explain in this guide.
Contents
How To Change The Administrator On Windows 10
There are five different ways to change the administrator on Windows 10. You can use:
- Settings.
- Control Panel.
- User Accounts.
- PowerShell.
- Command Prompt.
How To Change Windows 10 Administrator Using Settings
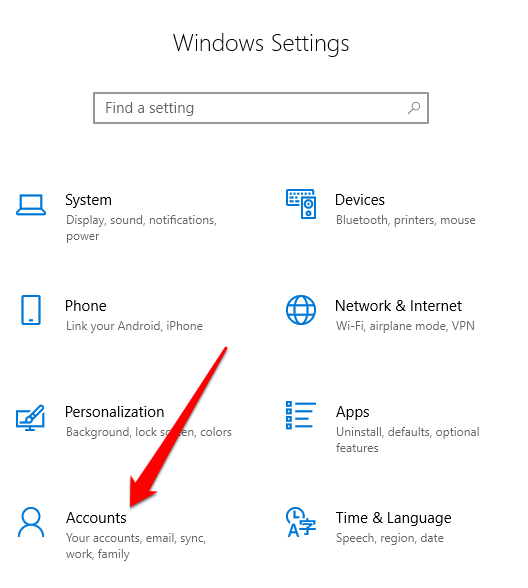
- Click Start > Settings and select Accounts.
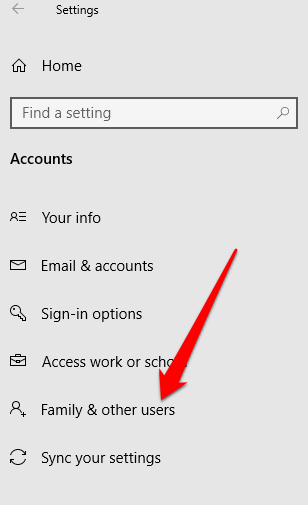
- Click Family & other users.
- Click on the user account and select Change account type.
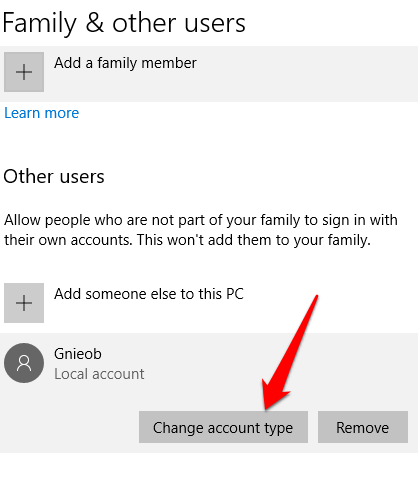
- Select the Administrator account type and then click OK.
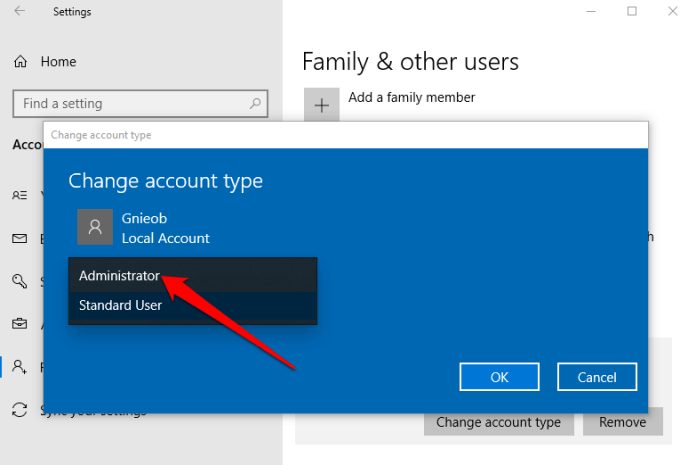
- Restart your computer to effect the change and start using the account with the administrator privilege level.
How To Change The Administrator On Windows 10 Using Control Panel
- Click Start, select Control Panel and go to the User Accounts section.
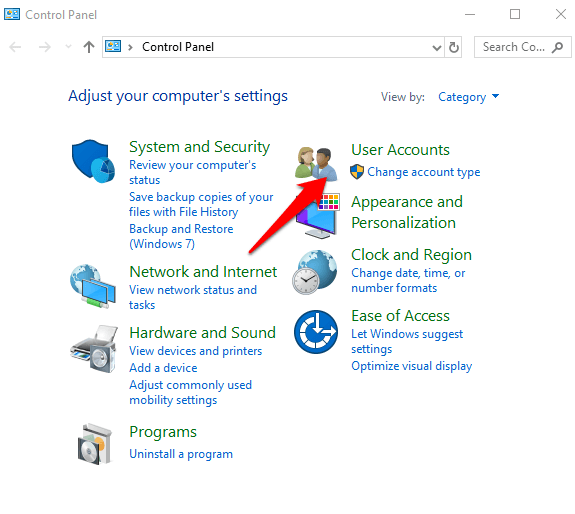
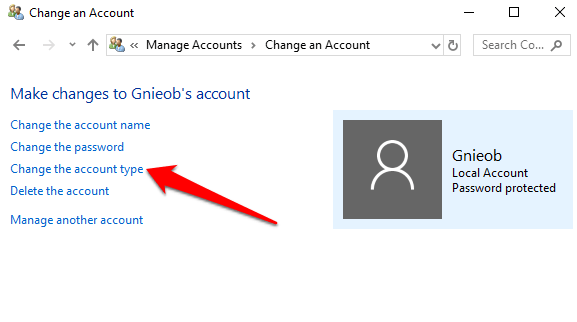
- Click on the account you want to change and select Change the account type.
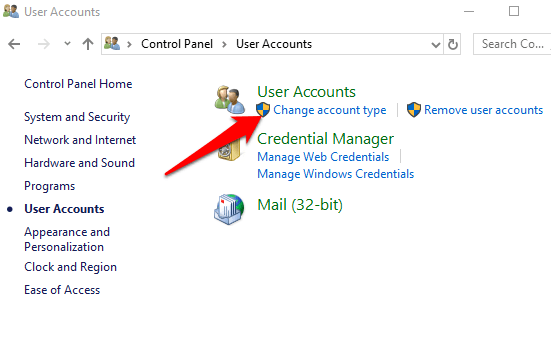
- Choose the user account you’d like to change to administrator.
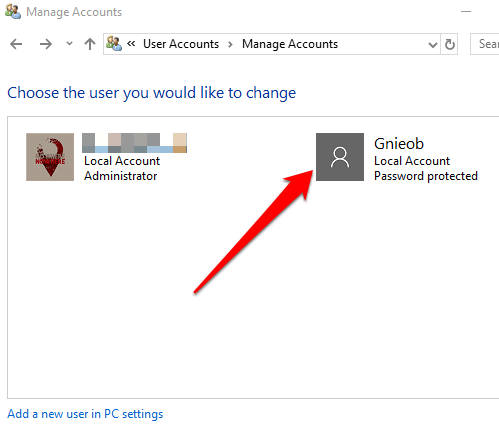
- Click the Change Account Type link on the left.
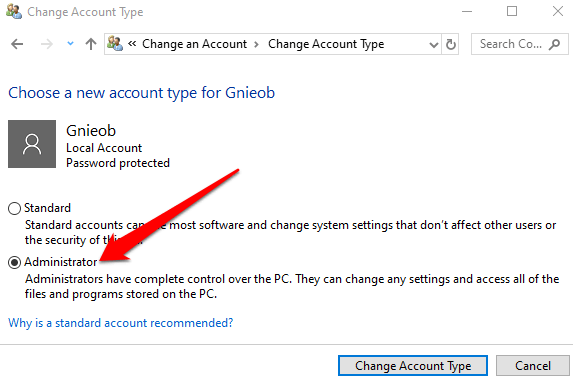
- Select Standard or Administrator account
How To Change Windows 10 Administrator Using User Accounts
You can set an account to Administrator type using the netplwiz command or User Accounts.
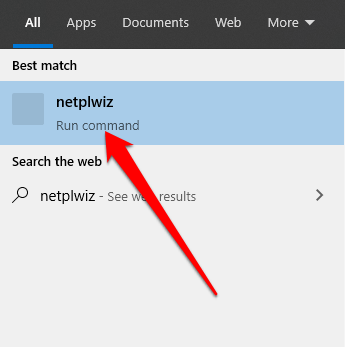
- To do this, click Start and type netplwiz in the search box. Click the result to open User Accounts.
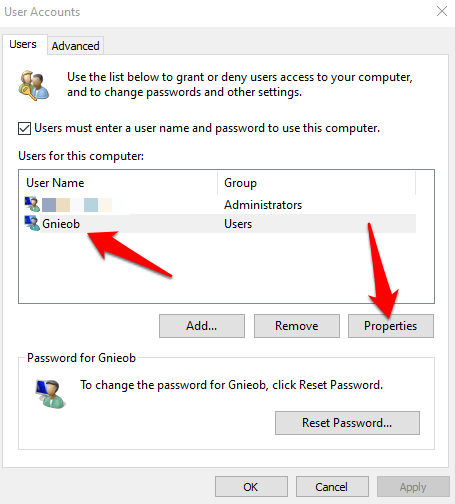
- Click on the account you want to change and select Properties.
- Next, click the Group Membership tab. Select the Standard user or Administrator account you’d like to change. You can also choose different user groups under the Other membership option. Here, you can select Remote Desktop users, Guests, Power Users, Cryptographic operators, and backup operators among others.

- Click Apply > OK. Repeat this action to confirm and then restart your device to apply the changes and use your new administrator account.
How To Change The Administrator On Windows 10 Using PowerShell
PowerShell is a command line shell that allows system administrators to automate tasks like creating new users, passwords, and more so that they don’t have to waste time on such mundane things (read more in our guide on Using PowerShell For Home Users).
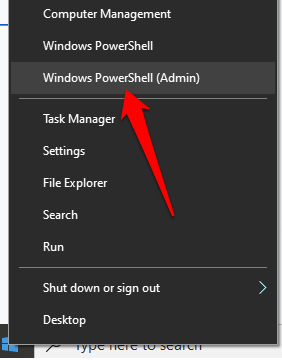
- To change the administrator on Windows 10 using PowerShell, right-click Start > Windows PowerShell (Admin).
- Type this command to change the account to administrator: add-LocalGroupMember -Group “Administrators” -Member “ACCOUNT-NAME”
Note: Replace “Account-Name” with the actual name of the account you’re changing to administrator.

How To Change The Administrator On Windows 10 Using Command Prompt
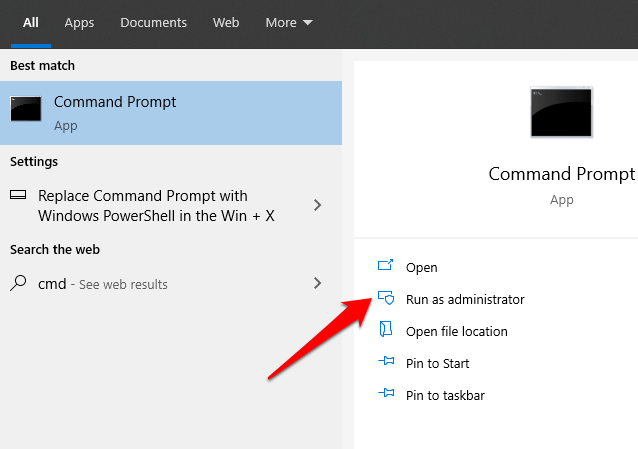
- Click Start and type CMD in the search box. Select Command Prompt > Run as administrator.
- Type this command to change the account type to Administrator: net localgroup Administrators “ACCOUNT-NAME” /add. Press enter.
Note: Remember to replace “Account-Name” with the actual name of the account you’re changing to administrator.
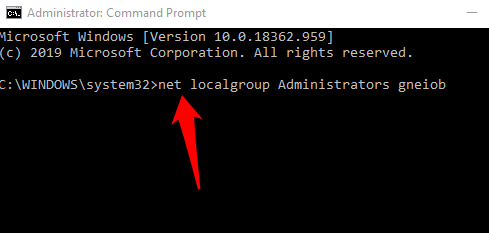
- To view the account type, enter this command: net user ACCOUNT-NAME and press Enter. Once you complete these steps, the account will load with the administrator privileges next time the user signs in to the device.
Create a Local Administrator Account In Windows 10
You can also create a local user or administrator account in Windows 10 and give it administrator permissions. Users of Windows 10 version 1803 and later can add security questions, which allows them to reset their local account passwords anytime.
- To create a local user account and give it administrator privileges, click Start > Settings > Accounts and select Family & other users.

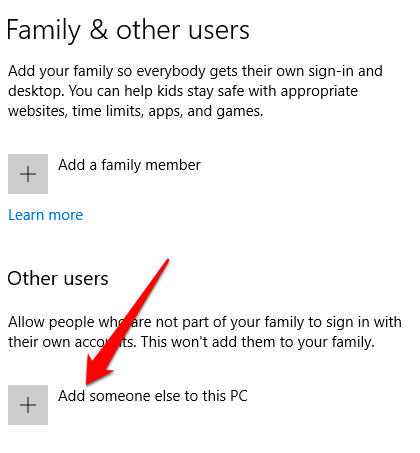
- Select Add someone else to this PC.
- Next, enter a username and password.
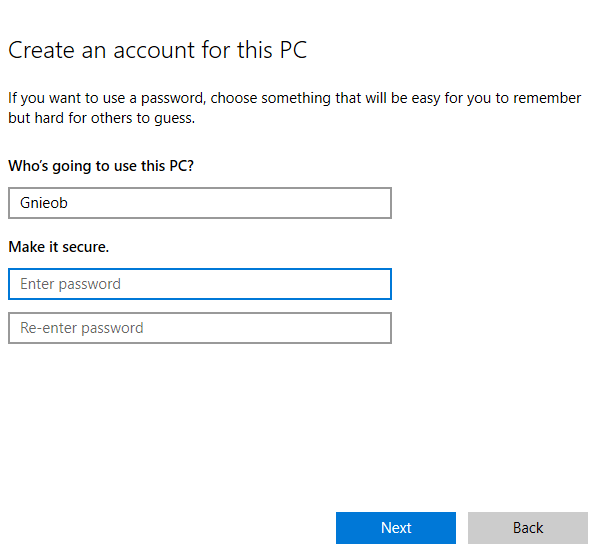
- Choose the security questions you prefer to answer in case you lose or forget your password, and click Next.
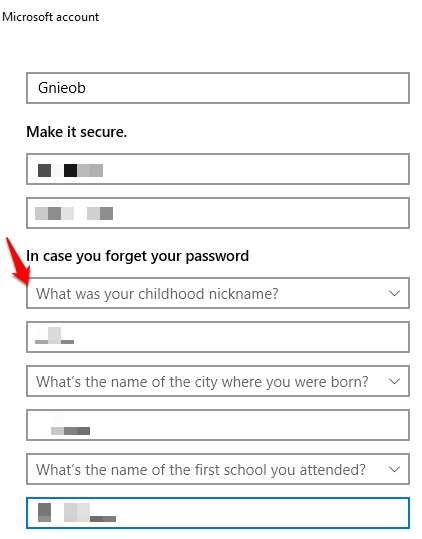
Enter a username and password, and type a password hint or select security questions. Click Next once you’re done, and then use any of the methods above to change the user account to an administrator.
Were you able to change the administrator on your Windows 10? Let us know in the comments.


