The default cursor you always use on Windows may, at times, feel a bit boring and outdated. Windows is a great operating system if you want to change things like this, though. It provides you full ability to customize your desktop experience.
So, if you feel like changing your cursor, it’s entirely possible. And there are lots of options online to do just that. No matter what shape or color, something you like is probably available to use for free. You can also make minor changes with the size or color of the cursor without downloading anything.


The only difficult part is actually figuring out how to change the cursor on Windows 10. You have to do this by going into Window’s settings, and it may seem a bit confusing doing it on your own. Here is how to change your Windows 10 cursor without any hassle.
Use Cursor Customization Settings
If you don’t want any major changes to your cursor but simply want to change something such as the size, you can do this right through Window’s settings.
- Select the Windows button, then go into Settings.
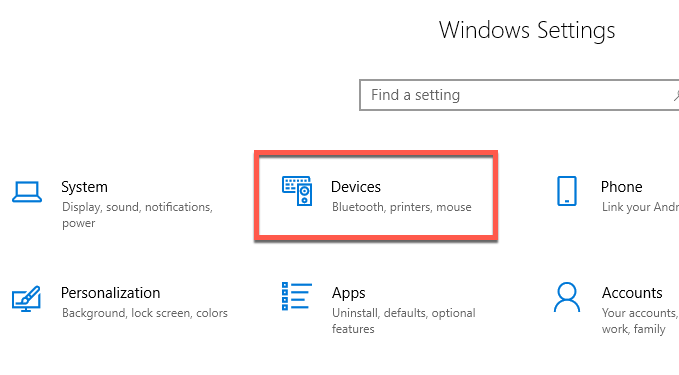
- From the settings, click Devices.
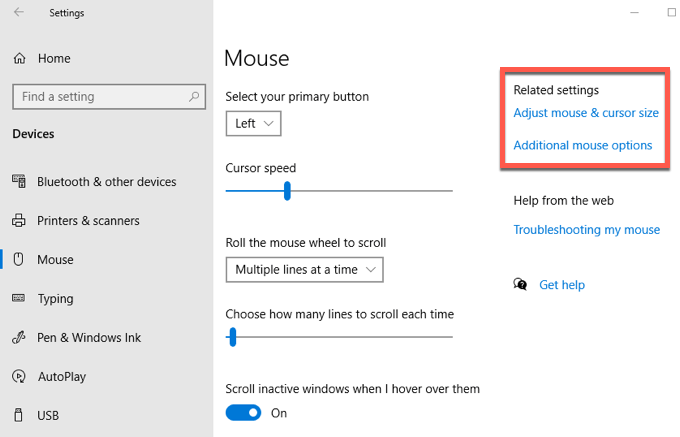
- Click on the Mouse option from the left-hand side, then Additional Mouse Options.
- A Mouse Properties window will come up, and from here select Pointers.
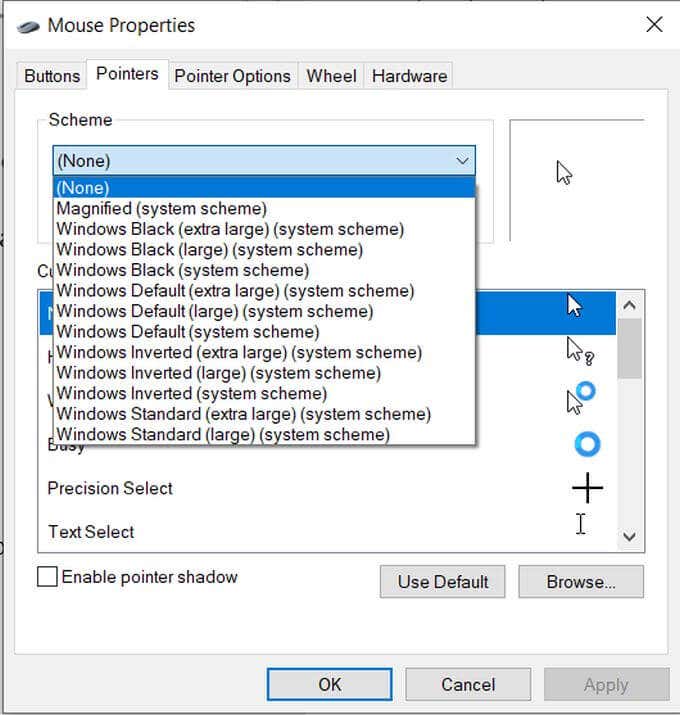
- Under the Scheme dropdown, you can choose from multiple different options to change your cursor on Windows 10. For colors you can choose; black, default, or inverted. You can also change the size to large or extra large.
- Once you’ve selected the one you want, click Apply and then OK.
You’ll see that all the different cursor icons for different activities will be changed as well as the scheme. If you want to change a specific cursor option, you can do this without changing the rest.
- Again, open Settings > Devices > Mouse > Additional Mouse Options.
- Navigate to the Pointers pane in the Mouse Properties window.
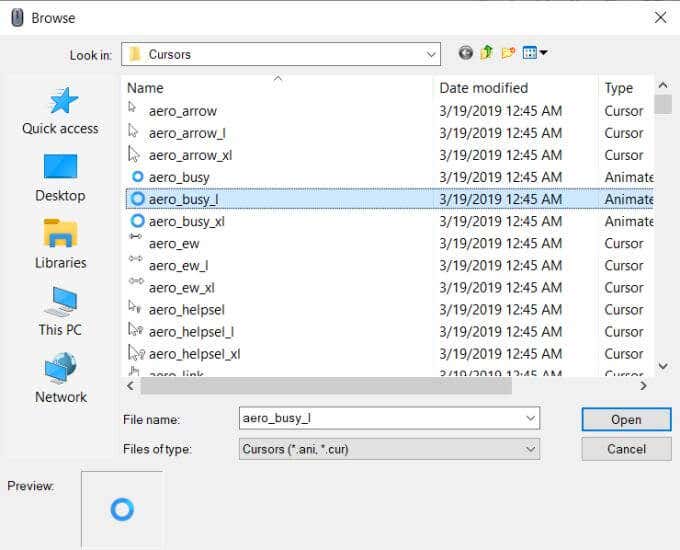
- Find the cursor option you want to change and select it, then click Browse.
- The file manager will open to a window with all the cursors Windows has available. You can choose one you’d rather use, then select Open.
- To save this custom scheme, you can select Save As under the Scheme dropdown and then name it.
- Select Apply then OK.
If you want to make some quick changes easily, there is another option to adjust your Windows cursor within the settings. If you go to Windows > Settings > Devices > Mouse > Adjust Mouse & Cursor Size you’ll come to a window where you can change multiple Windows 10 cursor settings.

At the top is size and color. You can move the slider to make the cursor larger or smaller. Below that, you can also change the cursor’s color. There is the default white, black, and inverted, but you can also choose a custom color.
To do this, select the fourth color option with the color wheel. You can choose from suggested colors, or click on Pick a Custom Pointer Color to choose your own from a color selector.
You can also change the cursor thickness when you’re typing by using the slider below Change Cursor Thickness.
Download Cursors Online
You might be looking for something a little more colorful or unique than just the default Windows cursors available. If that’s the case, there are lots of different cursors you can find for free online to download and use.
Since you’ll have to download these from third-party sites, you should always be careful of where and what you download. If a site seems sketchy, don’t use it, as you could possibly get your computer infected with malware. A good site to find cursors is Open Cursor Library.
Here is how to change your cursor from a downloaded file:
- After downloading the file, find where you saved the file, open it, and click Extract All near the top right. Save the file somewhere you can find easily and where you won’t want to move it.
- Go to Windows > Settings > Devices > Mouse > Additional Mouse Options
- Open the Pointers pane.
- In the Customize box, select the cursor you want to change. Then click Browse.
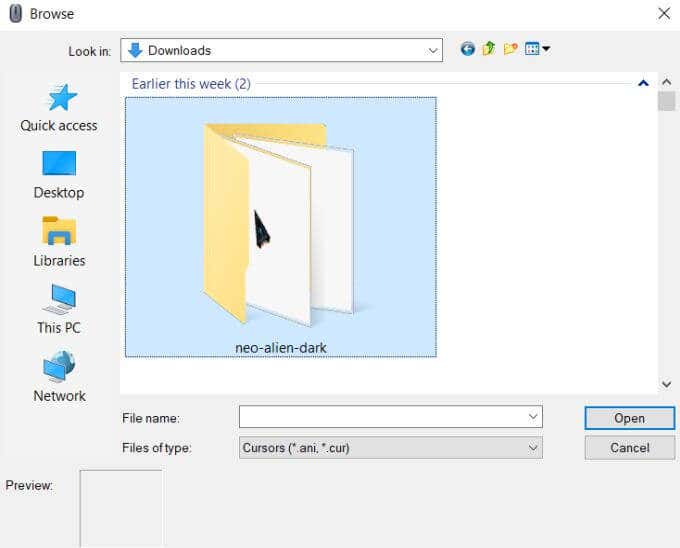
- Locate the file with the cursors you’ve downloaded, and select the cursor that matches the one you wish to change. Select Open to use the cursor.
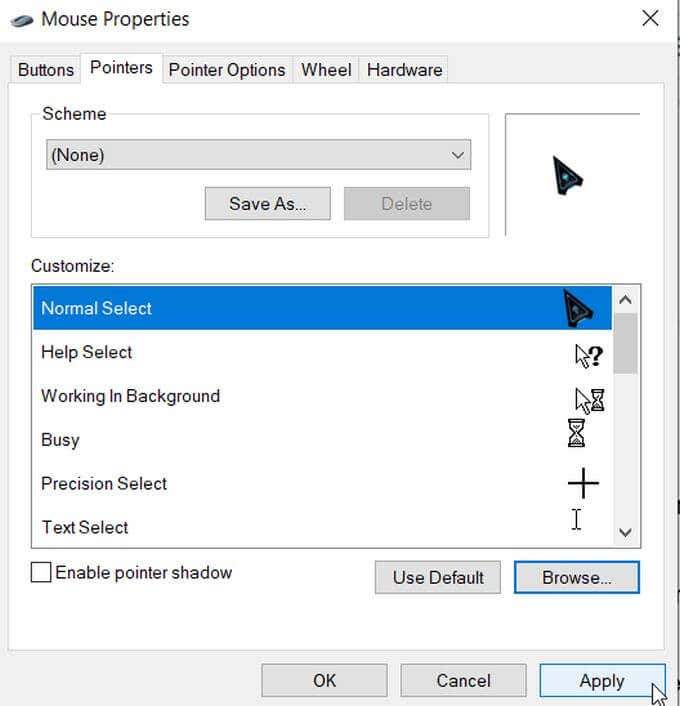
- Do this for all the cursors you wish to change, then select Apply, then OK.
Other Cursor Customization Options
There are even more changes you can make to your cursor if you wish. Under the same Mouse Properties window, you’ll see the Pointer Options pane. Select this and you’ll see some more advanced changes you can make.
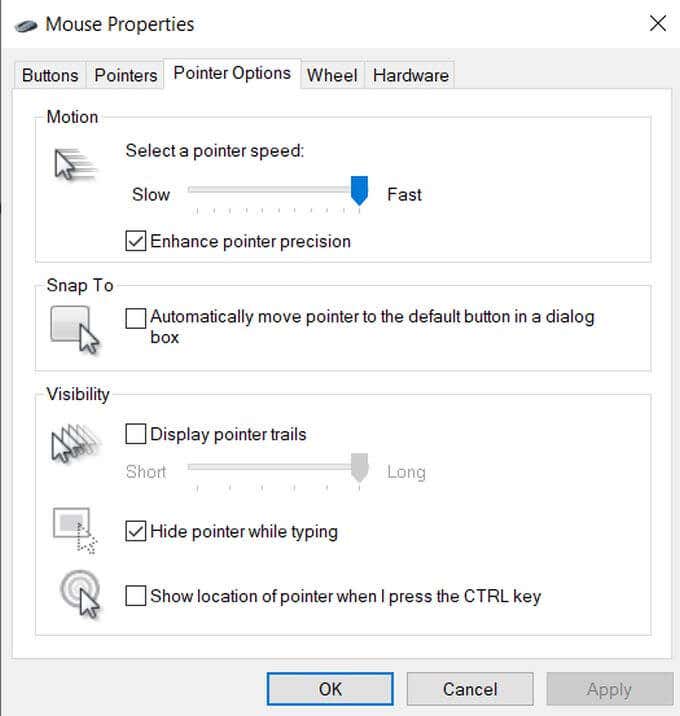
In the Motion box, you can change the speed of your cursor by moving the slider towards Slow or Fast.
Under Snap To, you can have the cursor automatically go to the default option in dialogue boxes.
In the Visibility box, there are a few more options you can change. If you check the box for Display Pointer Trails, your cursor will create a trail whenever it moves. You can adjust how long it does this by moving the slider towards Short or Long.
You can also check the box under this to hide your pointer when typing. Under that, you can check a box that allows you to press the CTRL button which will then show the location of your cursor on your screen.


