When you connect to a local network, the device you’re using is given an IP address, allowing other devices to find and communicate with it, as well as signifying that the device itself has correctly authenticated. The larger the network, the more IP addresses that will be in use, which can cause some allocation issues.
In most cases, IP address allocation is determined by your local router, so to change your IP address on a Windows 10 PC, you’ll need to configure your network as a whole. Alternatively, you may want to set a static IP address, or change your public IP address for all your devices. To change your IP, here’s what you’ll need to do.

Contents
Why Change Your IP Address On Windows?
There are a couple of reasons why you might want to change your IP address.
Typically, a local network router will allocate a temporary IP address to your device when you connect using DHCP (the protocol used to assign IP addresses), giving it a temporary lease to that address. When the lease runs out, it will need to be renewed, otherwise you could be allocated a new address.
While this usually happens automatically, problems can sometimes occur. A poorly configured or busy local network, along with misconfigured devices, might result in the same IP address being allocated twice, causing conflicts.
If this happens, you may wish to set a static IP address, giving your device a permanent address. You’ll want to do this for devices that are regularly accessed by other devices, such as home servers or network attached storage devices.
These all apply for local networks, but you may want to change the IP address given to you by your internet service provider. This can be trickier to do, but there are a few ways to change this address if your ISP allows it.
Configuring Your Network Router DHCP Settings
One of the easiest ways to change your IP address is to configure your network router to assign a new IP address. To do this, you should configure the DHCP settings on your router to assign IP addresses differently.
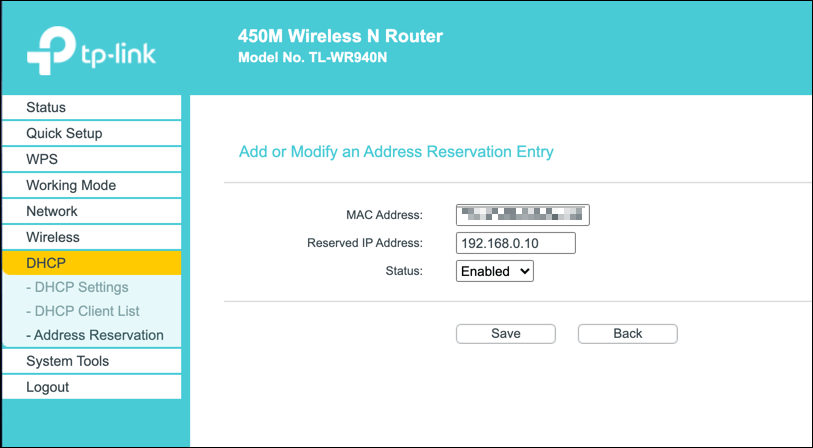
You could, for instance, set a static allocation for your Windows PC. When your device connects, your router will always assign the same IP address to it by using your device’s MAC address to identify it.
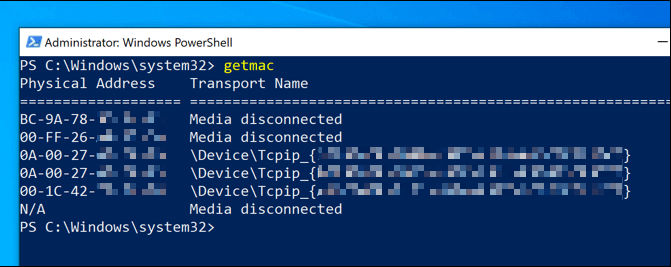
If you don’t want to do this, you could also change the IP range used by your local router. This means that your local IP address may still change from time to time, but the range of addresses will be different. Your IP address may change from 192.168.0.10 to 192.168.10.10, for instance.
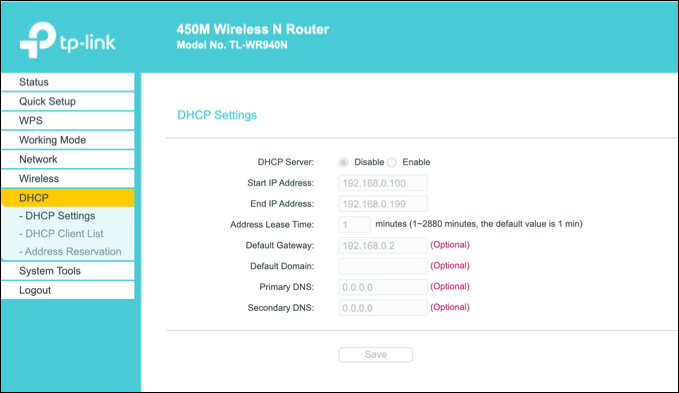
To do this, you’ll need to access your router’s administration page. This will vary by device, but typically, many local routers can be accessed by typing http://192.168.0.1 or http://192.168.1.1 from your web browser. Consult your user manual for the correct username and password to use here.
The steps to change your DHCP settings will also vary, but you’ll typically find DHCP settings listed under its own section (eg. DHCP), while fixed IP allocations can be found under address allocation or similar.
Releasing DHCP Lease and Resetting Your Dynamic IP
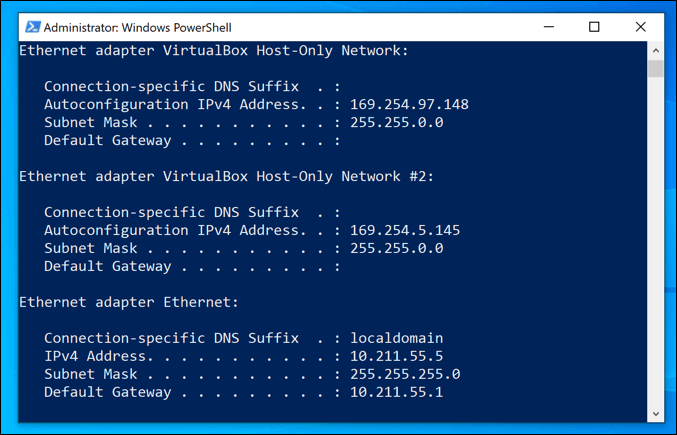
Any changes you make to your router’s DHCP settings may require you to release or renew your Windows IP address using the Windows PowerShell.
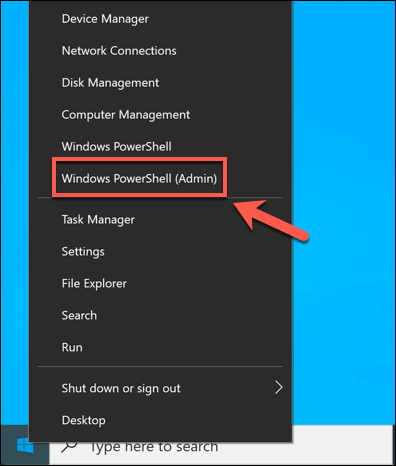
- To do this from the Windows PowerShell, right-click the Start menu and click the Windows PowerShell (Admin) option.
- In the PowerShell terminal window, type ipconfig /release to release your DHCP lease and disconnect. With your new settings in place, type ipconfig /renew to reconnect.
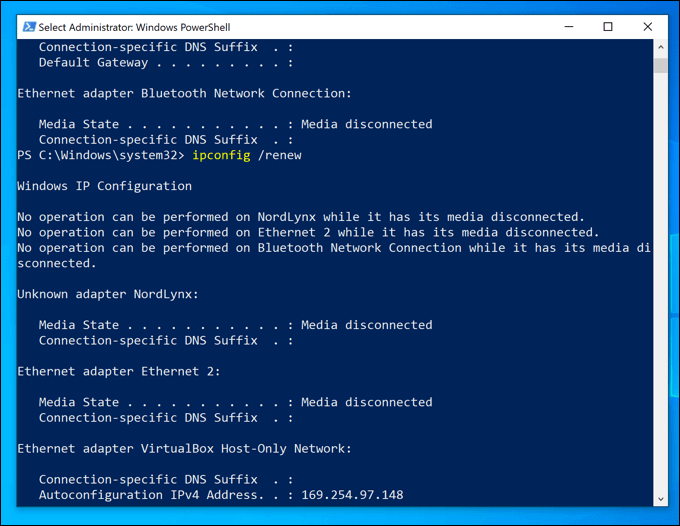
If your router settings have been correctly changed, releasing your DHCP lease and resetting your IP will result in a new IP address being allocated to your device.
Setting a Static IP Address On Windows 10
A static IP address can be achieved through a fixed DHCP allocation, but you can also set this manually in your Windows 10 settings. You may want to do this if you’re making a direct connection to another device.
This may also work with your local router, but as your device is already being assigned an IP using DHCP, an IP conflict may occur. In this case, it’s better to use a fixed IP allocation to do this instead.
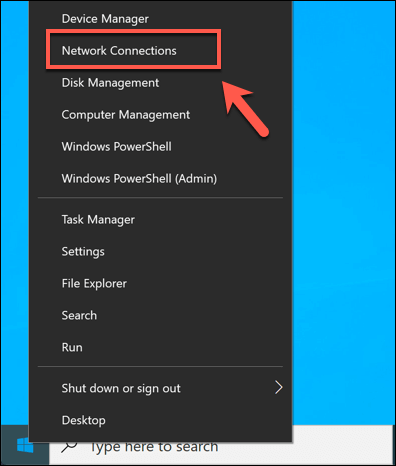
- To set a static IP address, open your network settings by right-clicking the Start menu and clicking the Network Connections option.
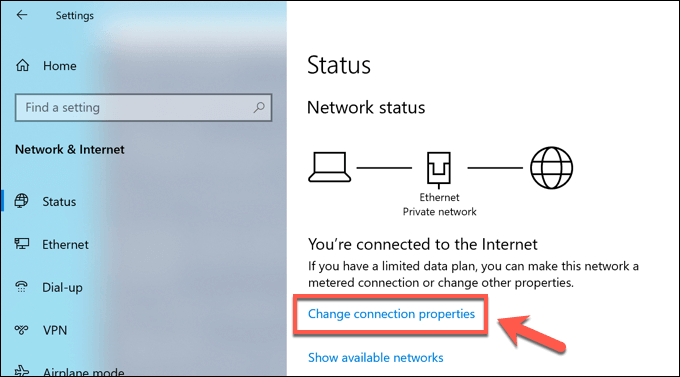
- In the Network Connections settings menu, press the Change connection properties option.
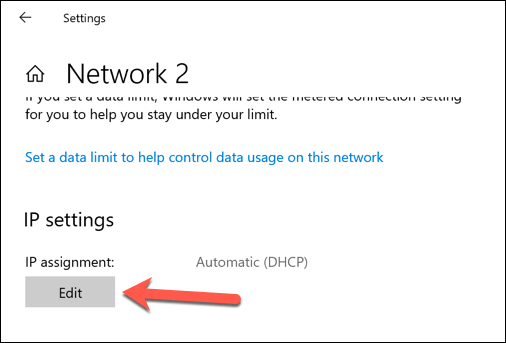
- Under the IP Settings category, press the Edit option.
- Change the IP allocation type to Manual. Enable either IPv4 or IPv6, then type the static IP settings you wish to apply. An example configuration for an static IPv4 IP address would include 192.168.0.10 for IP address, 24 for subnet prefix length, and 192.168.0.1 for gateway (referring to your local router) and preferred DNS server. Click Save once you’re done.
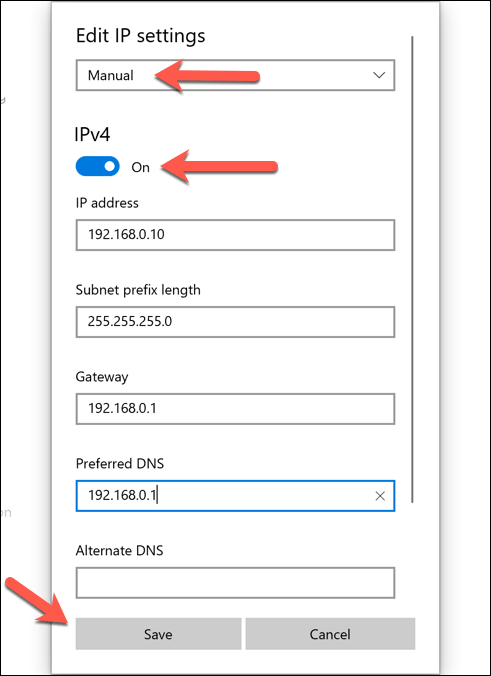
Once saved, your IP address settings will be applied automatically. You may need to release your existing IP using the steps above or restart your PC for the changes to take effect fully.
Change Your Public IP Address On Windows 10
Your public IP address is the address assigned by your internet service provider, giving you access to the internet. This is assigned to your modem (which is usually combined with your network router, but not always), allowing all other connected network devices to the internet, too.
Changing this address can sometimes be difficult. You’ll need to check if you’re assigned a dynamic (temporary) or static IP address by your ISP first. If you’re assigned a static public IP, your ISP will need to change this for you.
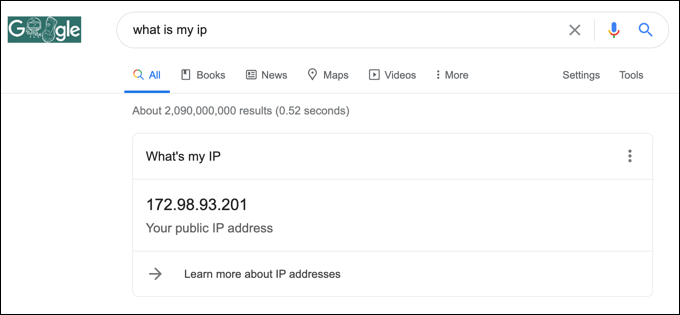
For dynamic IP addresses, you can usually reset this by switching your network modem off for a period of time. By doing this, you’re disconnecting your device from your ISP.
As with your local network, your public IP lease will eventually run out, meaning you may be allocated a new IP address at this point. However, this isn’t guaranteed to work, and you may need to try another method.
If your public IP address won’t change, there are other methods you could try. Using a virtual private network, will hide your public IP as you browse online, for instance.
Configuring Your Network On Windows 10
Whether you’re configuring a server for your network (or for wider internet users), or you just want to free up allocations for other devices, it’s an easy process to change your IP address on Windows 10, although much of the work relies on being able to access your router to properly configure your network.
If your network configuration is causing problems, you may wish to reset your network router to wipe the slate clean and start again. IP allocation issues might be why you’re struggling with network connection issues, but thankfully, there are several ways to fix unidentified network problems on Windows 10.


