Like any other app, Outlook also creates and saves cache files on your computer to speed-up its operations. These files help the app auto-complete certain things and help it get to the required files quickly than if there was no cache. Sometimes, though, you may want to clear the Outlook cache.
You’ll want to do it especially when you notice a slowdown in the performance of the app, which is often the result of a lot of cache files that have been created over a period of time. There are ways to delete various Outlook cache files as shown below.
Contents
Clear Outlook Cache Files Using File Explorer
Using File Explorer to clear Outlook cache is one of the easiest ways to do the task. Since cache files are like any other regular files on your computer, you can navigate to the folder where they’re located and get rid of all of them at once. When that’s done, your Outlook cache will be gone.
- If the Outlook app is open on your computer, you need to close it before you can delete the cache. Save any work you may be doing in it and quit the app.
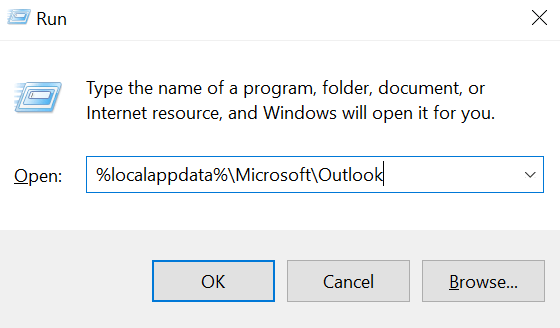
- Press the Windows + R keys at the same time to open the Run box. Type the following path into the box and press Enter.
%localappdata%MicrosoftOutlook
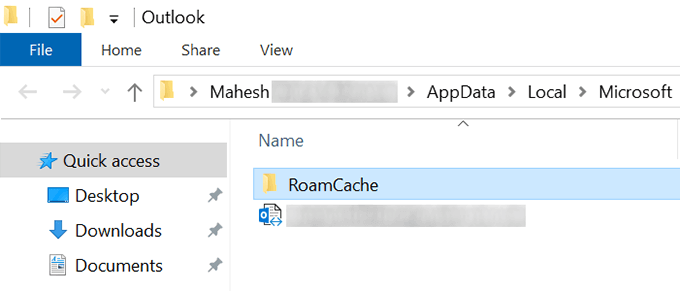
- It’ll open a folder containing your Outlook profile and cache files. You want to find the folder that says RoamCache and double-click on it to open it.
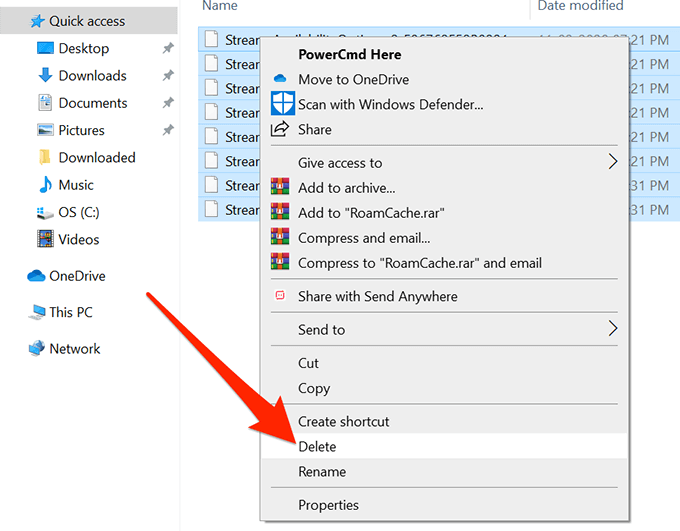
- All the files that you currently see on your screen are the Outlook cache files. To get rid of these files, select them all by pressing Ctrl + A on your keyboard, right-click on any one file, and select the Delete option.
- You may want to clear your Recycle Bin to ensure the files are gone for good.
While clearing the Outlook cache files doesn’t usually cause any issues, it’s a good idea to back them up to a separate folder before you remove them. In case things go south, you can restore your backed up files.
Clear Individual Cache Entries In Outlook
The above method removes all the Outlook cache files from your computer. If you’re only looking to remove specific entries, such as certain email addresses that show up as suggestions, then you can do that as well from within the Outlook app.
This only deletes the entries that you choose in the app.
- Open the Outlook app on your computer.
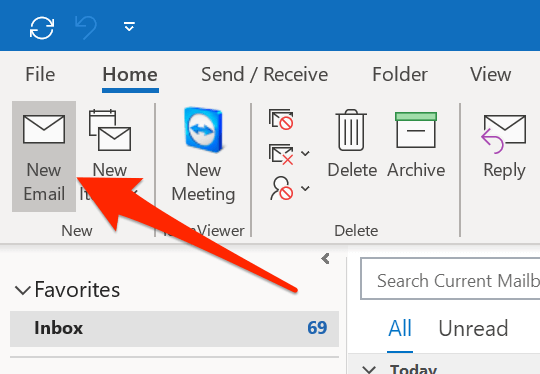
- Click on the New Email button to open the email compose window. You won’t actually be writing any emails.
- In the To field on your screen, type in the entry that you want removed from the Outlook cache.
- When the entry appears as a suggestion, hover your mouse over it and you’ll find an X icon next to the entry. Click on this icon and it’ll remove the selected entry from the Outlook cache library.
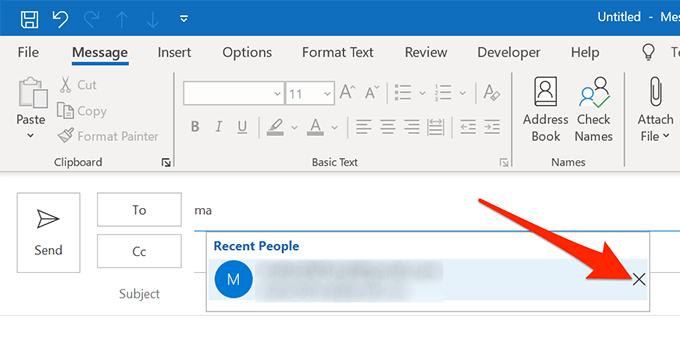
- If you’re looking to remove more than one entry, you’ll need to repeat the procedure for each of your entries.
Clear Auto-Complete Cache In Outlook
While writing new emails, you might have noticed that Outlook offers you to auto-complete certain things. It is able to do it because it has those items saved in its cache library. However, if you find this behavior of Outlook to be annoying or you just don’t want such suggestions, you can clear this data from the app on your computer.
Both disabling and clearing the auto-complete cache in Outlook is pretty easy to do.
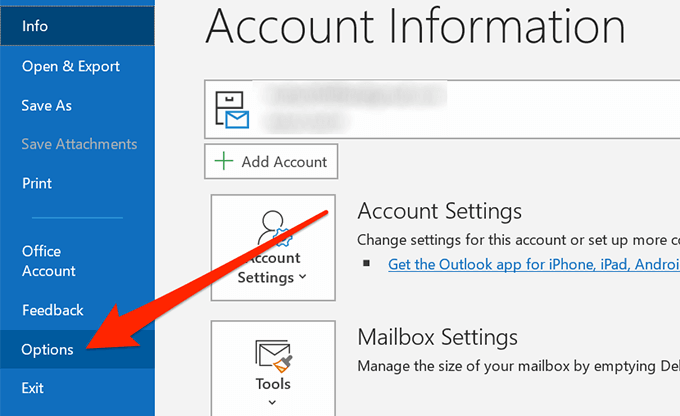
- Open Outlook on your computer and click on the File tab at the top.
- Select Options from the left sidebar on the following screen. It opens the main Outlook settings menu.
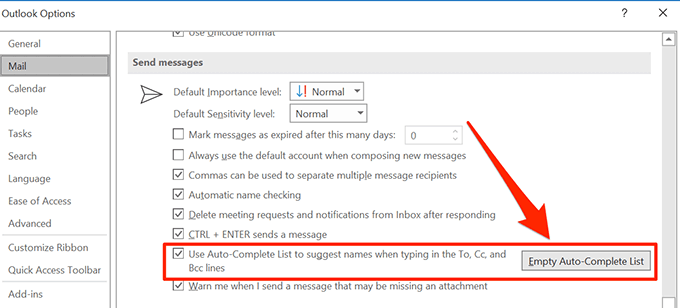
- You’ll see a number of options in the left sidebar on your screen. Find the one that says Mail, usually second in the list, and click on it to open it.
- Various options related to mail will appear on the right-hand side pane. Scroll down in this pane and find the section labeled as Send messages. Then find the option that reads Use Auto-Complete List to suggest names when typing in the To, Cc, and Bcc lines and click on the Empty Auto-Complete List button next to it.
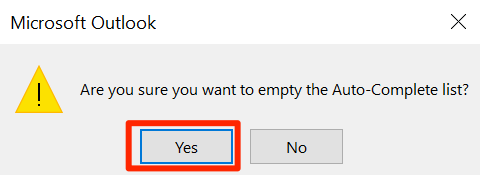
- A prompt will appear on your screen. Click on Yes to get rid of the Outlook auto-complete cache on your computer.
Clear Form Cache In Outlook
If you use any forms within Outlook on your computer, your computer might have cache files for these forms as well. You need to clear them up as well for a complete deletion of all the Outlook cache files.
This can also be done from within the app on your machine.
- Launch Outlook on your computer, click on the File tab at the top, and select Options from the left sidebar.
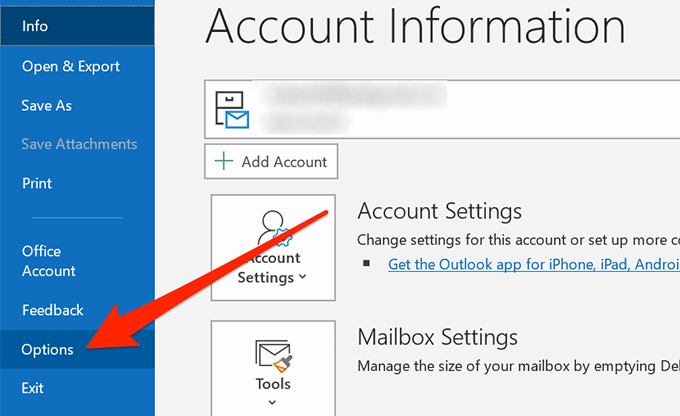
- On the following screen, find the option that says Advanced in the left sidebar and click on it.
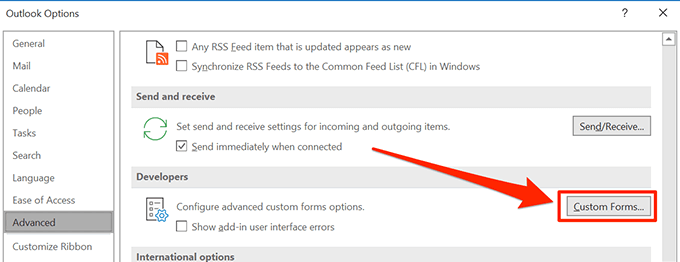
- Scroll down in the right-hand side pane until you see the Developers section. Find the Custom Forms button in this section and click on it to open it.
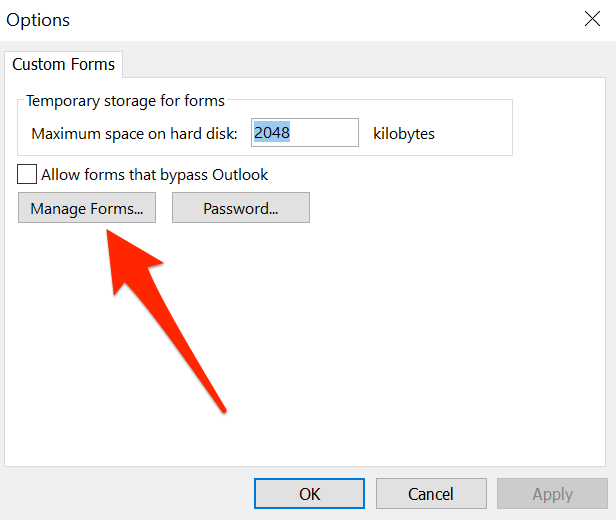
- A new window will open with a couple of buttons on it. Click on the Manage Forms button to continue.
- You’ll find various buttons on the screen that follows. Click on the one that says Clear Cache to delete your Outlook form cache files. There won’t be a prompt or anything like that.
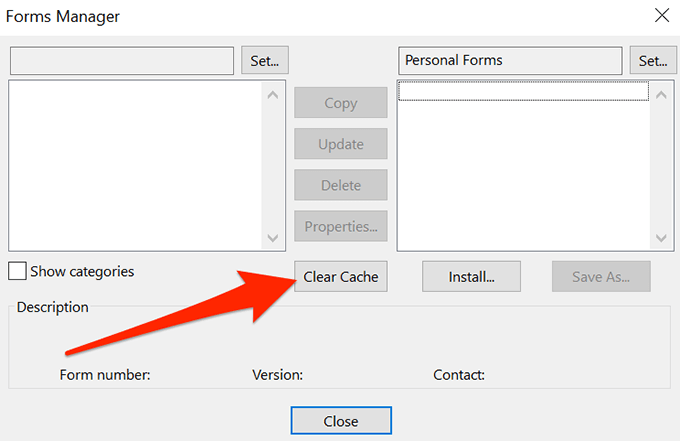
- You can then close the open screens as your task is done.
If you’ve used any of these methods to clear Outlook cache on your computer, we’d like to know what method you used and why you chose to delete these cache files. Any specific reasons for doing so? Your response is awaited in the comments section below.

