Disabling Secure Boot unlocks some advanced capabilities on Windows PCs. Only Secure Boot-disabled computers can install Linux, boot from non-trusted devices, and use certain aftermarket graphics cards. However, you must (re)enable Secure Boot to upgrade your PC to Windows 11.
You need not worry about enabling Secure Boot if you plan to clean install Windows 11 from a USB drive. But it’s something you must do to upgrade to Windows 11 without losing any data. This tutorial covers steps to verify your computer’s Secure Boot status. Additionally, we’ll show you how to enable Secure Boot for Windows 11 installation.

Contents
What Is Secure Boot in Windows?
Secure Boot is a security standard designed by a group of computer manufacturers. The security feature is written in your PC’s firmware to keep your device safe. The firmware or Basic Input/Output System (BIOS) is a hardware component that boots before the operating system. When you turn on your computer, Secure Boot checks for programs and malware not trusted by your device’s manufacturer.
For example, say your PC is infected with a bootkit targeting your computer’s bootloader (the software that starts Windows). Secure Boot detects and shuts down the bootkit, ensuring your computer boots with an authentic bootloader file.

For better security in Windows 11, Microsoft designed the operating system to work in computers that support Secure Boot. The Secure Boot requirement is for good reasons, but some computers don’t have the feature enabled by default. Luckily, enabling Secure Boot isn’t tricky.
Verify Windows 11 Eligibility Using “PC Health Check”
Before enabling Secure Boot, use the PC Health Check app to confirm that your computer can run Windows 11. The app diagnoses your PC’s hardware comprehensively and reports issues with Secure Boot and other system components.
Install the PC Health Check app and select Check now in the “Introducing Windows 11” section.
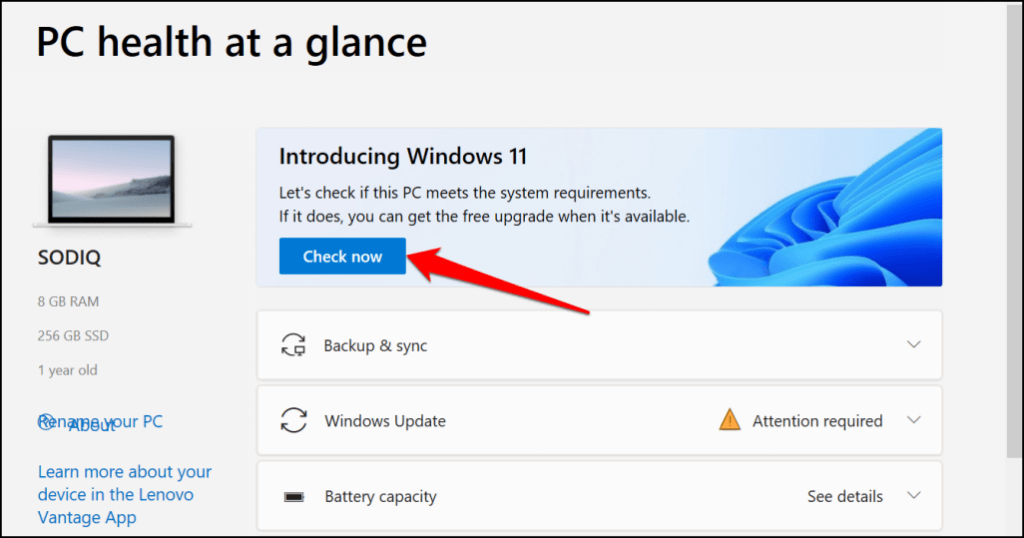
The PC Health Check app and Windows 11 Set Up utility will display a “This PC must support Secure Boot” error if Secure Boot is disabled on your device. The following section has step-by-step instructions on verifying your computer’s Secure Boot status.
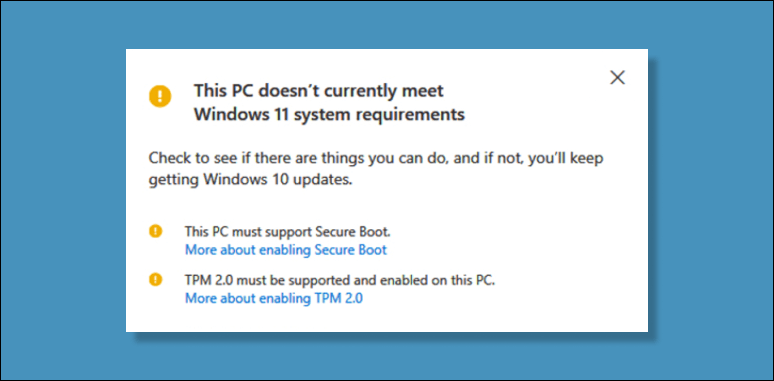
Trusted Platform Module version 2.0 (TPM 2.0) is another security setting you must enable to run Windows 11. If the PC Health Check app displays other processor-related errors, your computer probably doesn’t satisfy the TPM system requirement. Enable TPM in your PC’s BIOS settings and try installing Windows 11 again.
How to Check Secure Boot Status in Windows
Use the Microsoft System Information tool to verify your system’s Secure Boot status.
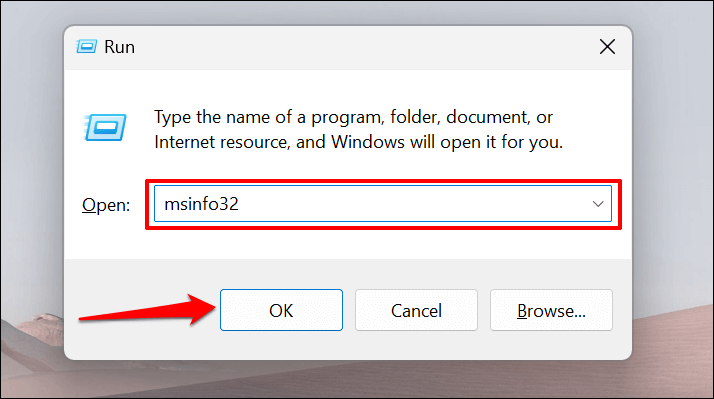
- Press Windows key + R, type msinfo32 in the dialog box, and select OK.
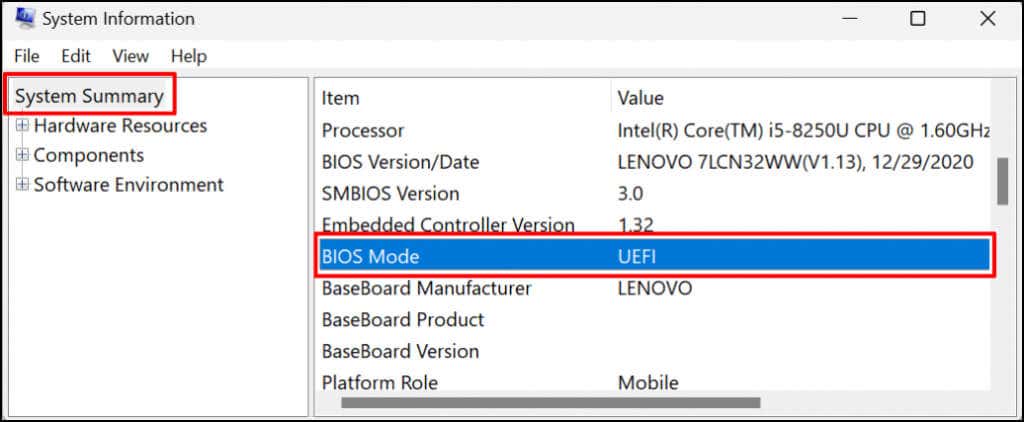
- Select System Summary on the sidebar, locate “BIOS Mode” on the right side of the window, and ensure it reads UEFI.
- Scroll down the list and locate Secure Boot State.
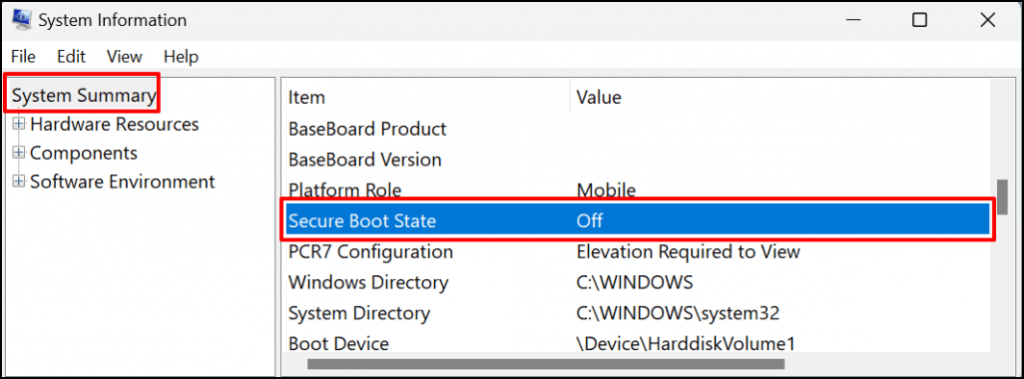
If you can’t find “Secure Boot State,” press Ctrl + F, type secure boot in the search bar, and press Enter.
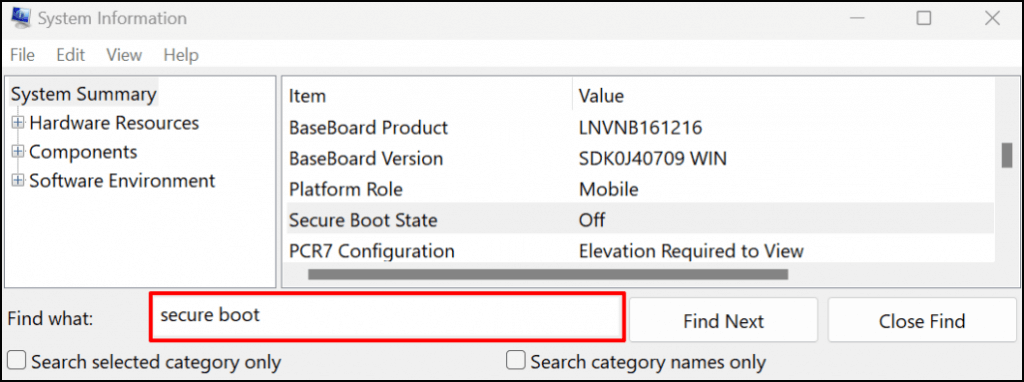
If the value is “Off,” Secure Boot is disabled on your PC. Proceed to the next section to learn how to enable Secure Boot. Afterward, enable Secure Boot, and you should now be able to upgrade your PC to Windows 11.
Note: If your PC uses Legacy BIOS, you can always switch to UEFI (Unified Extensible Firmware Interface). The MBR2GPT (Master Boot Record to GUID Partition Table) tool lets you switch between Legacy BIOS and UEFI without reinstalling Windows. Refer to this tutorial on changing Windows 10 BIOS to UEFI mode for detailed instructions.
How to Enable Secure Boot in Windows
If your computer’s Secure Boot feature is disabled, here’s how to turn it back on.
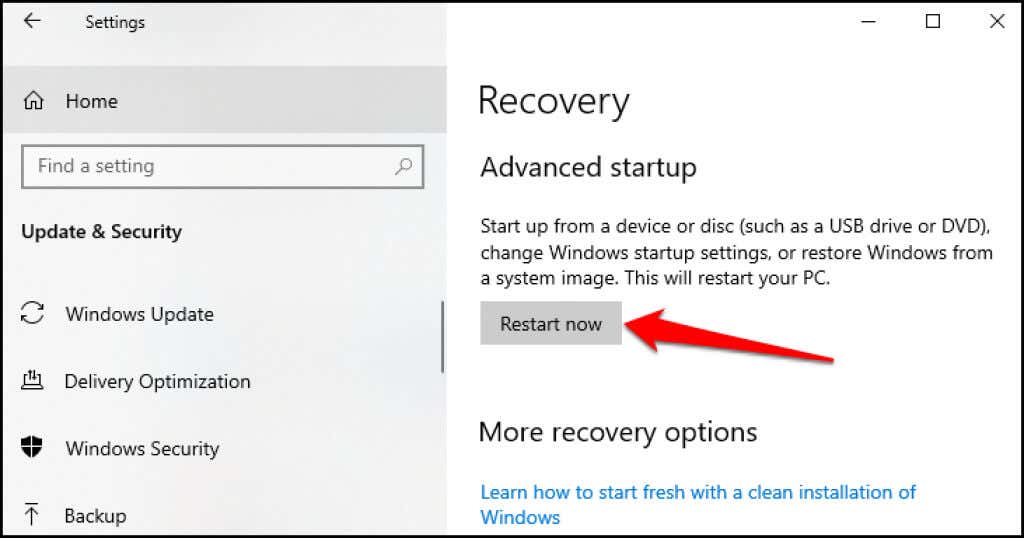
- Open your computer’s Settings, go to > Updates & Security > Recovery, and select Restart Now.
- Wait for your PC to boot into the system recovery menu. Select Troubleshoot to proceed.
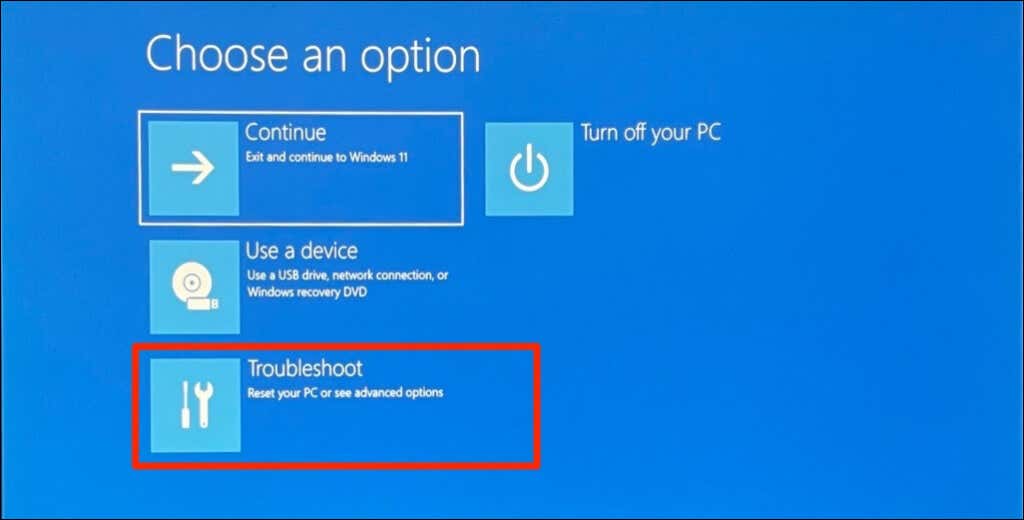
- Choose Advanced options on the next page.
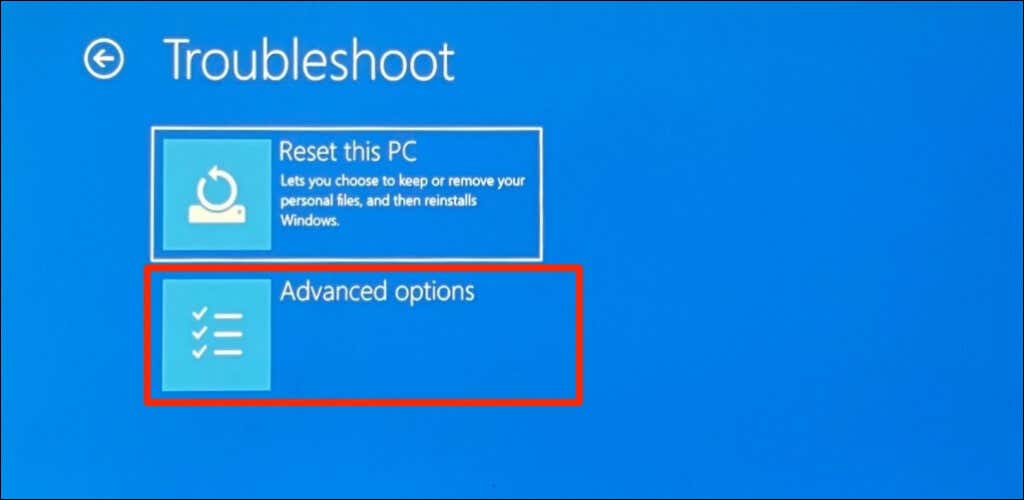
- Select UEFI Firmware Settings.
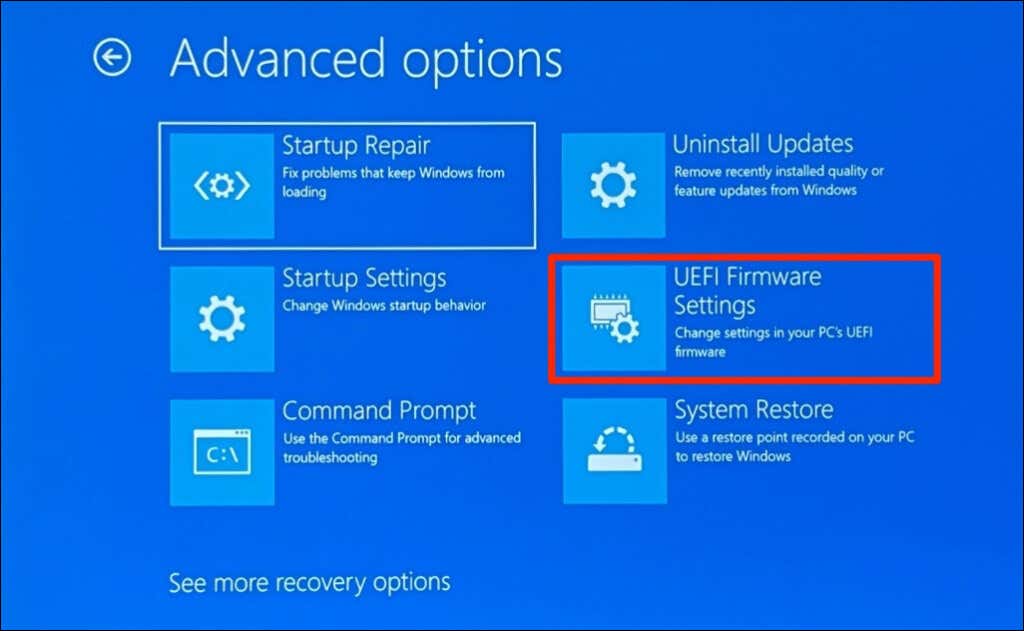
Note: If you don’t find “UEFI Firmware Settings” on the page, your PC’s motherboard doesn’t have a TPM chip. That means your computer can’t run Windows 11.
- Select the Restart button.

Wait for your computer to boot the BIOS setup utility. The interface of the BIOS settings page will vary depending on the model or manufacturer of your computer’s motherboard.
- Head to the “Security,” “Authentication,” or ”Boot” section. Locate the Secure Boot Mode or Secure Boot option and ensure it’s “Enabled.”
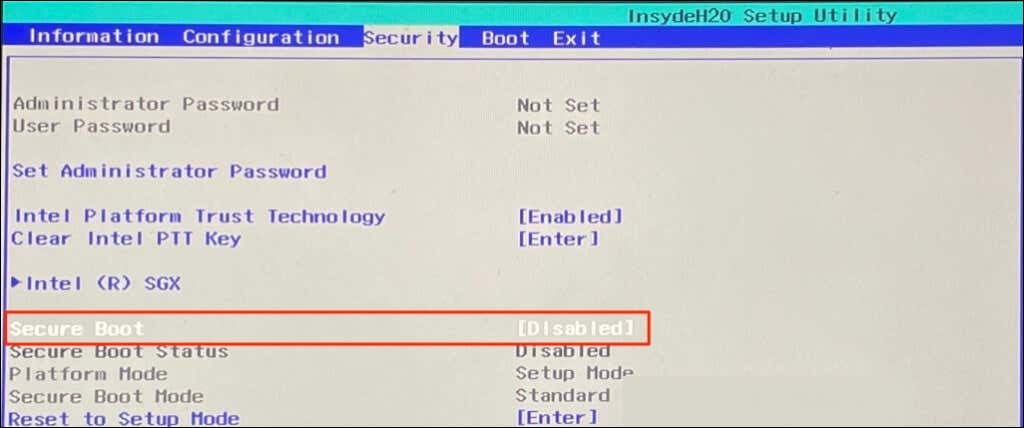
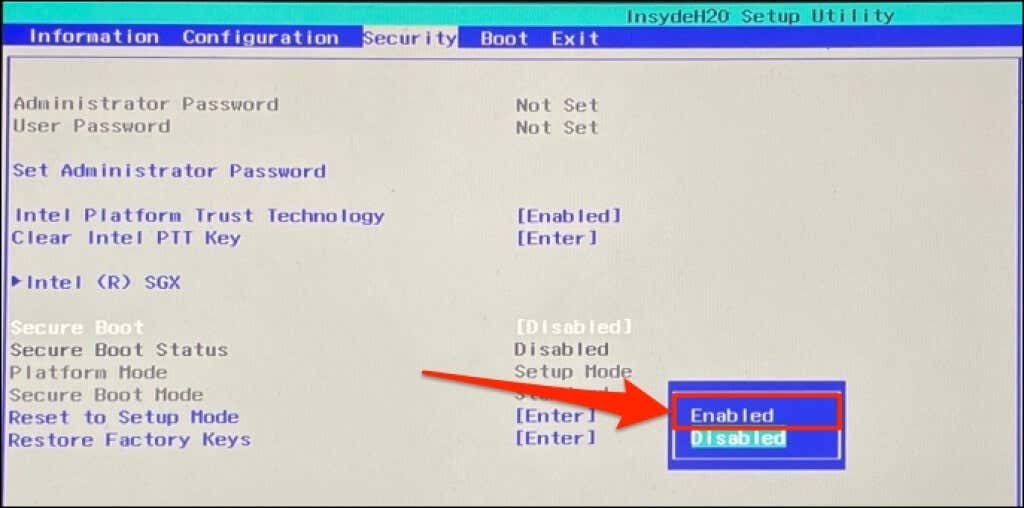
If disabled, use the arrow keys on your keyboard to navigate to Secure Boot and press Enter. Select Enabled and press Enter again.
- Go to the Exit tab and select Exit Saving Changes. Select Yes on the confirmation and press Enter.
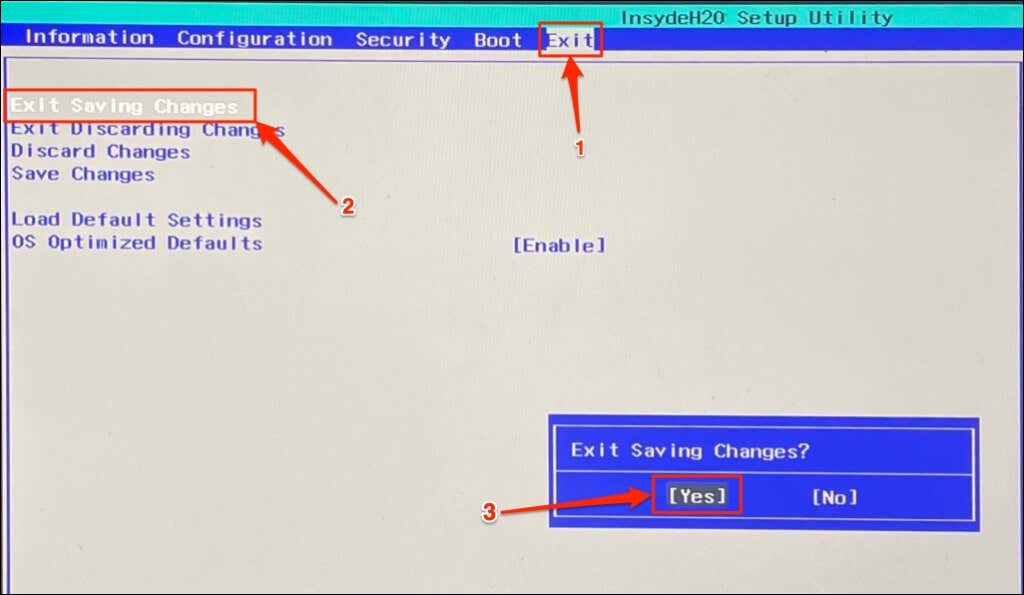
Wait for your computer to reboot and try upgrading to Windows 11 again. You should also use the System Information tool to confirm that your PC’s Secure Boot state is now on.
Can’t Enable Secure Boot? Try These Steps
If your computer doesn’t let you enable Secure Boot, reset the BIOS to default settings, and try again. Sometimes, you may need to reset your PC (without deleting files) to re-enable Secure Boot. Contact your PC manufacturer for support if these troubleshooting steps prove abortive.


