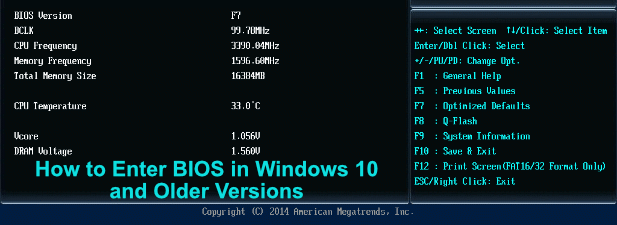
The Basic Input/Output System (BIOS) is the initial low-level code that allows your PC to start up correctly when it’s first powered up. Some PC users will be familiar with the instruction to press a key during bootup to access BIOS, but Windows 10 allows for an easier method to enter the BIOS menu.
This is especially true if your PC is using the newer, UEFI (Unified Extensible Firmware Interface) menu as a BIOS replacement. Rather than pressing the keyboard repeatedly when your PC first starts up, you can enter BIOS directly. Here’s how to enter the BIOS in Windows 10 and older operating systems.

Contents
BIOS, UEFI BIOS, Legacy + UEFI: Which BIOS Do You Have?
Older PCs only had one type of low-level firmware responsible for PC start-ups—the BIOS. For modern PCs, there are two types of firmware interfaces, as well as a third, hybrid type that you may come across.
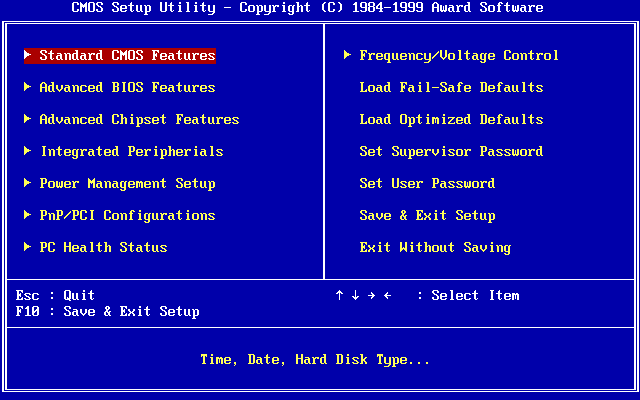
The first is the BIOS itself—the original, and sometimes referred to as the legacy BIOS to distinguish it from UEFI. It has some limitations, including the inability to recognize boot drives over 2.1TB in size. Older operating systems like Windows XP will need to use this.
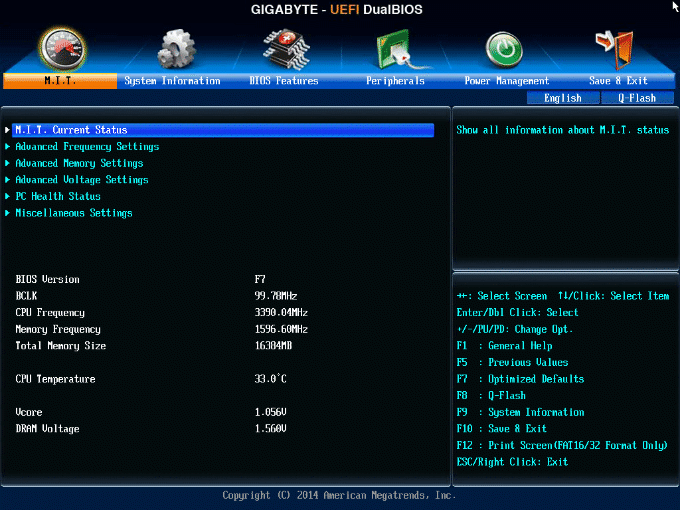
That’s why modern PCs have moved to UEFI (or UEFI BIOS) as the replacement for the older, text-only BIOS interface. It allows for faster booting, storing your startup information on a special EFI partition on your drive. It also supports larger drives, more drive partitions, and has better menus with mouse support.
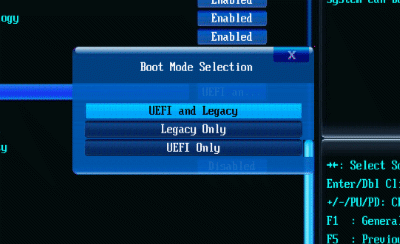
You may also see Legacy + UEFI (or Legacy/UEFI) mentioned in certain BIOS/UEFI menus. This acts as a pre-check that determines what type of system drive you have and whether to use UEFI or the older legacy BIOS to start up your PC.
If you’re unsure whether you’re using UEFI or legacy BIOS on your PC, look for your BIOS version, consult the user manual for your PC or motherboard, or try the steps below to enter BIOS in Windows 10 and find out for yourself.
How to Enter BIOS in Windows 10
Rather than attempt to access the UEFI BIOS menu by quickly tapping a keyboard key when your PC first boots, you can boot directly into it if you’re running Windows 10. You can only do this if your PC uses UEFI rather than the legacy BIOS—for older PCs or Windows versions, follow the instructions in the next section.
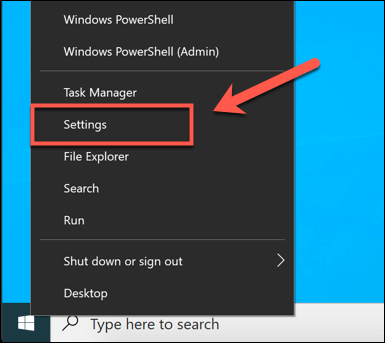
- To access the UEFI settings, you’ll need to go to your Windows 10 Settings menu. Right-click the Start menu button and select Settings to do this.
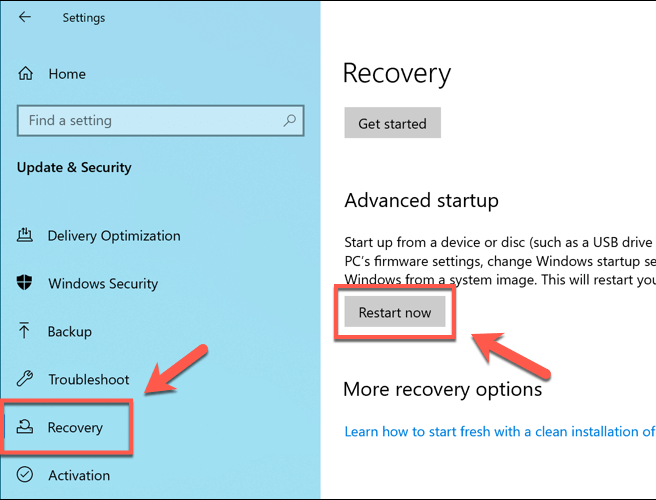
- In the Windows Settings menu, click Update & Security > Recovery. Under the Recovery tab, press the Restart Now button under the Advanced startup section.
- This will boot Windows 10 into the Advanced Startup menu. From here, select the Troubleshoot option.
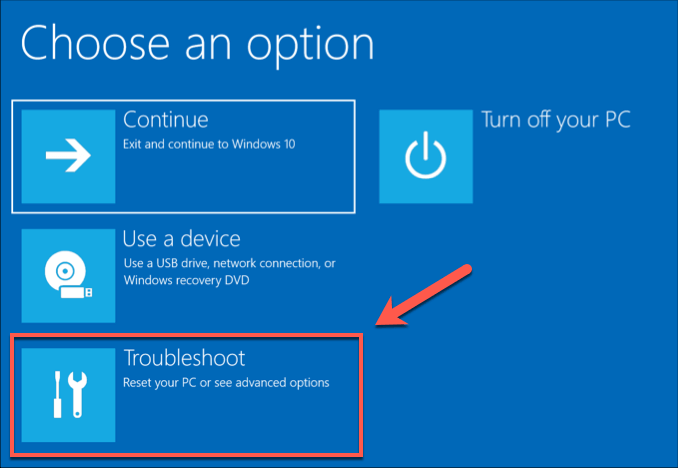
- In the Troubleshoot section, press Advanced options.
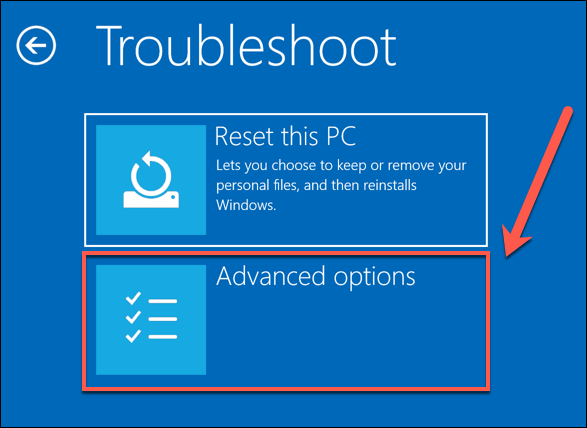
- Under the Advanced options menu, click the UEFI Firmware Settings button. This will load your UEFI settings menu.
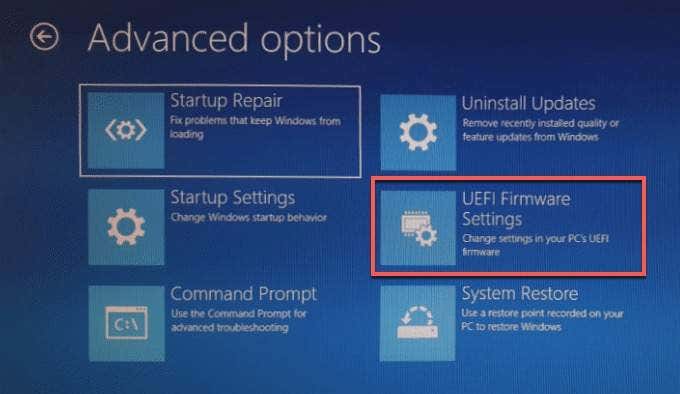
If you don’t see the option for UEFI Firmware Settings, your PC is probably using a legacy BIOS. As we’ve mentioned, you can only follow these steps for newer PCs using the UEFI firmware.
This is going to be the case for most modern PCs running Windows 10, but if you’re using an older PC with a legacy BIOS, you’ll need to follow the steps below.
How to Enter BIOS or UEFI Menu in Older Versions of Windows
While the legacy BIOS has been replaced by UEFI on most modern PCs, some users may still be using it. This is especially true if you’re trying to use an older PC with an operating system like Windows 7 or Windows XP.
Unfortunately, there isn’t a built-in option to boot into the BIOS menu using Windows—you’ll need to do it manually.
This is where things can get tricky. To do this, you’ll need to interrupt the boot-up sequence when your PC is first turned on. You usually do this by pressing a certain key on your keyboard, but different manufacturers use different keys for this process.
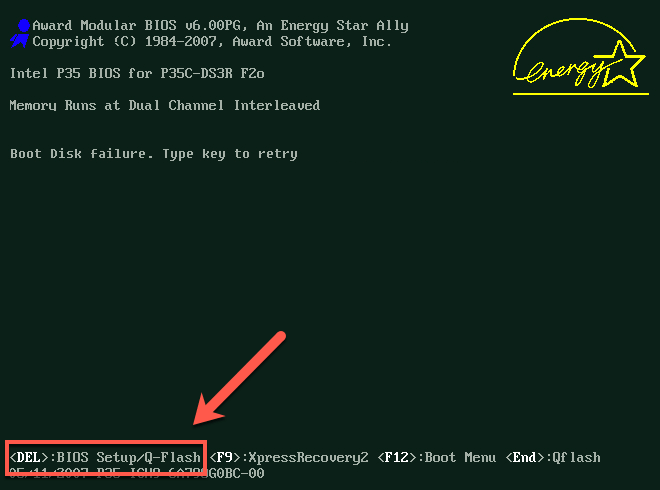
You can usually spot which key to press (very briefly) during the boot-up sequence if your BIOS instructions are shown. If they aren’t, or you can’t spot them in time, check the user manual for your PC or motherboard to find the right key to press.
You can also try some of the common keys, such as ESC, Delete, F1, F2, F10 or F12. You’ll need to press this key (potentially more than once) as your PC starts up—if you fail, turn your PC off and try again.
What to Do If You Can’t Enter the BIOS Menu
It should be a straightforward process once you know how to enter the BIOS in Windows 10. If you still can’t access the BIOS or UEFI BIOS menu, however, you may need to look at what’s stopping you.
Check your system settings, and if you’re trying to access a legacy BIOS menu, try multiple key presses until you find the one that works. If your PC came with a legacy BIOS password (or you set one yourself) and you can’t remember it, then you’ll need to reset the password first.
If you need to access a UEFI BIOS and you can’t boot into Windows, interrupt the Windows boot-up sequence about three times. This will load the Windows troubleshooting menu, where you can boot into UEFI using the steps listed above.
If all else fails, your last resort should be to reset the BIOS to default settings, which should help you gain access.

