Trying to hunt down specific files on your Windows 10 PC can sometimes feel like trying to locate your car keys. Technology hasn’t quite got to the point where we can wish for something to appear and it does. Instead, we have to manually search for lost or forgotten files.
Thankfully, there are still some advanced methods that you can use to hunt down files you just can’t remember the location of. These methods will require you to kick in your memory receptors a little bit, but with these search tools, the whole task of finding your lost files will become a lot less daunting.


Contents
Getting Started With Finding Lost Files On Windows 10
We will be using a number of advanced Windows 10 search tools to track down your files, coupled with step-by-step questions you can follow. The more you know about your file, the easier it will be to locate it.
By the end of this guide, you’ll have a list of custom search parameters you can enter based on how many questions you answered to help track down your file.

Before we begin, one quick thing to check is your browser download history. Did you download the files you are looking for on the internet? If so, you can go to your internet browser and type Ctrl+J to open the downloads folder.
Chrome, Firefox and Microsoft Edge have search functions built into the download history, so starting there could be a much faster way to locate your files.
You can choose to search by file name or file type. For example, if you knew the file was an .mp3 file, searching .mp3 can return relevant results.

If that doesn’t work, or you know you didn’t download your file from the internet, it’s time to dig into our advanced Windows 10 search tools.
First, let’s start at the root of the problem – locating which drive your file was saved. If you do not know where the file was saved, you’ll need to search the entire system, which may take your PC a long time depending on how many storage devices you have.
Open Windows explorer by pressing Windows Key + E and navigate to This PC on the left side.
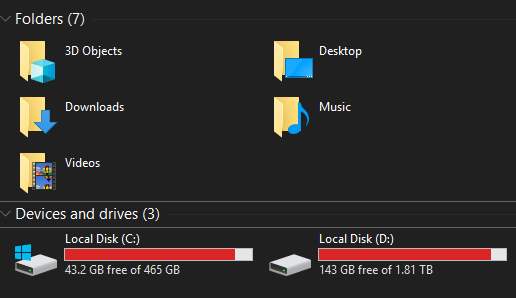
Next, double click on the drive if you know it, otherwise stay on the ‘This PC’ page.
Advanced Windows 10 Search Tools To Find Lost Files
Now that we’re in the correct directory, let’s start. This is how this guide will work. We’ll run you through a number of questions. If you know the answer to that question, we’ll provide a relevant search filter for that answer.
By the end of the guide, you’ll have a very fine tuned search.

After each step, add the search to the search bar in the Windows Explorer tab in the directory you chose.
Do You Know When the File Was Created?
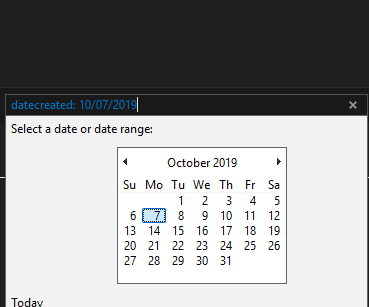
- The date search filter can help you to locate files quickly. If you know the exact date, for example, you can type
datecreated: dd/mm/yyyy
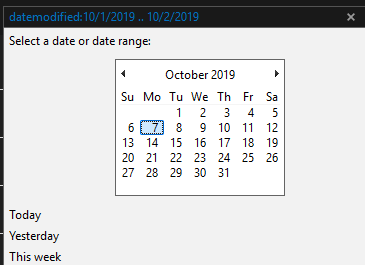
- You can also use date ranges, for example, type
datecreated: dd/mm/yyyy .. dd/mm/yyyy
- If you don’t know the specific date or date range, you can also use specific months or years. For example
datecreated: October 2019
If you cannot track down your file after using the date range filter, follow the next step below.
Do You Know The File Type?
Do you remember what file type your file was? This can help fine-tune your search massively.
- For example, was it a .jpg file? In that case, you can add .jpg to your custom search. Just paste the file type right after the datecreated: search filter if you have one entered.
- You can do this for all file types. For example, common files could include .jpg, .mp4, or .docx, whilst uncommon files could include .gnut, .bik, or .vpk. All of these files can still be searched by Windows Explorer.
- If you don’t know the specific file extension, you can add another search parameter relating to the file type. For example, if you know it’s a video, you can type kind:video in the search box.
If you are unsure what file type your file falls under, it’s best to avoid it completely.
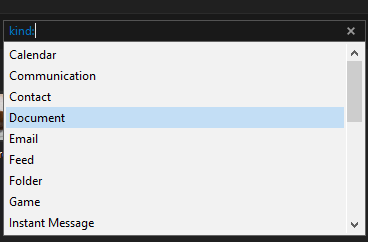
When you type kind: into the search box, you’ll also get a drop down box so that you can choose which type of file it is.
Do You Know Part of The File Name?
At this point, you should have a search with both a date range and a file type, and this should give you far fewer results to search through. The next step is to type in portions of the name of the file.
- For example, if you think the word game is in the file name, entering game will return all files with that in the name.

As you can see, so far we have narrowed down our search quite significantly. Even if the file name is a bunch of random numbers or letters, entering any sequence you may remember might help you.
If you still cannot find your file at this point, it may be more difficult to locate. Are you 100% sure the file was saved? Was it deleted? Or maybe the file was saved on another PC?
Alternatively, if it was named something obscure, it may be time to dig deeper. In the future, it’s always best to practice good naming routines. Finding files can be very quick on Windows 10 so long as you know just part of the name of the file.
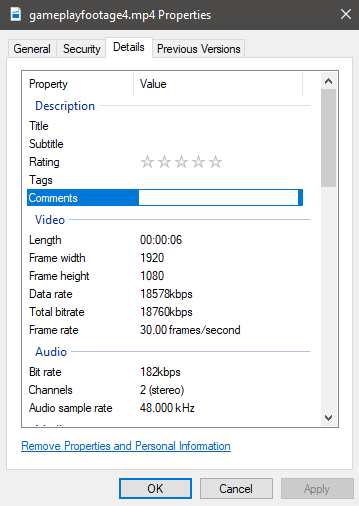
If you need even finer search filters, and you know more details about a file, you can take it further. In fact, if you view the properties of any file, you will find a list of attributes, most of which can be searched for. You can also add custom details and tags for finding later.


