If you’re seeing a missing DLL error on your Windows PC, it’s usually a sign that something has gone wrong. It could be that your software is corrupted and needs reinstalling, or it could point to deeper issues with your PC, such as corrupt system files or a stubborn malware infection.
Another major cause, however, are missing or corrupted software libraries that allow programs to run on Windows. A “vcruntime140.dll is missing” error, for instance, points to a missing or corrupted Microsoft Visual C++ runtime installation. If you want to fix this issue, here’s what you’ll need to do.
Contents
Repairing or Removing a Microsoft Visual C++ Installation
The vcruntime140.dll file is part of the Microsoft Visual C++ software runtime library. Provided by Microsoft, this library is used as part of the process of compiling software (created in C++ using Visual Studio) to run on Windows PCs. If the file is missing, the “vcruntime140.dll is missing” error will appear.
To fix this issue, the first thing you should attempt is to repair the Visual C++ installation on your PC. If that doesn’t work, you should remove it entirely by following these steps, then proceed to the next section to reinstall it.
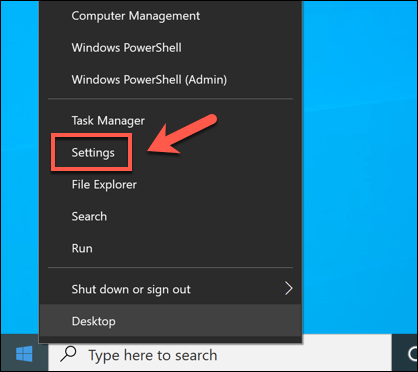
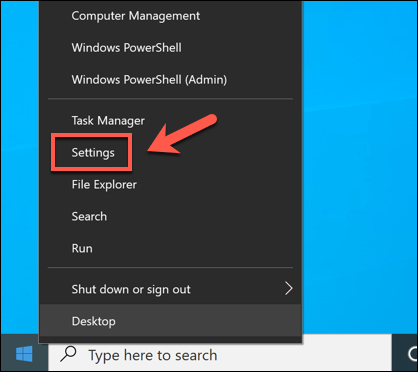
- To repair a Visual C++ installation, you’ll need to open the Settings menu. To do this, right-click the Windows Start menu and select the Settings option.
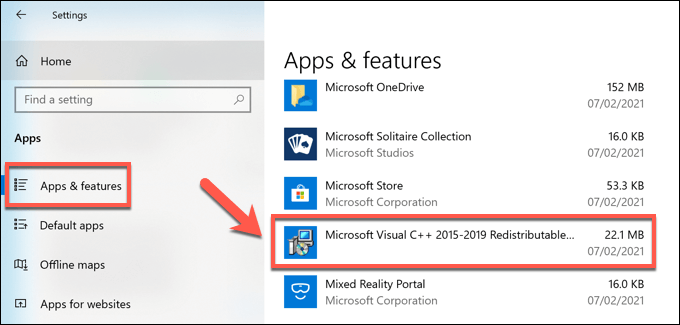
- In the Settings menu, select Apps > Apps & features. On the left, you’ll see a list of installed apps. Scroll through the list or use the search bar until you find the Microsoft Visual C++ 2015-2019 Redistributable option listed. If it’s missing, proceed to the next section.
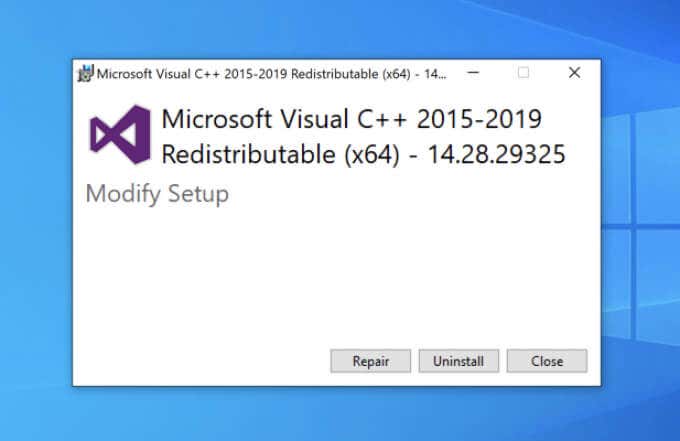
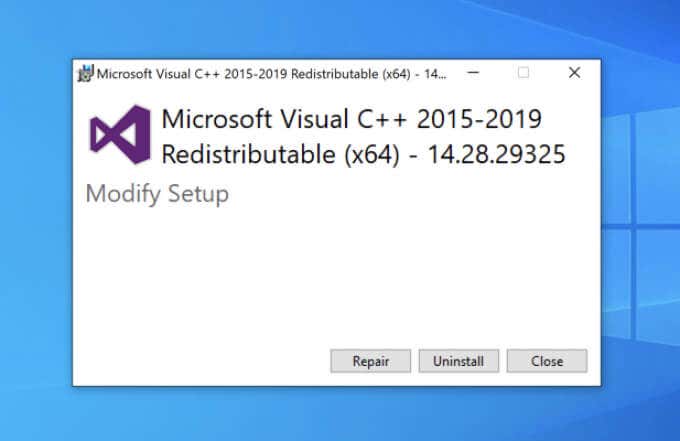
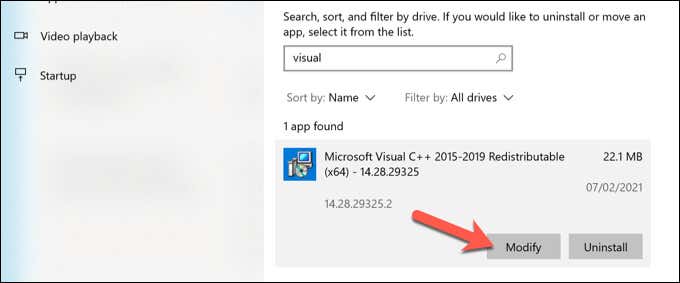
- If the Microsoft Visual C++ 2015-2019 Redistributable option is listed, however, select it, then select the Modify option.
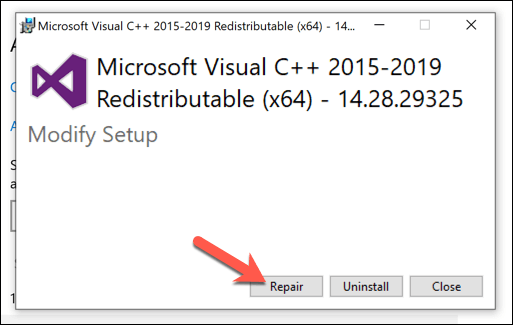
- In the Microsoft Visual C++ 2015-2019 Redistributable window that opens, select the Repair option.
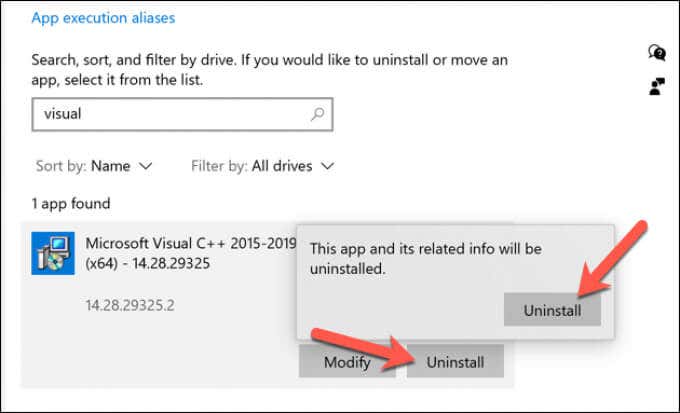
- Allow the process to complete, then restart your PC. If you still see a “vcruntime140.dll is missing” error, you’ll need to remove the Microsoft Visual C++ runtime entirely and reinstall it. To do this, select Uninstall > Uninstall in the Settings > Apps > Apps & features menu.
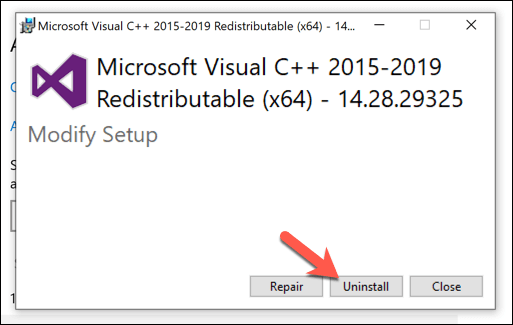
- In the Microsoft Visual C++ 2015-2019 Redistributable window that opens, select the Uninstall option and allow the process to complete. Once it’s finished, restart your PC and continue to the next section.
Installing or Reinstalling a Microsoft Visual C++ Installation
Without the Microsoft Visual C++ runtime library installed, software that relies on it won’t work, so you’ll need to install it. You’ll also need to do this if you’ve removed a corrupted installation previously.
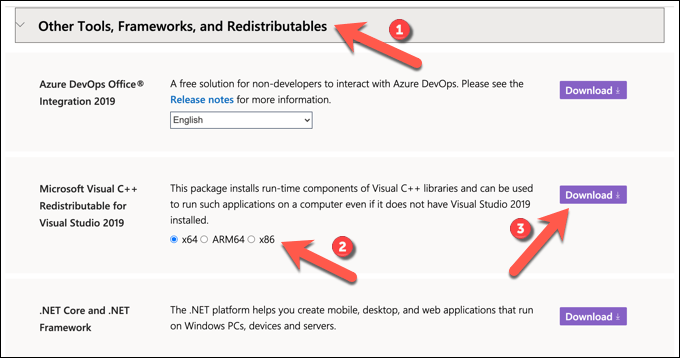
- First, head to the Visual Studio website to download the latest version of the software runtime library. Scroll down towards the bottom of the page, then select the Other Tools, Frameworks, and Redistributables category to view the available options. From there, select the correct CPU architecture for your PC (eg. x64 for 64-bit PCs, x86 for 32-bit PCs, or ARM64 for ARM-based devices), then select the Download button.
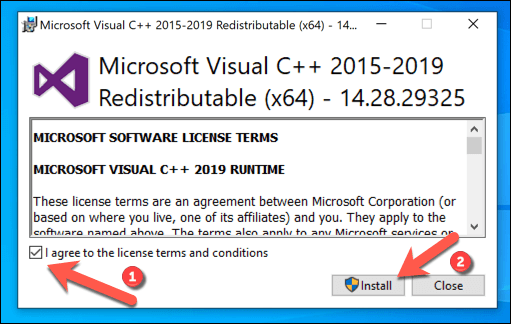
- Run the installer file (eg. VC_redist.x64.exe) once the download is complete. In the installer window, accept the license terms by selecting the checkbox provided, then select the Install button to proceed.
- Allow the installer a few moments to complete. If it installs without any issues, select the Close button to close the window, then restart your PC.
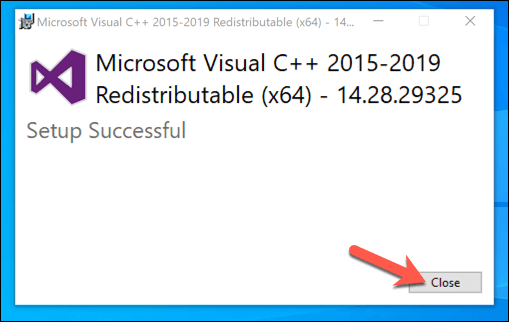
This should, for most users, resolve the “vcruntime140.dll is missing” error on Windows 10 PCs. However, if the software you’re running requires an older version of the Visual C++ runtime (before 2015), you’ll need to download and install the older version instead.
You may also be able to fix the issue by removing and reinstalling software that has an older version of the Visual C++ runtime installer included. This is common in larger software bundles, such as games, that require multiple runtime libraries to work correctly.
By reinstalling software that’s coupled with an older Visual C++ runtime installer, the specific version of that library required to run the software should automatically reinstall itself and resolve any lingering issues.
Running Windows Update
The Microsoft Visual C++ runtime receives security updates through Windows Update, just like other major Windows services. If you’re having trouble with a “vcruntime140.dll is missing” error, it might be worth checking for any recent updates using the Windows Update service.
While this is unlikely to fix a broken installation, installing new updates could repair your installation automatically. You can check for new system updates in the Settings menu.
- To access this, right-click the Start menu, then select the Settings option.
- In the Settings menu, select the Update & Security option, then select Windows Update in the next menu.
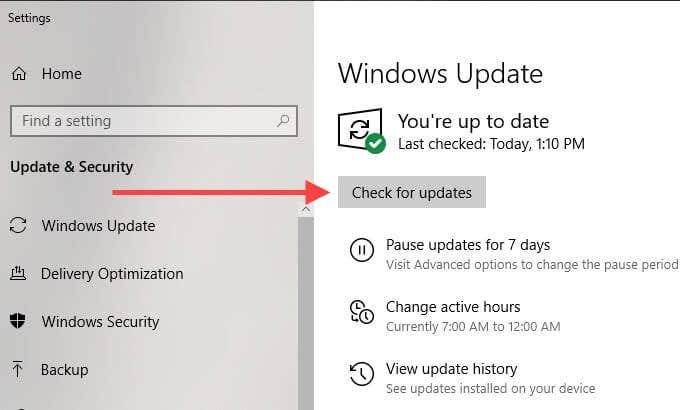
- Select the Check for Updates option to search for new updates. If there are updates pending, select the Restart now option instead.
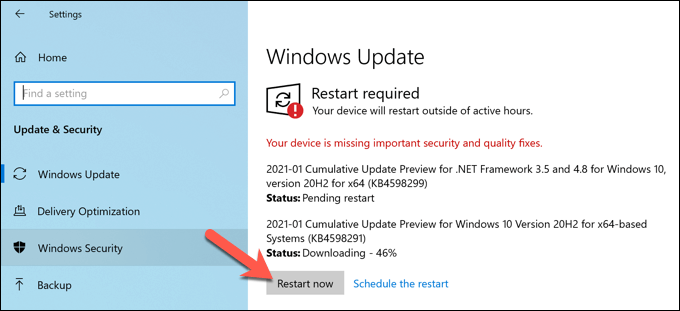
Windows will check for updates and install any that are currently pending. Once installed, you’ll need to restart your PC to ensure that they’ve been correctly applied. You should then check your software to see if the missing runtime issue is resolved.
Downloading DLL Files Online
If very specific error messages like “vcruntime140.dll is missing” start to appear, you might be tempted to source the file online to fix it. Various DLL download sites exist, allowing you to quickly download the missing file to resolve the issue.
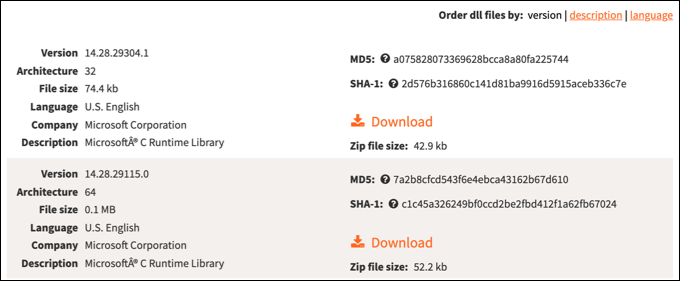
We would recommend avoiding sites like these, however. DLL files are crucial elements of the Windows operating system that allow software to interact with more restricted Windows components. Unless you absolutely trust the source, it’s usually a better idea to remove and reinstall the entire Visual C++ runtime library instead.
This should resolve the issue for most users, but if you’re still having issues, you could source the file from another PC in your network as a last resort.
Keeping Windows 10 Maintained
The steps above should help you to fix a “vcruntime140.dll is missing” error on your Windows 10 PC. In most cases, repairing the installation or reinstalling the Visual C++ redistributable should fix the issue, but you may also need to look at removing and reinstalling any affected software.
A missing DLL file is usually a sign of a PC that’s having some issues, which is why it’s important to keep up with regular PC maintenance. You can do this by keeping Windows updated to ensure you have the latest bug fixes, as well as running regular malware scans to remove malware that could leave your PC at risk.

