Iastordatasvc is a system process that continually runs in the background of Windows and can use up about 30 percent of the CPU’s resources on a regular basis. Occasionally, the CPU usage can go higher than that. This may cause the PC to slow down significantly. This guide will show how to fix this problem.

Contents
What Is IAStorDataSvc?
Iastordatasvc (Intel Storage Data Service) is a major component of the Windows operating system used by the pre-installed Intel Rapid Storage Technology (RST). The process helps to save all your frequently used apps and files automatically onto the solid-state drive (SSD) so you can access them much faster.
If you’re a home user and don’t use a SSD on your PC, it’s fine to disable or uninstall the Iastordatasvc process as it’s mostly used in Enterprise, server, and high-end systems.

The Rapid Storage Technology application caches frequently used programs, which involves building its cache index and clearing or upgrading cache to save new information. Sometimes, Iastordatasvc consumes more CPU resources than it should, particularly when the installed version is out-dated.
Quick Fixes
Before addressing IaStorDataSer for high CPU usage issues, review the list below to see if these quick fixes resolve the issue.

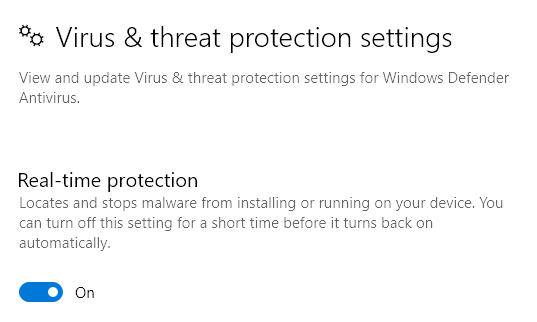
- Temporarily disable your antivirus as it could be interfering with the Intel RST process.
- Check that you have the latest driver updates on your PC.
- Run a virus or malware scan to check if a malicious program could be causing the high CPU usage issue. In case you haven’t installed any antivirus software, check out our list of the best virus and malware scanners guaranteed to nuke any virus.
- Close any running background processes or programs that you’re not using.
- Update Windows to ensure that it’s operating effectively and not causing a conflict with the Intel app due to some underlying issues.
How to Fix IaStorDataSvc High CPU Usage on Windows 10
If you’ve tried the quick fixes mentioned above and nothing has changed, try the solutions below.
Update Intel Rapid Storage Technology (RST) Driver
If the Intel RST driver is updated, it could significantly impact the performance of the system and result in high CPU usage. You can try to resolve the problem by updating the driver to the latest version.
- Search for Intel Rapid Storage Technology chipset driver online or visit Intel RST to open a page with a list of drivers.
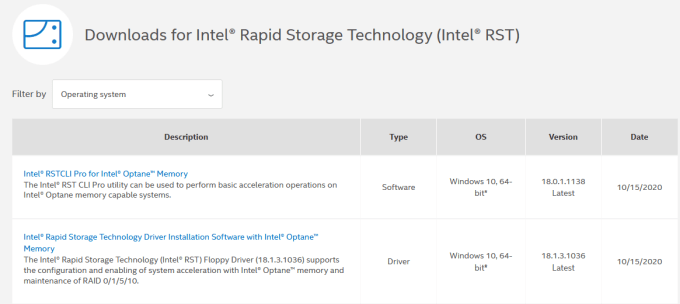
- From this list, make sure you look at the version and date. The version should say “Latest” and you preferably would like to pick the one with the highest version number (16, 18, 20, etc).
Note: If you’re not sure which driver to choose, it’s not a big deal. You can either go to your device manufacturer’s website and find the driver from the download section there or you can simply download from the Intel RST page above and try the installation. The Intel installation program automatically checks if the driver is compatible with your system and will give you an error message if it isn’t.
- Before you install the new driver, you should go ahead and uninstall the old one. Scroll down to the bottom of the article for steps on uninstalling Intel RST. Reboot your computer.
- Next, install the latest driver you just downloaded and restart your PC again.
Disable the Intel Rapid Storage Technology Service
If you don’t need the Intel RST application and all of its associated processes and services on Windows 10, you can try disabling the service to see if that resolves your issue. If you find your system performs significantly faster after disabling the service, you can either leave it disabled or you can follow the instructions below to uninstall it altogether.
You can disable the service using the steps below:
- Right-click Start > Run, type services.msc and press Enter.

- Find Iastordatasvc or Intel Rapid Storage Technology (if it’s still there) in the Services window, right-click and select Stop.
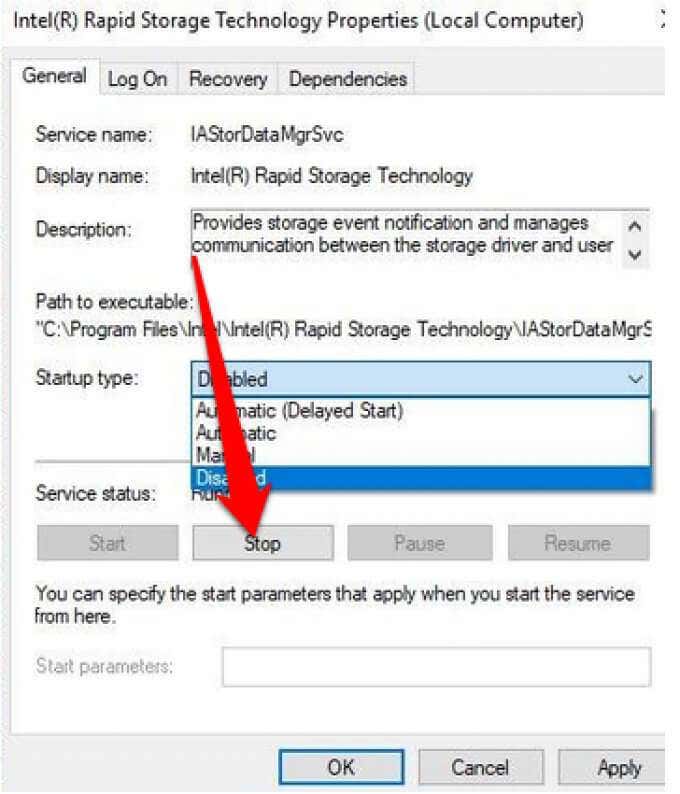
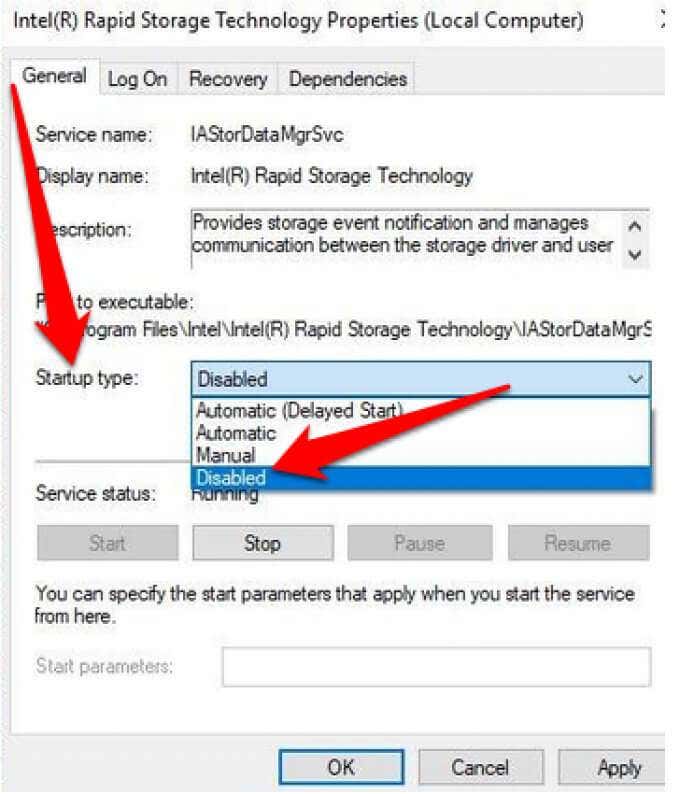
- Next, right-click Intel Rapid Storage Technology again and select Properties.
- In the new window, go to Startup Type and select Disable > OK.
Remove the Rapid Storage Technology Application
As mentioned earlier, this application isn’t always needed depending on your system. If you have no Intel Optane memory or don’t have a SSD paired with a traditional hard drive, you won’t see any benefit by using Intel RST. In this case, it’s best to remove the application completely. You can always reinstall it later if required.
Below are 3 different ways to uninstall the Rapid Storage Technology Application.
First, you can just open Control Panel > Programs, click on the application and select Uninstall.
The second method is to right-click Start > Run, type appwiz.cpl and select OK. Double-click on Intel Rapid Storage Technology in the list of installed programs and select Uninstall. Make sure you clear out the junk files to remove any residue from the app.
Another way to uninstall the app uses the following steps:
- Right-click Start > Settings > Apps > Apps and Features.

- Scroll down to Intel Rapid Storage Technology and select Uninstall.
- Follow the uninstall wizard and restart your PC once it completes.
Stop IaStorDataSvc From Hogging CPU Resources
High CPU usage can be difficult to track down. If the problem still plagues you, check out our other guides on how to deal with high CPU usage caused by system interrupts, Svchost.exe or Dwm.exe.
Leave a comment below and let us know which solution helped you fix the Iastordatasvc high CPU usage issue on your PC.

