Do you see a volume icon with a red x-shaped symbol on the system tray in Windows 10? If you place your cursor over it, you should also see a “No Audio Output Device is installed” error notification.
That typically happens when your computer fails to detect an audio device due to corrupt, outdated, or incompatible audio drivers. To make things worse, you will experience no sound at all until you resolve the issue.


If restarting your computer doesn’t do anything, then the troubleshooting tips that follow should help you fix “No Audio Output Device is installed” in Windows 10.
Contents
Run Audio Troubleshooter
Windows 10 comes with a built-in audio troubleshooter that can automatically detect and fix audio-related issues on your computer. It’s best to run that first before you dive into the rest of the fixes.
1. Open the Start menu and select Settings.
2. Select Update & Security.
3. Switch to the Troubleshoot side-tab.
4. Select Additional troubleshooters.
5. Select Playing Audio. Then, select the Run the troubleshooter button.
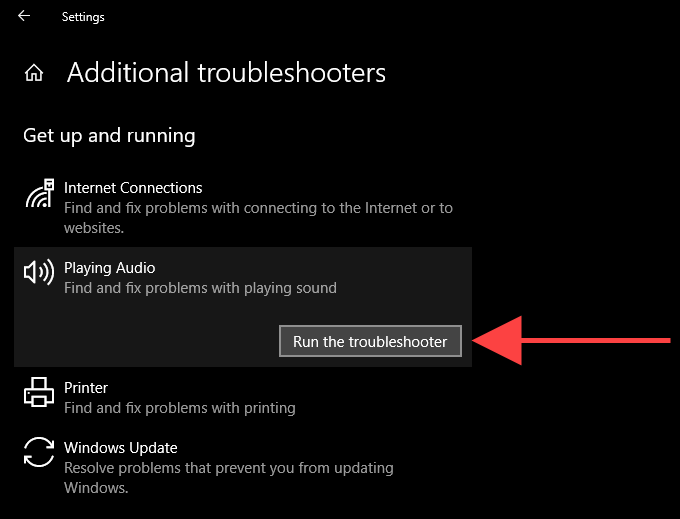
Follow the onscreen instructions to fix problems with the audio device on your computer. If the troubleshooter asks you to pick between multiple audio devices, run it repeatedly for each one of them.
Disconnect and Reconnect External Audio Output Device
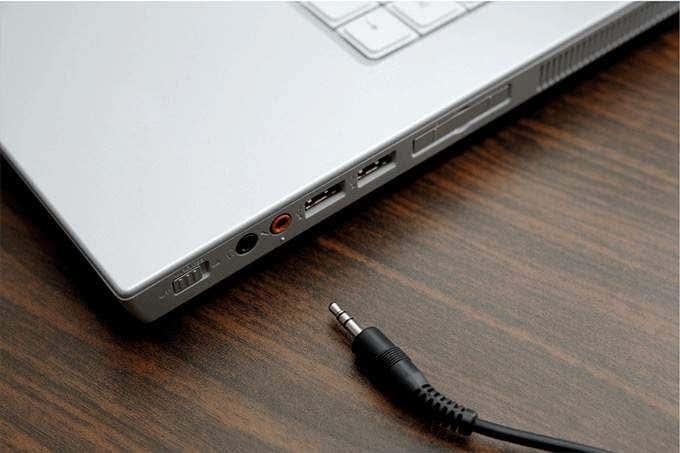
Do you have an external audio output device (such as a headphone) connected to your computer physically? Try removing it. Then, restart your computer and reconnect it. If that did not help, continue on with the rest of the fixes.
Uninstall and Reinstall Audio Device
Uninstalling and reinstalling the audio device/sound card on your computer is a potent fix that can help resolve the “No Audio Output Device is installed” error. The Device Manager applet in Windows 10 should help you with that.
1. Right-click the Start button and select Device Manager.
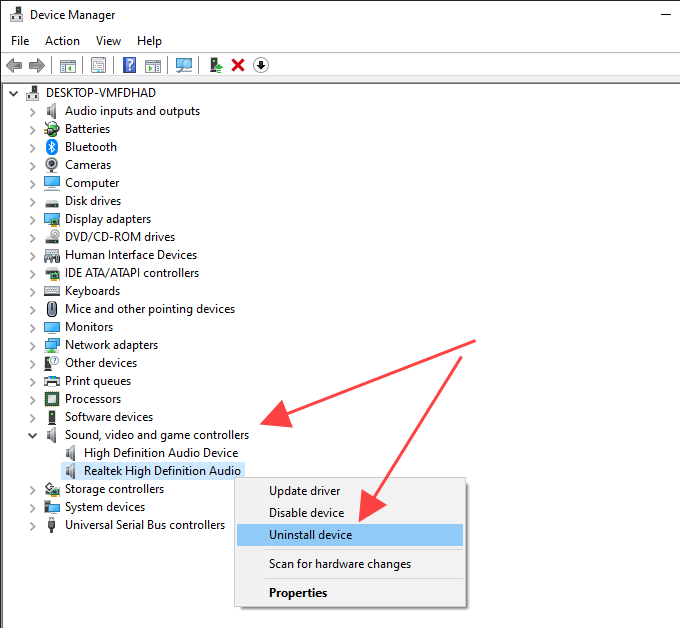
2. Expand the Sound, video and game controllers section.
3. Right-click your computer’s audio device and select Uninstall Device.
4. Check the box next to Delete the driver software for this device (if available) and select OK to uninstall the device.
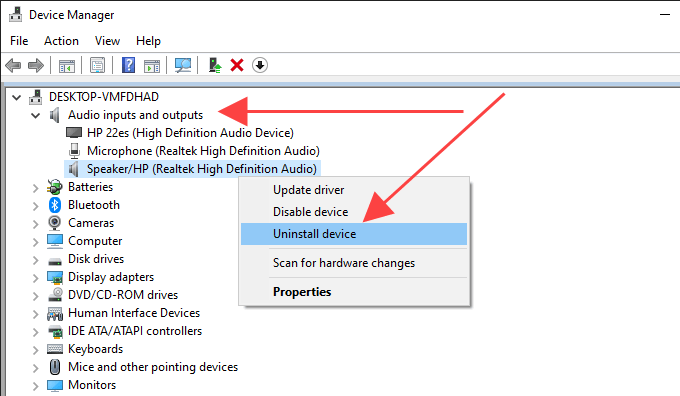
5. Expand the Audio inputs and outputs section and repeat steps 3–4.
6. Restart your computer. That should prompt your computer to reinstall the audio device.
7. Re-open the Device Manager. You should see the reinstalled audio device listed underneath the Sound, video and game controllers and Audio inputs and outputs sections. If not, right-click a vacant area and select Scan for hardware changes.
If reinstalling the audio device fixed the issue, you should see a fully functional volume icon on the system tray.
Update Audio Drivers
Try updating the audio drivers on your computer. Head over to the device manufacturer’s website, specify the correct make and model of the sound card, and download the latest drivers. Then, either install them yourself or have Windows 10 do that for you via the Device Manager. If you prefer the second method, go through the following steps.
1. Right-click the Start menu and select Device Manager.
2. Expand the Sound, video and game controllers section.
3. Right-click the audio driver and select Update driver.
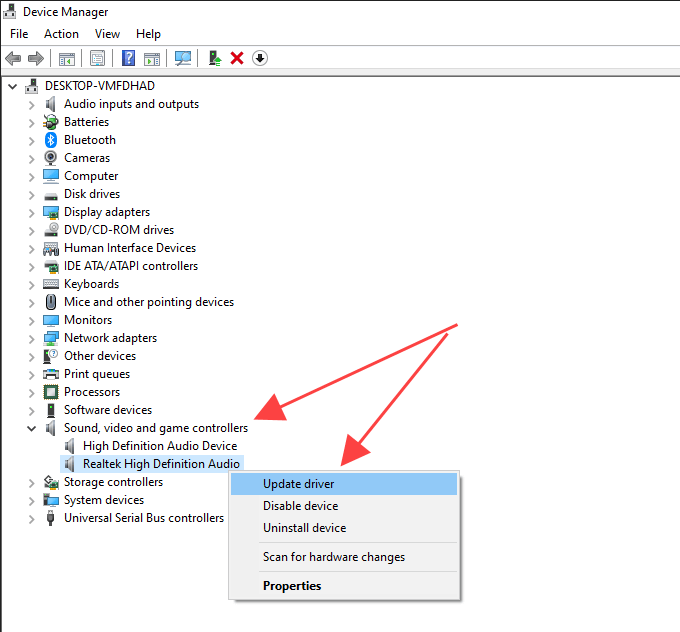
4. Select Browse my computer for drivers.
5. Use the Browse button to locate the folder containing the downloaded drivers.
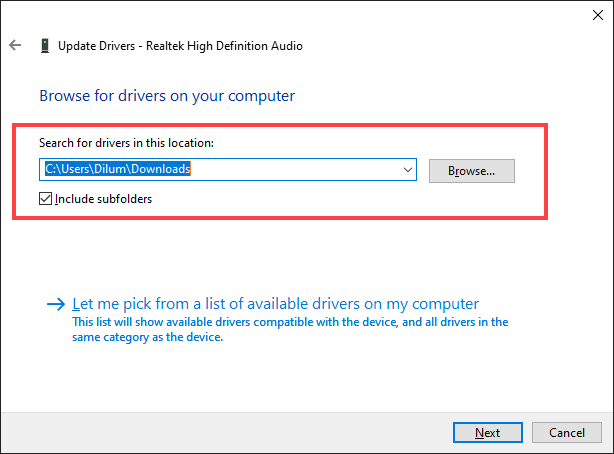
6. Select Next and follow the remaining prompts to install the new audio drivers.
Alternatively, you can use a driver updater utility to download and install the correct audio drivers for your computer automatically.
Update Windows 10
Sometimes, updating Windows 10 can break the audio device drivers on your computer. The best way to resolve that is to install any subsequent incremental updates.
Back in 2018, for example, the “No Audio Output Device is installed” error showed up on computers with Intel-based audio chipsets due to a faulty driver pushed out by Windows Update. Microsoft quickly fixed that with another minor update.
1. Open the Start menu and select Settings.
2. Select Update & Security.
3. Select Check for updates.
4. Select Download & install to update Windows 10.
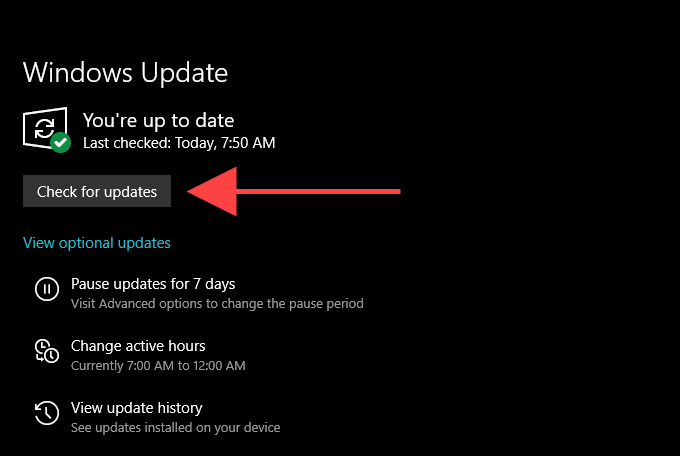
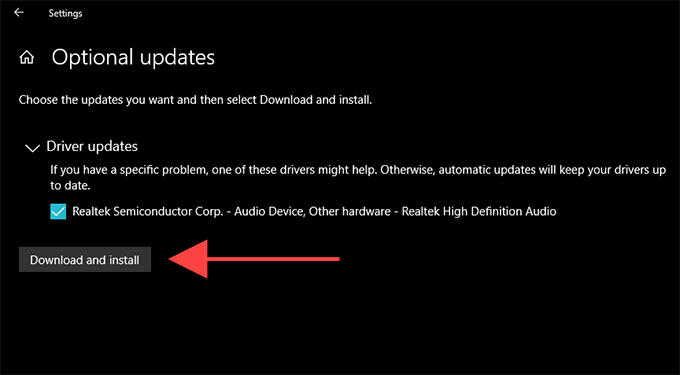
5. Select View optional updates (if visible on the same screen). Then, check the boxes next to any audio device-related updates and select Download and install.
Install Audio Device as Legacy Hardware
If you don’t see your audio device driver listed within the Device Manager, you can try setting it up as a legacy device. You can also do that if the “No Audio Output Device is installed” error still keeps showing up despite going through the fixes above.
1. Right-click the Start button and select Device Manager.
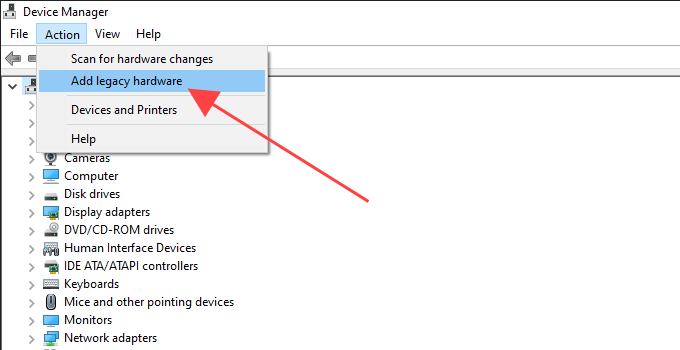
2. Select any item within the Device Manager. Then, open the Action menu and select Add legacy hardware.
3. Select Next on the Welcome to the Add Hardware Wizard screen.
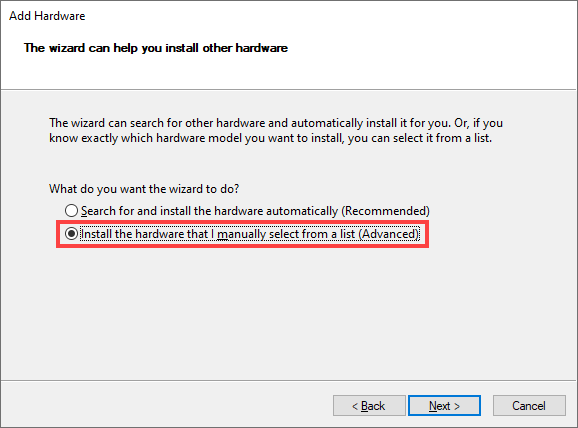
4. Pick the Install the hardware that I manually select from a list (Advanced) option and select Next.
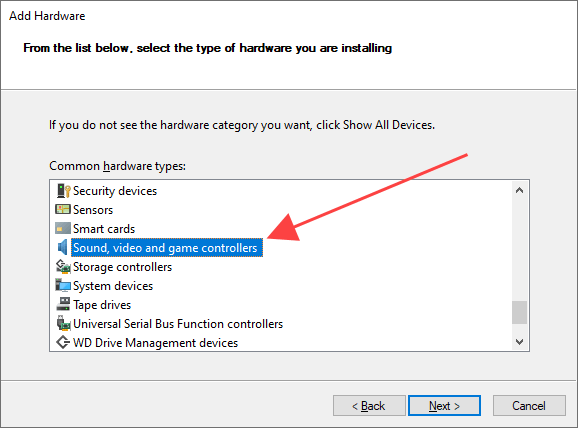
5. Pick Sound, video and game controllers as the hardware type and select Next.
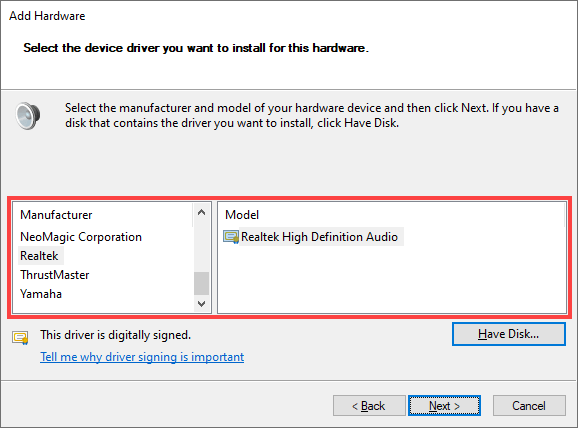
6. Select the audio manufacturer from the list to the left of the screen. Then, select the model from the right side. If you have a disk that contains the drivers for the audio device, select Have Disk and specify the disk’s location. Select Next to continue.
7. Select Next again to install the audio device.
8. Select Finish to complete the installation process.
9. Restart your computer.
Did that help? If not, let’s check out what you can do next.
Reset Windows 10
If none of the fixes above helped, try resetting Windows 10 to its factory defaults. You may be dealing with a deep underlying audio-related issue that nothing but a fresh set of Windows settings can fix. You can choose to keep your data intact, but it’s best to create a backup of the computer before you go ahead.
1. Open the Start menu and select Settings.
2. Select Update & Security.
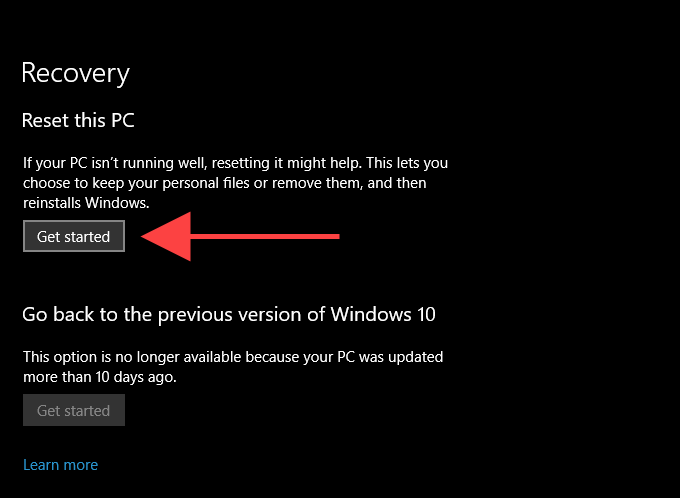
3. Switch to the Recovery tab. Under the Reset this PC section, select the Get started button to initiate the reset procedure.
If resetting Windows 10 did not help fix the “No Audio Output Device is installed” error, you’re likely looking at a device-specific issue. Reach out to the audio device manufacturer for additional help.


