Windows 11 brings the same File Explorer you’re familiar with from previous versions. Just like before, the utility isn’t without issues. You may experience File Explorer slowing down or not responding to your commands.
Some of the problems include a minor issue with your PC, a system file going corrupt, or your PC being infected with a virus or malware. In this guide, we’ll look at a few potential solutions to the problem.
Contents
Restart File Explorer on Your Windows 11 PC
Restarting File Explorer doesn’t mean closing and reopening your folder windows. Your PC offers you an option that stops the Windows Explorer process and then relaunches the process from scratch.
Doing that helps fix minor issues with the utility.
- Right-click the Start menu icon and choose Task Manager.
- Right-click Windows Explorer on the Task Manager window and select Restart.
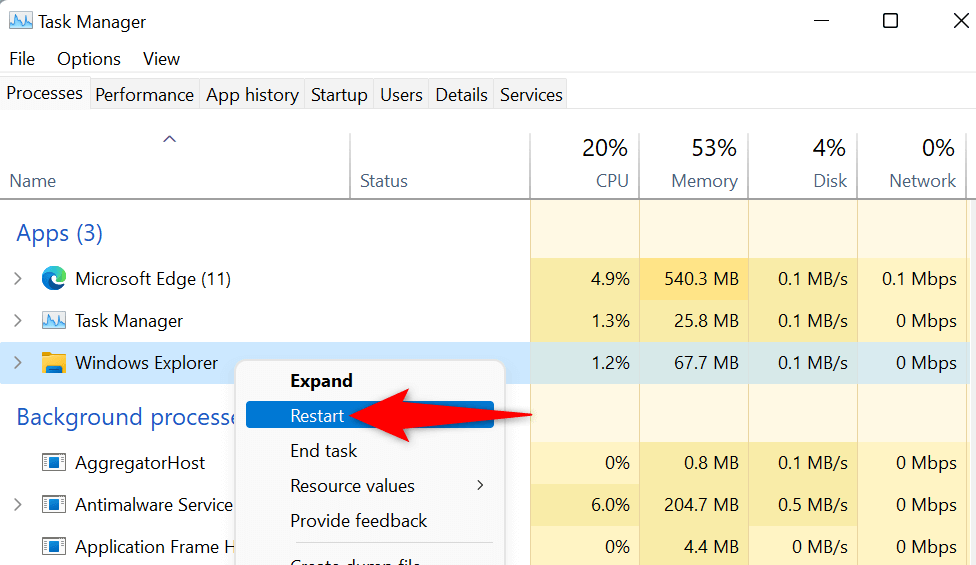
- Your File Explorer will automatically close and reopen. Note that Windows Explorer includes more than just File Explorer. You’ll also see your taskbar and desktop momentarily disappear and then reload.
Restart Your Windows 11 PC
If your issue isn’t resolved after restarting Windows Explorer, restart your PC and see if that works. Restarting your Windows 11 PC helps fix many minor glitches, including those causing File Explorer not to function correctly.
Make sure you save your unsaved work before proceeding to reboot the PC.
- Open your Start menu.
- Select the Power option at the bottom-right corner.
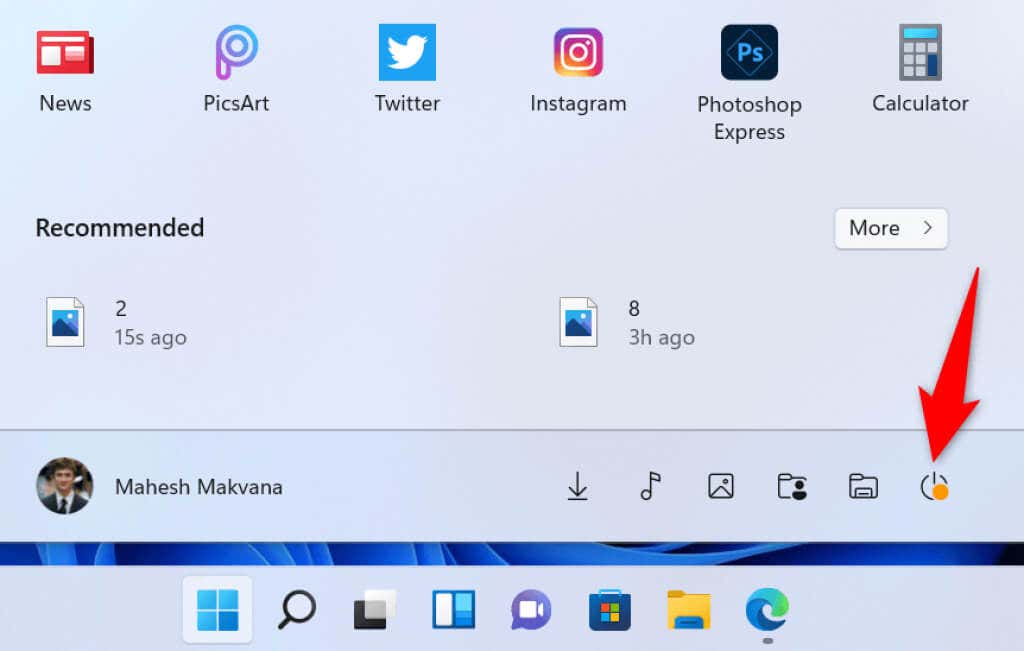
- Choose Restart in the menu that opens.

- Your PC will turn off and then turn back on.
- Launch a File Explorer window when your PC turns on.
Clear Windows 11 File Explorer’s Cache
One reason your File Explorer isn’t working as expected is that the utility has accumulated too many cache files. These files sometimes slow down or make the utility not function at all.
In this case, your best fix is to clear File Explorer’s cache files. This removes the underlying cache data so your issue can be resolved.
- Open File Explorer on your PC.
- Select the three dots at the top of the window and choose Options.
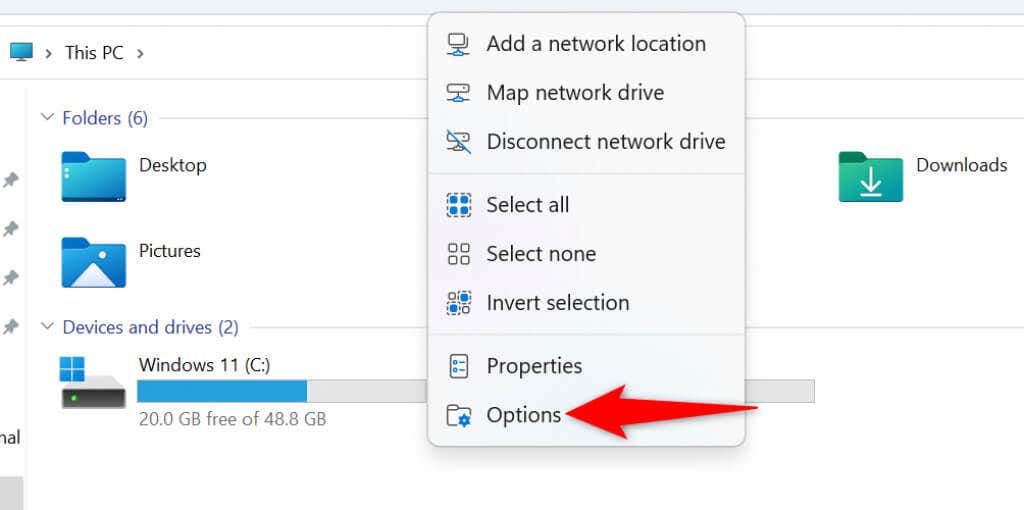
- Choose the Clear button next to Clear File Explorer history.
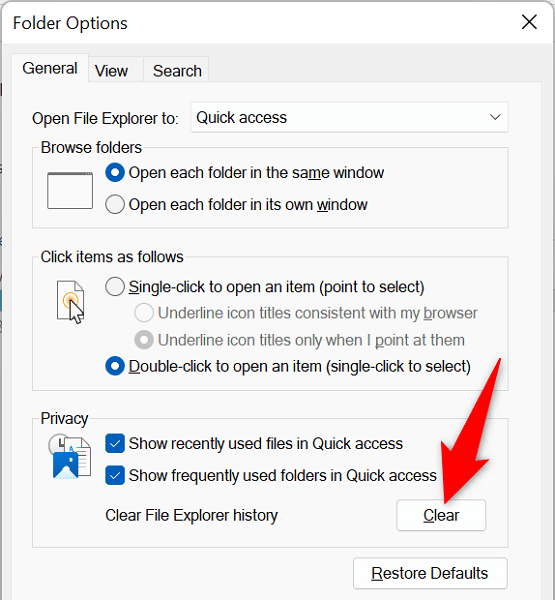
- Close and reopen all your File Explorer windows.
Check Windows Update
Whether you have File Explorer issues or not, we highly recommend keeping your Windows PC up to date. Doing so ensures you always have the latest security and bug fixes, which results in a smoother experience.
It’s quick, easy, and free to update Microsoft Windows:
- Open Settings on your PC by pressing the Windows + I keys.
- Select Windows Update in the sidebar on the left.
- Choose Check for updates in the pane on the right.
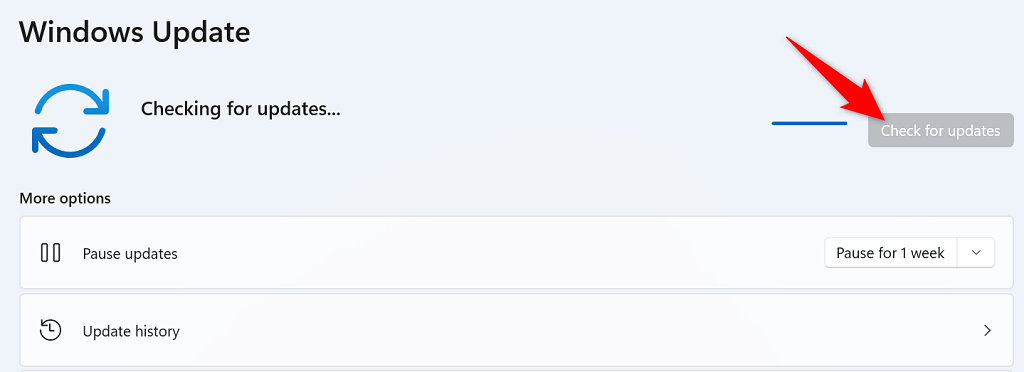
- Download and install the available updates.
- Restart your PC and launch a File Explorer window.
Use the System Maintenance Tool
Windows 11 includes a System Maintenance tool to help you scan your PC for common problems. You should run this tool when your File Explorer goes haywire, as there’s a good chance you can fix your issues with this tool.
You can launch System Maintenance from Control Panel as follows:
- Access the Start menu, search for Control Panel, and choose Control Panel in the search results.
- Select System and Security in Control Panel.
- Choose Security and Maintenance on the window that follows.

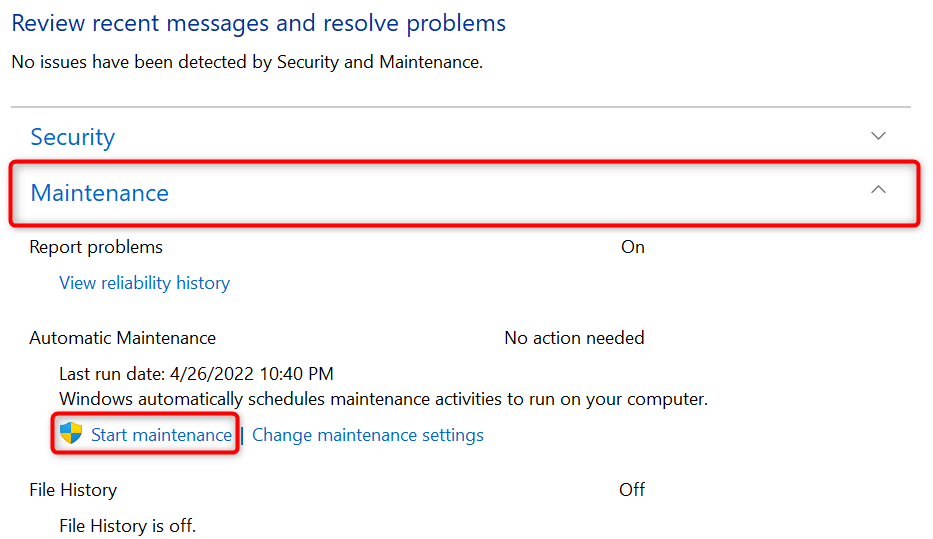
- Expand the Maintenance section and choose Start maintenance.
Scan Your Windows 11 PC for Viruses and Malware
Viruses and malware can cause various issues on Windows PCs, including making system tools like File Explorer function poorly. While unlikely, it’s worth running a virus scan to see if your PC is infected with any threats.
Thanks to Windows 11’s built-in antivirus, you don’t need to install a third-party app to find and remove various threats from your machine. You can run a scan with this built-in utility and find and remove the items causing File Explorer not to work.
- Open the Start menu, search for Windows Security, and select the tool in the search results.
- Choose Virus & threat protection on the window that opens.
- Select Scan options.

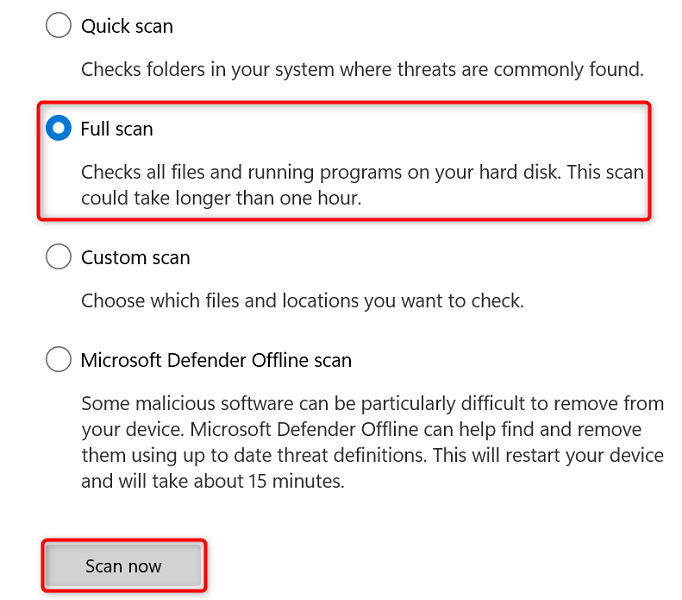
- Enable the Full scan option and select Scan now.
- Wait for the scanner to scan and remove viruses from your PC. This can take a while.
- Restart your PC when the virus scanning is finished.
Fix File Explorer Using SFC (System File Checker) and DISM
A possible reason you have issues with File Explorer is that your PC’s system files have become corrupt. This can happen for various reasons.
Luckily, Windows 11 includes a tool called SFC (System File Checker) to scan for and fix corrupt files on your computer. You can use this command with DISM to get the original Windows core files and then replace the corrupt files with the working ones.
This method involves running a couple of commands from Command Prompt, but you don’t have to know everything about the command line to use the technique.
- Open the Start menu, search for Command Prompt, and select Run as administrator.

- Choose Yes in the User Account Control prompt.
- Type the following command on the Command Prompt window and press Enter:
DISM.exe /Online /Cleanup-image /Restorehealth

- Let Windows fix the recovery image on your system. This can take several minutes.
- Enter the following command in Command Prompt and press Enter: sfc /scannow
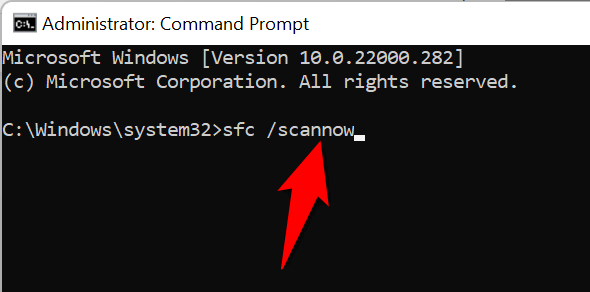
- Wait for Windows to find and fix corrupt files on your system.
- Restart your PC when the files are fixed.
If you get an error message while running the SFC command, boot your PC in safe mode and try running the command that way.
File Explorer is the go-to file management tool on Windows PCs. If this tool ever stops working, you can’t access your files, which is a huge deal. Luckily, you have several ways to resolve issues with your Windows Explorer and bring the tool back to action. Good luck!


