If you want programs to launch alongside Windows 11, you must include them in its Startup folder. This folder is hidden but easily accessible once you know where to look.
Read on to learn how to locate the Startup folder in Windows 11 and what you must then do to add programs to it. We’ll also go over how to manage applications that already open at startup.
- Turn on Fast Startup Missing in Windows 8/10 Power Options?
- Windows 10 Startup Folder Not Working? 8 Troubleshooting Tips To Try
Related: Haven’t made the upgrade to Windows 11 yet? Learn how to access the Startup folder in Windows 10.
Contents
Access Startup Folder in Windows 11
Windows 11 provides separate Startup folders for each user account on your PC. However, it also includes a global Startup folder that affects all accounts. You can get to either location using a couple of methods—using the Run command or manually navigating to the folder location.
Use Shell Command
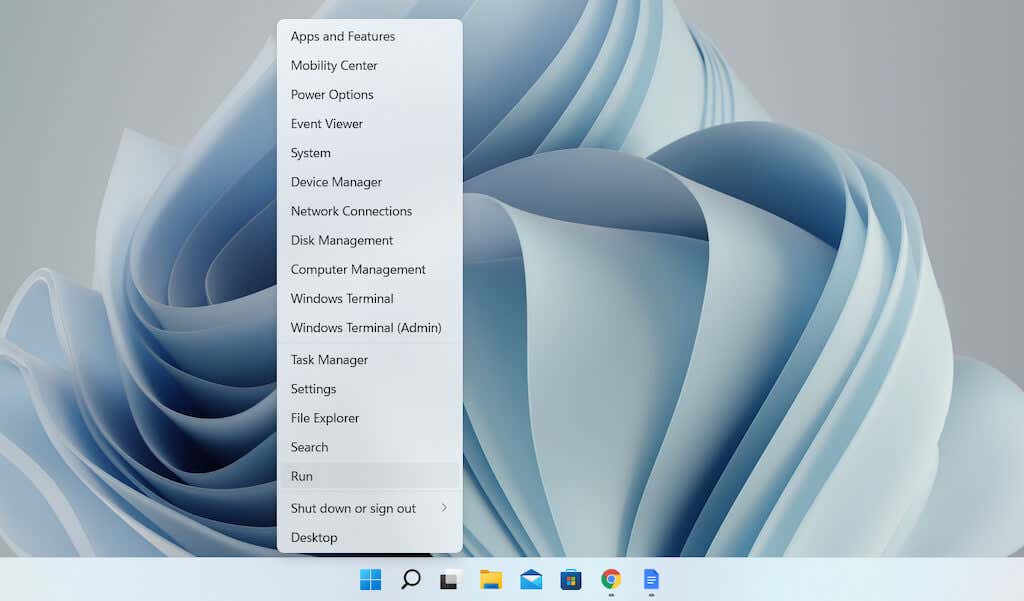
1. Right-click the Windows Start button on the taskbar and select Run. Or, press Windows Key + R.
2. Type the following into the Run dialog box and select OK:
- Open the Startup folder for your user account—shell:startup
- Open the Startup folder for all user accounts—shell:common startup
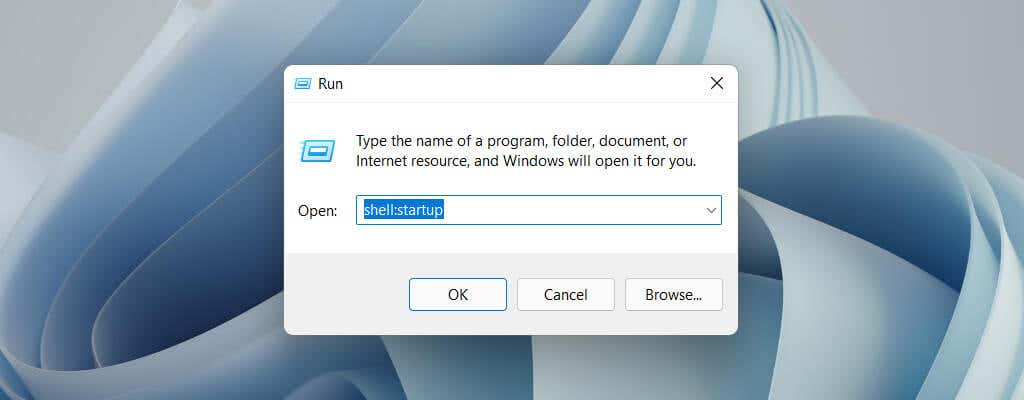
The Startup folder will automatically show up in a new File Explorer window.
1. Open a File Explorer window and select View > Show > Hidden items.
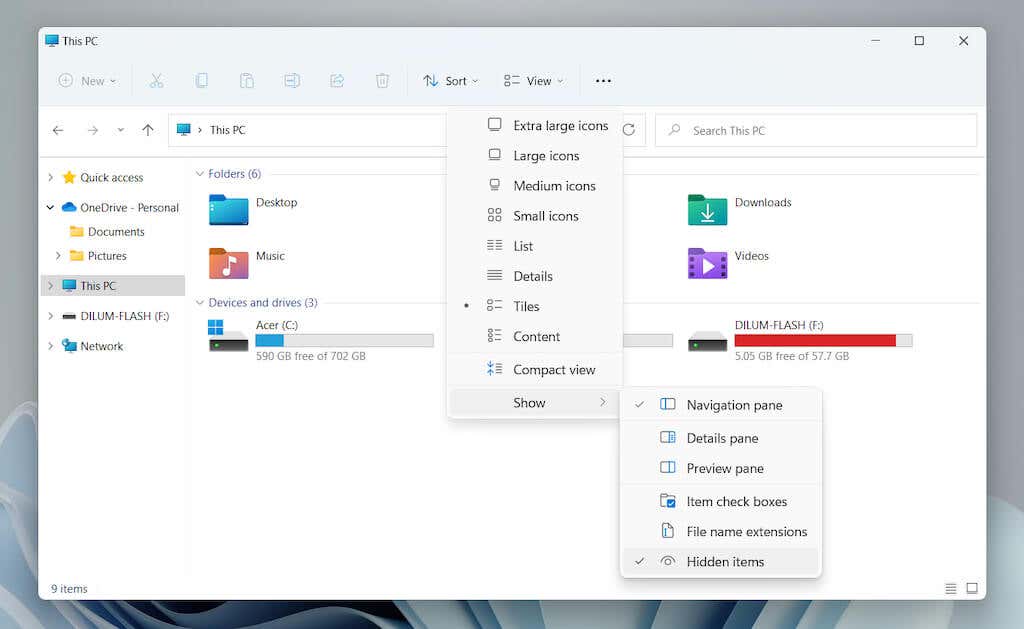
2. Navigate to the location you want:
- Startup folder for your user account—Local Disk C > Users > [Username] > AppData > Roaming > Microsoft > Windows > Start Menu > Programs > Startup
- Startup folder for all user accounts—Local Disk C > ProgramData > Microsoft > Windows > Start Menu > Programs > Startup
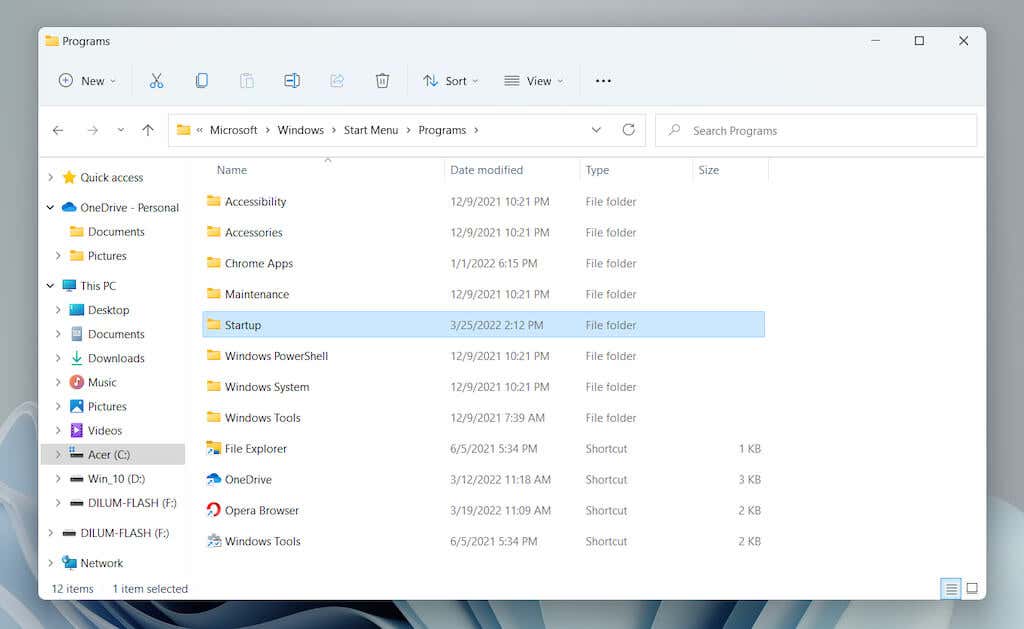
Alternatively, copy the following folder path—replacing [Username] with your Windows PC username—into the address bar in File Explorer and press Enter:
- Startup folder for your user account: C:Users[Username]AppDataRoamingMicrosoftWindowsStart MenuProgramsStartup
- Startup folder for all user accounts: C:ProgramDataMicrosoftWindowsStart MenuProgramsStartup
Add Programs to Startup Folder in Windows 11
Getting a program to autostart alongside Windows 11 requires adding a shortcut to its executable file into the Startup folder for your user account. If you want it to open for all user accounts on your PC, you must add it to the all-user global Startup folder. Here are several ways to create and add a shortcut.
Drag and Drop Executable (Current User Startup Folder Only)
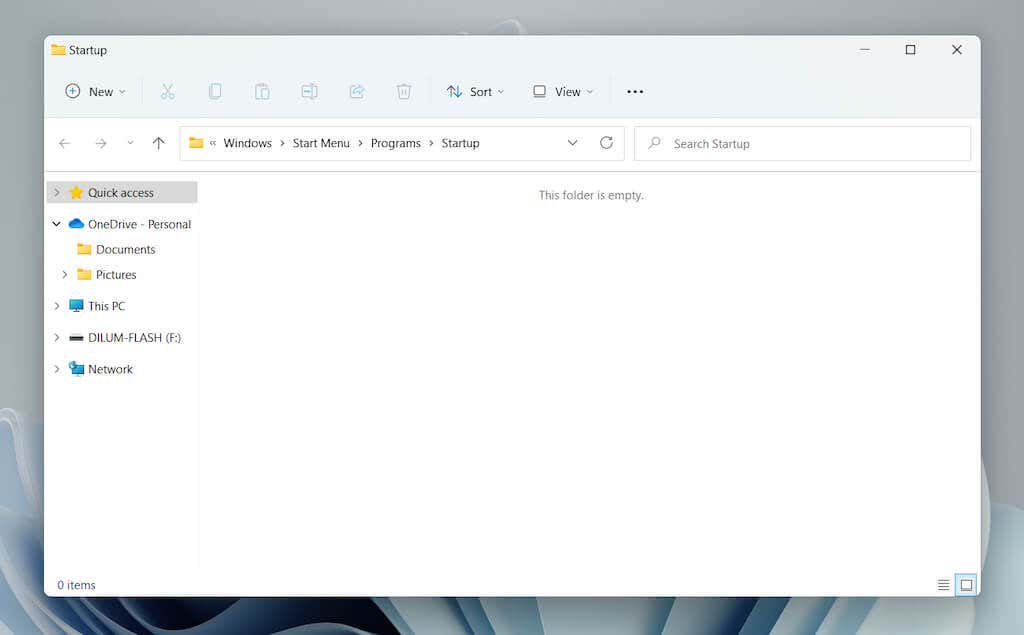
1. Open the Startup folder and drag the File Explorer window to a corner of your desktop.
2. Open a new File Explorer window (right-click the File Explorer icon on the taskbar and select File Explorer) and navigate to the location of a program’s installation directory. Then, identify the main executable (EXE) file related to the program. Select View > Show > File name extensions if you want to unhide the file extensions in File Explorer.
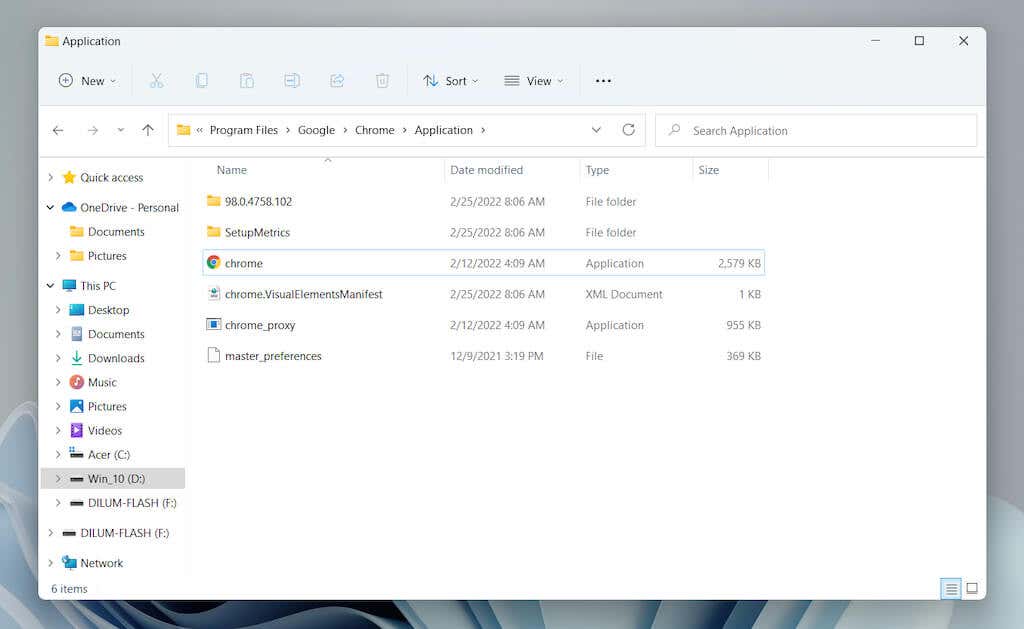
Note: Programs are usually present within the Program Files and Program File (x86) directories on the system drive (Local Disk C).
3. Drag the executable file into the Startup folder and release it once the cursor changes to Create link in Startup.
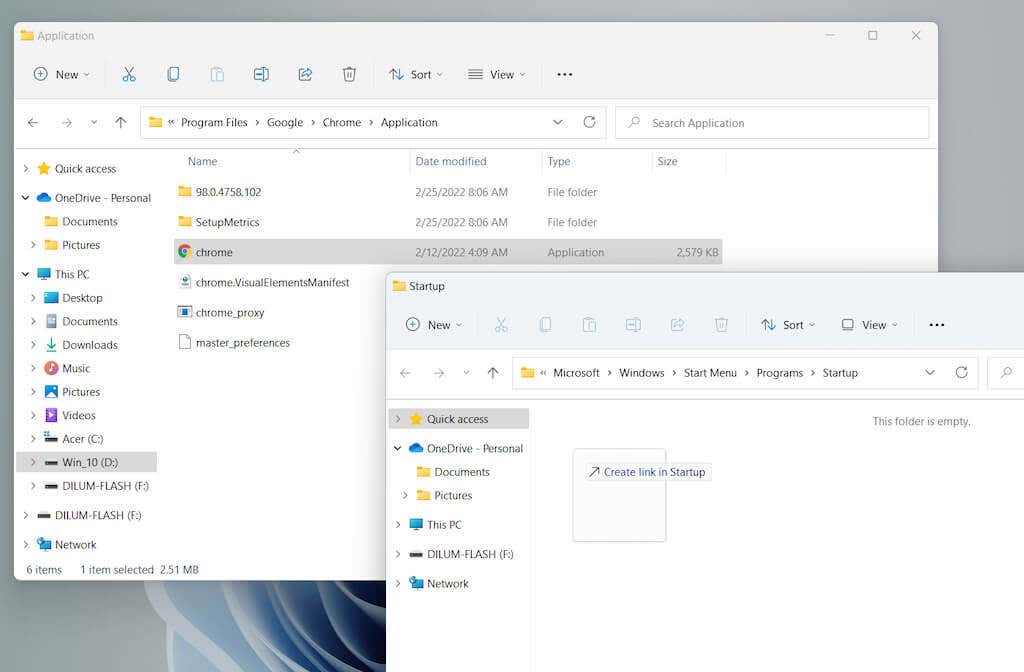
Tip: Can’t locate a program’s executable file. Just open the Start menu and drag the application from the All apps list into the Startup folder to create a shortcut instantly.
Directly Create New Shortcut (Current User Startup Folder Only)
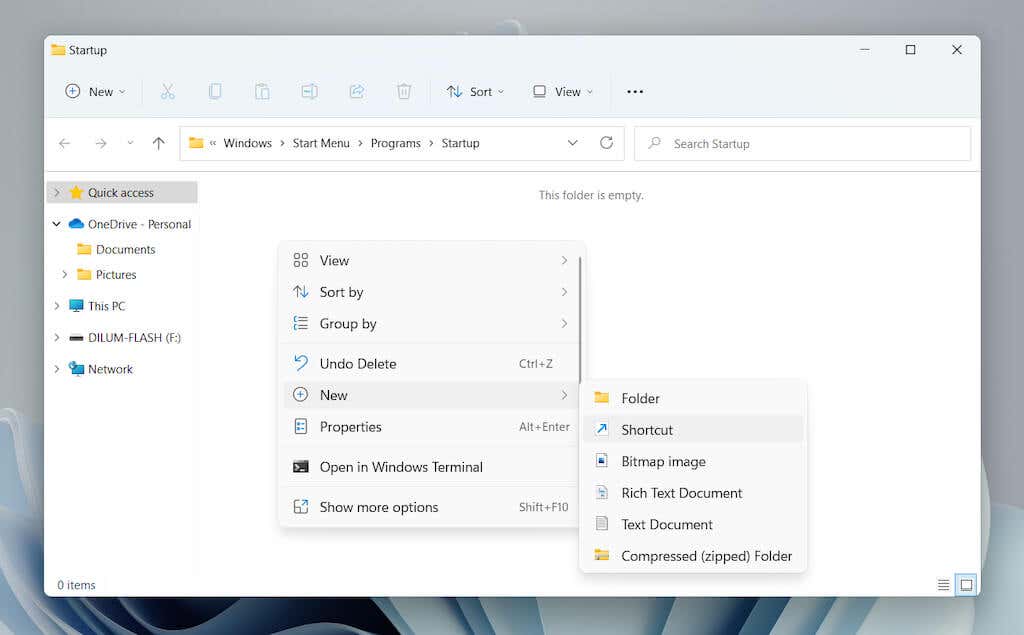
1. Right-click a vacant area within the Startup folder and select New > Shortcut.
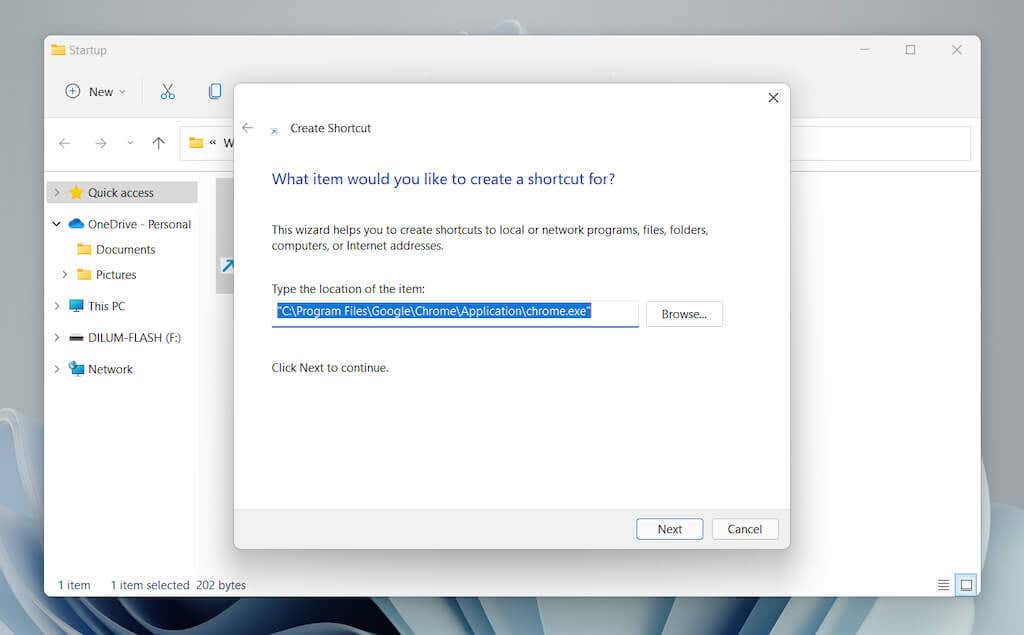
2. Select the Browse button and choose the program’s executable file from its installation directory. Then, select Next to continue.
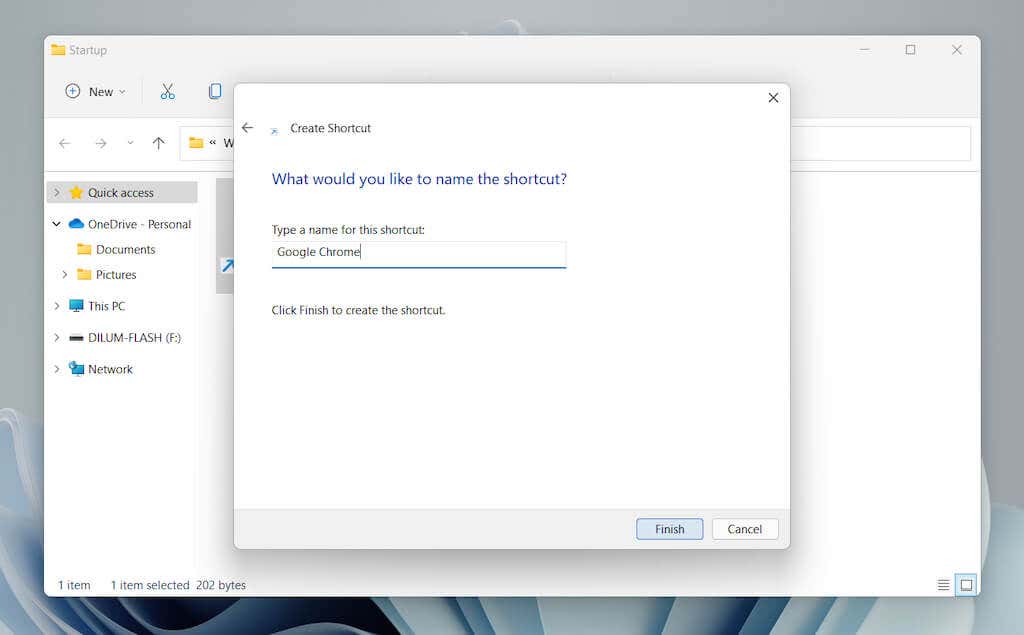
3. Enter a name for the shortcut and select Finish.
Move Shortcut From Desktop (Current User and All-User Startup Folders)
Due to folder-related permissions, the all-user Startup folder does not allow you to create shortcuts inside it. Instead:
1. Add the shortcut to the desktop first.
2. Drag the shortcut into the Startup folder.
3. Release when you see Move to Startup.
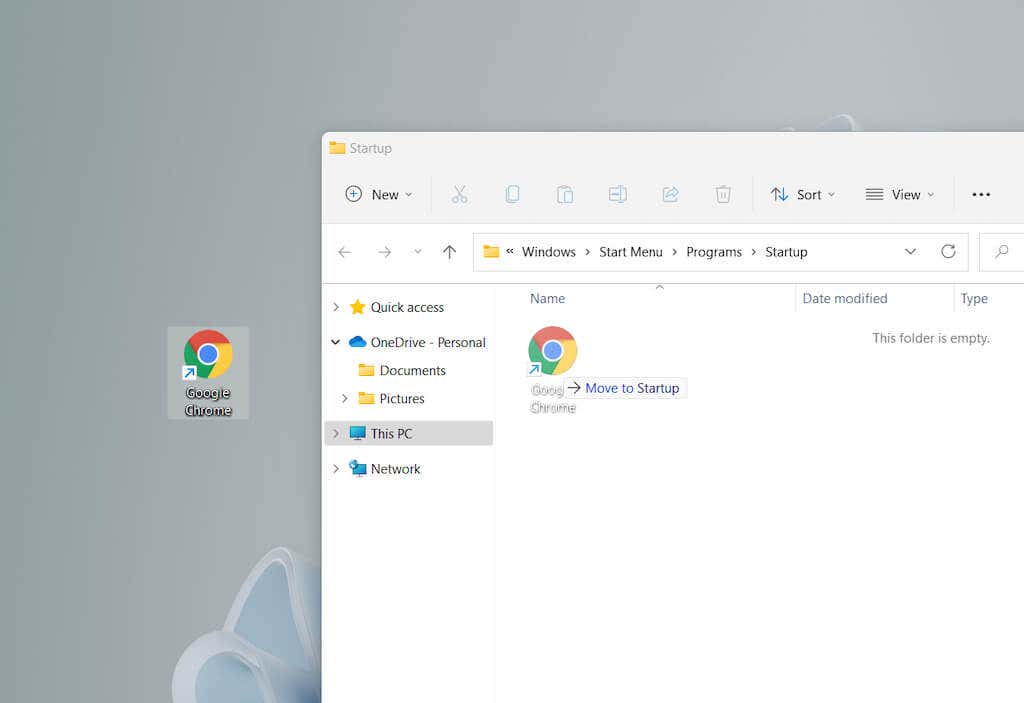
This method also works with the current user Startup folder.
Delete Programs From Startup Folder in Windows 11
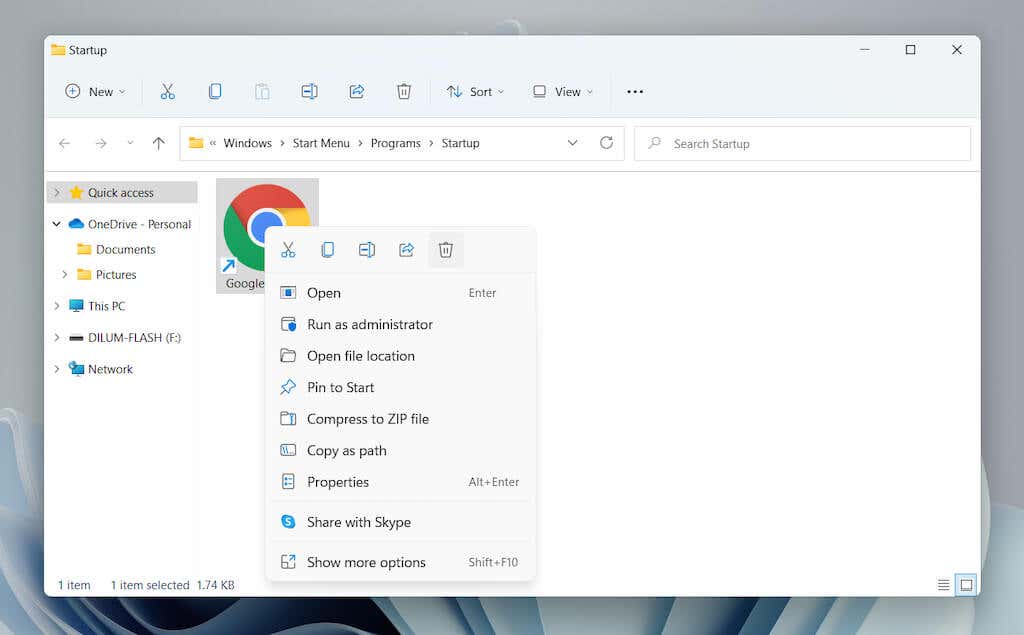
Just delete the shortcut if you want to stop a program from starting alongside Windows 11 at startup.
1. Open the Startup folder for your user account or all user accounts on your computer.
2. Locate the program you want to stop opening at startup—e.g., Google Chrome.
3. Right-click and select the Trash icon.
Manage Other Startup Programs in Windows 11
The Startup folder in Windows 11 is a location you use to add programs that can’t otherwise open automatically at startup. Suppose you want to manage applications that do come pre-configured to auto-start alongside the operating system. In that case, you must use the Startup management options within the Settings app and the Task Manager.
Manage Startup Apps via Settings
1. Open the Start menu and select Settings.
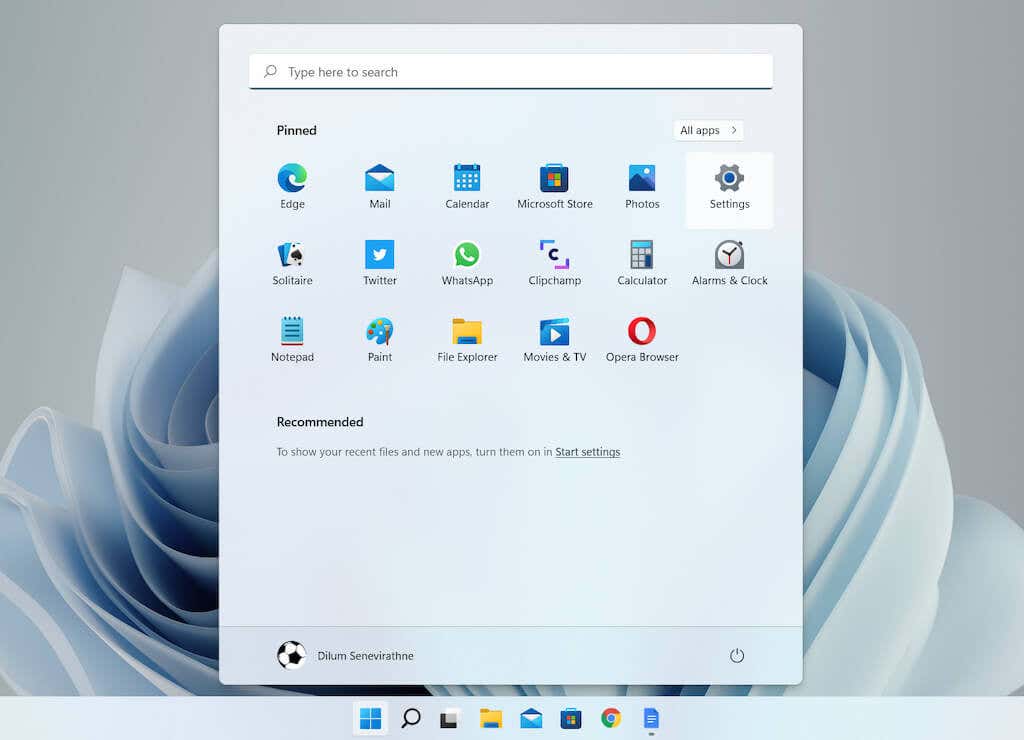
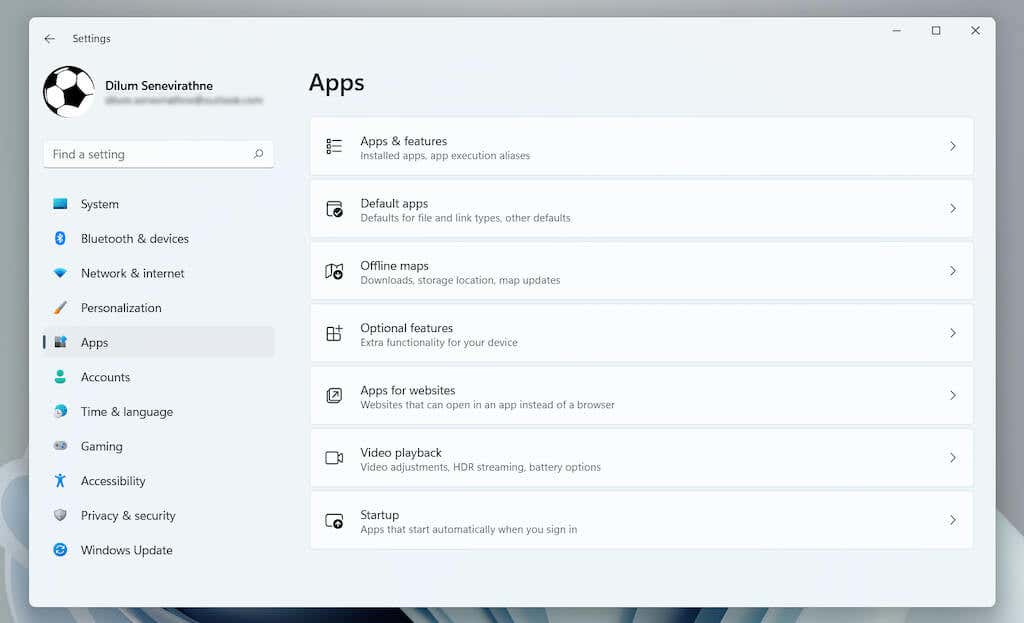
2. Select Apps > Startup to load a list of startup apps.
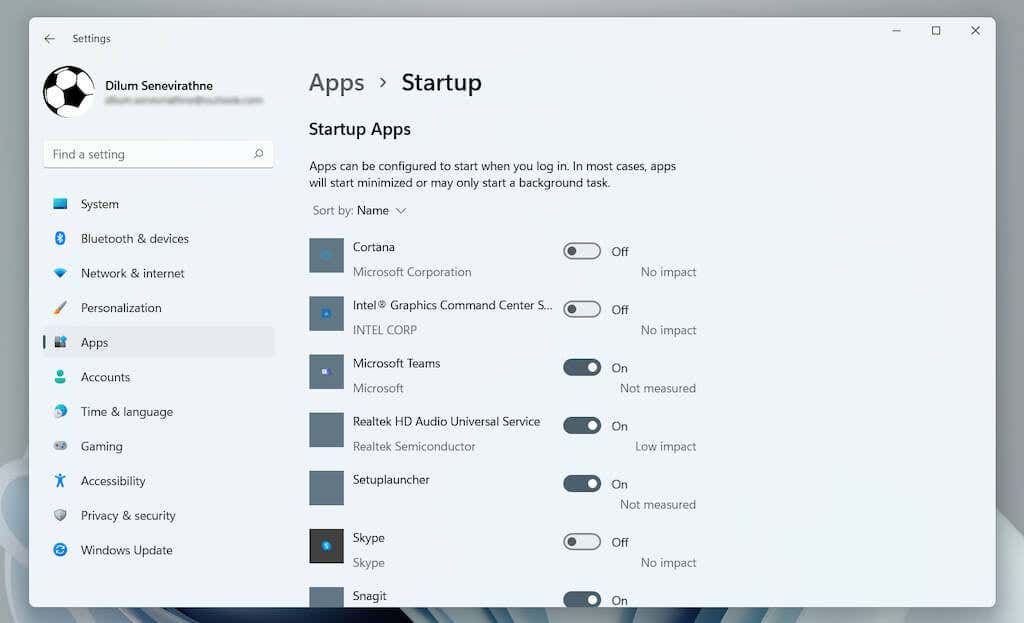
3. Turn off or enable the switch next to any program you want to disable or enable at startup.
Manage Startup Apps via Task Manager
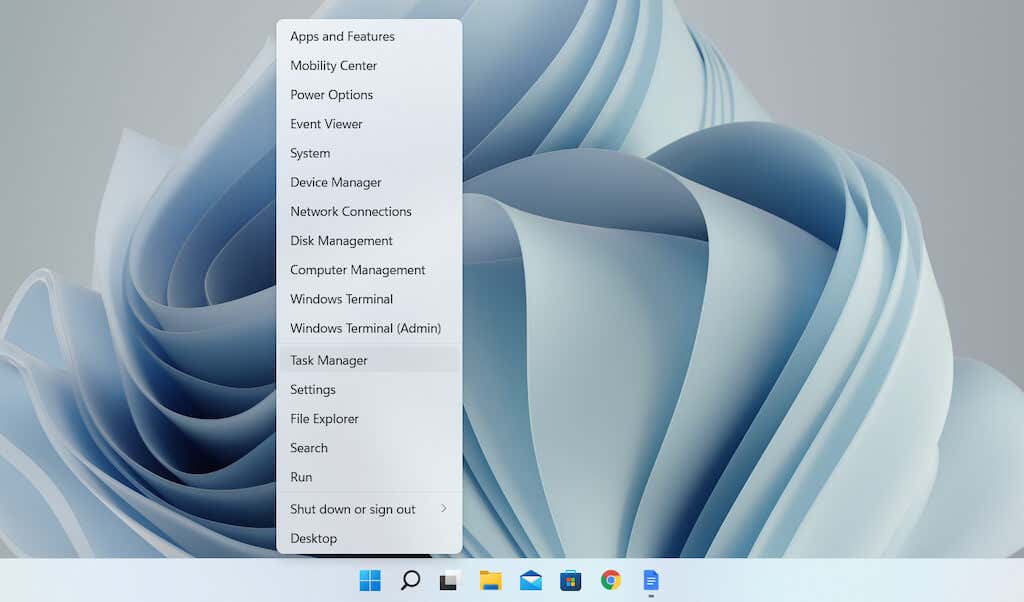
1. Right-click the Start button and select Task Manager.
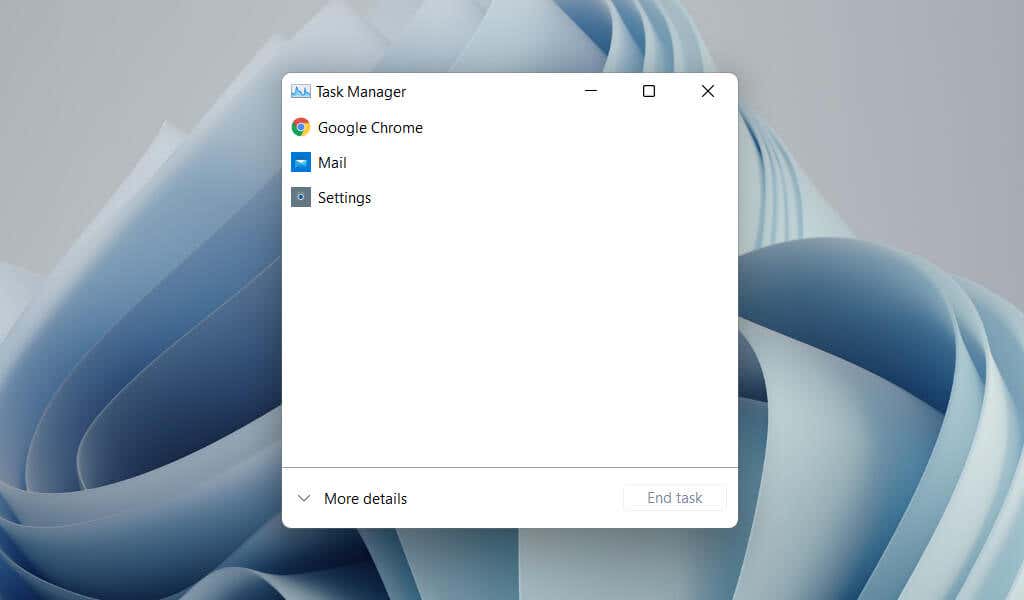
2. Select More details to expand the default Task Manager view.
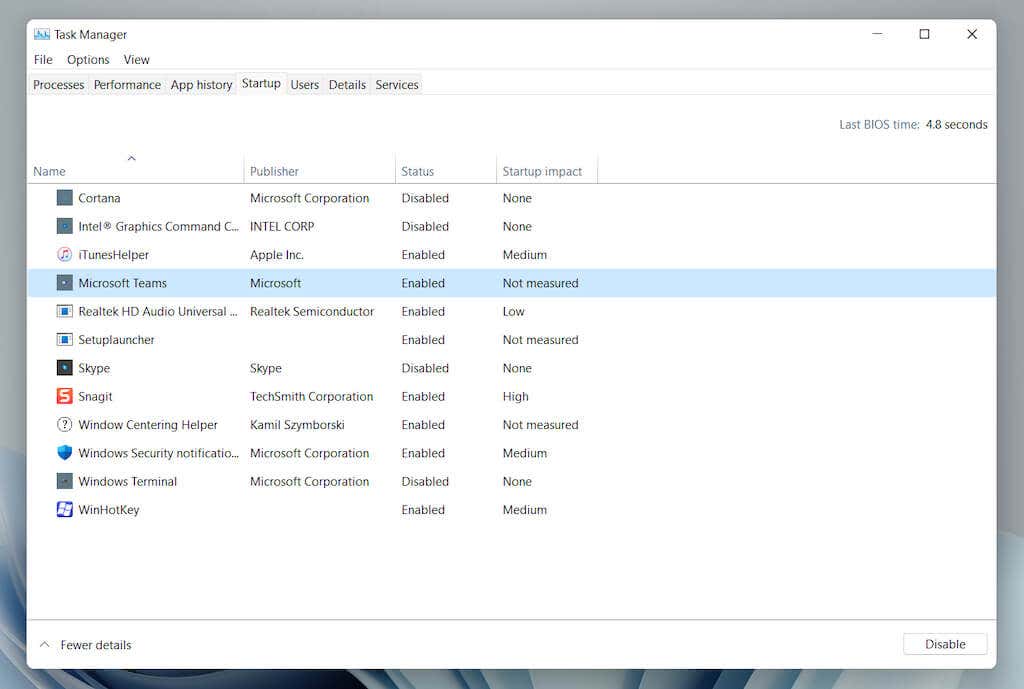
3. Switch to the Startup tab to load a list of startup items. Then, highlight a program and select the Disable/Enable button at the window’s lower-right corner to disable or enable it at startup.
Wrapping Up
Although getting your favorite programs to load automatically at Windows 11 startup allows you to begin using them right away and minimizes the potential for distractions, having too many startup apps can also adversely impact performance. So, remember to delete any programs you no longer use from the Startup folder and use the Settings app or the Task Manager to manage other startup items on your computer.


