Does your Windows 10 screen automatically dim for no specific reason? Chances are you’ve enabled adaptive brightness on your PC, but there are other reasons why your screen automatically dims.
No matter what’s causing it, there are a few simple fixes you can apply to your PC to stop it from automatically dimming. One of these methods should resolve the issue.

Contents
Disable Adaptive Brightness
Windows 10 comes with a feature called adaptive brightness that automatically adjusts the brightness of your display. If this option is enabled, and the surrounding environment changes, Windows automatically dims your screen.
In this case, turn the adaptive brightness feature off and see if your issue gets resolved. You can turn this option back on anytime you want.
- Open Windows 10’s Settings app by pressing Windows + I keys at the same time.
- Select System on the Settings window.
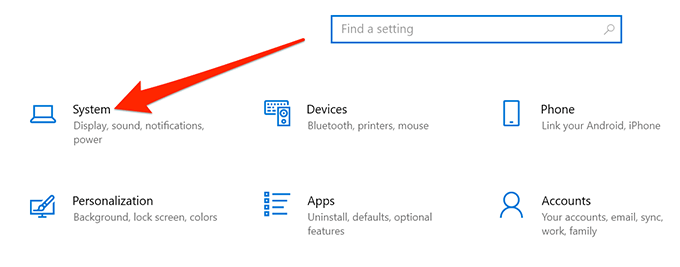
- Select Display from the options on the left sidebar.
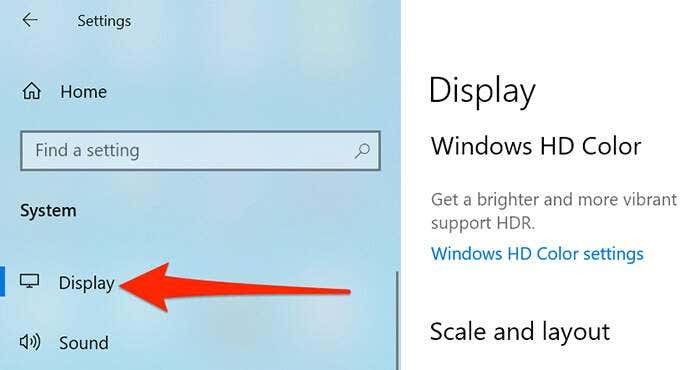
- On the right pane, deactivate the option that says Change brightness automatically when lighting changes.
From now on, Windows 10 won’t automatically increase or decrease your display’s brightness. If your screen gets too dark or too light, use the brightness slider on the Display settings menu to manually adjust the brightness levels.
Remove the Latest Windows 10 Update
Some users report that their screen started dimming right after installing a Windows update. In this case, you can remove the latest Windows 10 update you’ve installed. It might fix the issue.
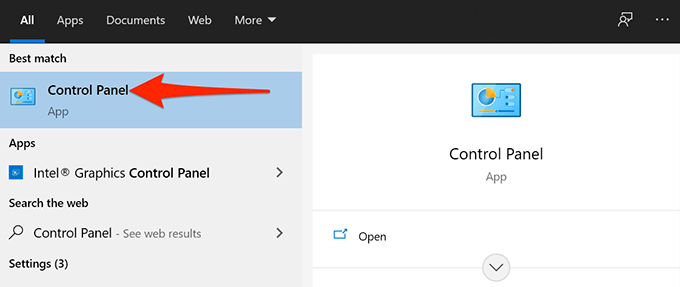
- Open the Start menu, search for Control Panel, and select Control Panel in the search results.
- In Control Panel, click the View by menu at the top and select Category.
- Select Programs from the available options on your screen.
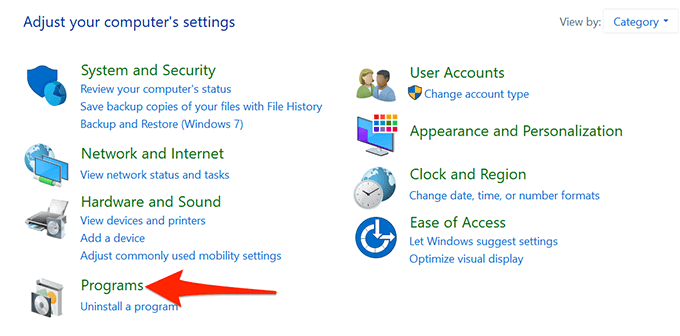
- On the following screen, under Programs and Features, select the View installed updates option.

- You’ll now see a list of installed updates on your computer. Select the Installed On column and ensure the most recent update appears first.
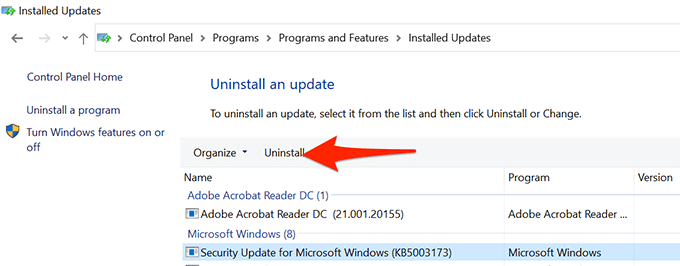
- Select the most recent update in the list, and then select Uninstall at the top.
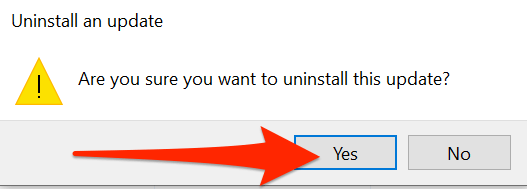
- Select Yes in the prompt that appears to get rid of the selected update.
- Restart your computer when the update is removed.
If your screen doesn’t dim after removing the update, the update was the culprit.
You’ll find these latest Windows updates at the Settings > Update & Security > Windows Update path on your PC.
Check the Startup Programs List
If your Windows 10 screen dims a few seconds after booting the computer, a startup program might be the reason. Your system loads many programs at the boot, and it’s worth checking this programs list to find any suspicious items.
- Access the Start menu, search for Settings, and select Settings in the search results.
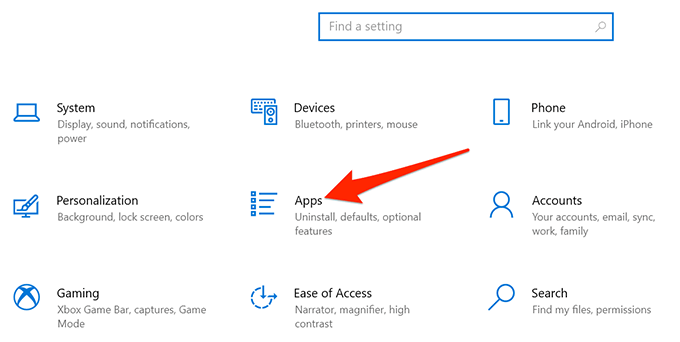
- Select Apps on the Settings window.
- On the left sidebar, select Startup.
- On the right, all of the programs with the toggle saying On are allowed to launch at the boot of your computer.
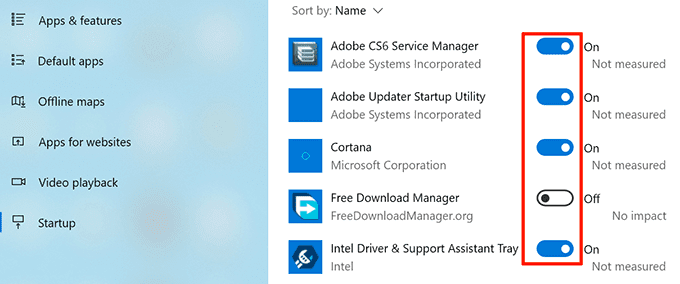
- Turn all or only suspicious programs off in this list. A suspicious program is basically the one that you recently installed before your screen issue started occurring.
- Restart your computer and see if the issue is gone.
Use Power Troubleshooter
Windows 10 includes many troubleshooters, one of which is a power troubleshooter. With this, you can find and resolve most power-related issues, including screen dimming issues, on your PC.
To run the troubleshooter:
- Open the Settings app on your computer.
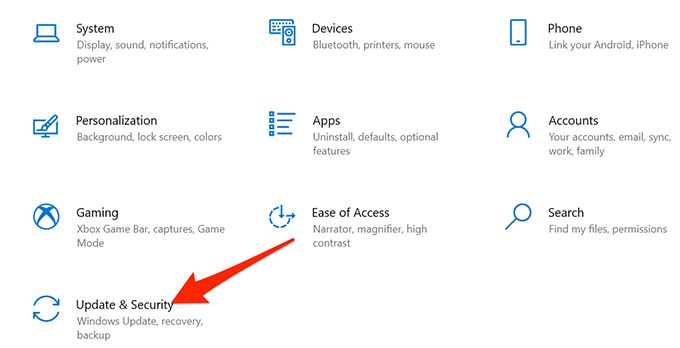
- Select Update & Security on the main Settings screen.
- On the left sidebar, select Troubleshoot.
- Choose the Additional troubleshooters option on the right pane.

- Find Power in the troubleshooters list, select it, and then select Run the troubleshooter.
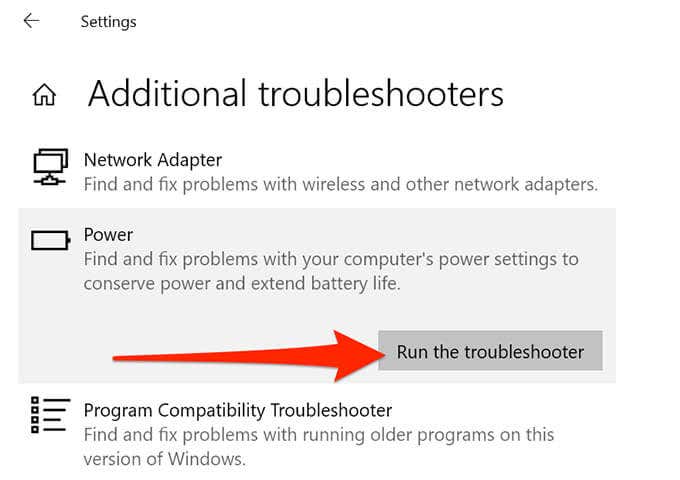
- Wait for the troubleshooter to detect and fix issues with your power settings.
Update the Graphics Card Drivers
A possible reason your Windows 10 PC’s screen automatically dims is that you’re using outdated graphics drivers. Graphics drivers allow your graphics card to interact with your system, and so you should always keep these drivers up to date.
If you haven’t updated these drivers in a long time, run a drivers update as follows.
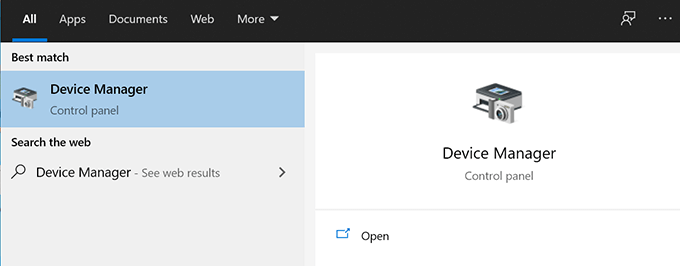
- Open the Start menu, search for Device Manager, and select that option in the search results.
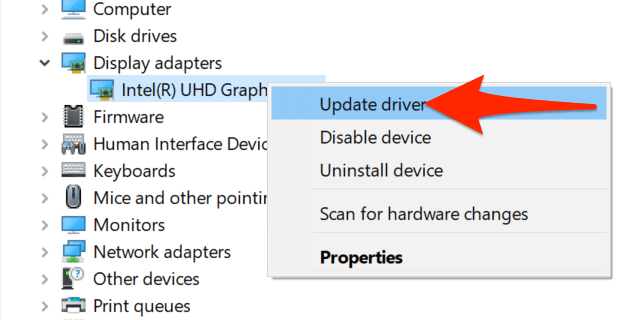
- Select Display adapters to expand its menu.
- Right-click your graphics card under Display adapters and select Update driver.
- In the window that opens, select the Search automatically for drivers option.
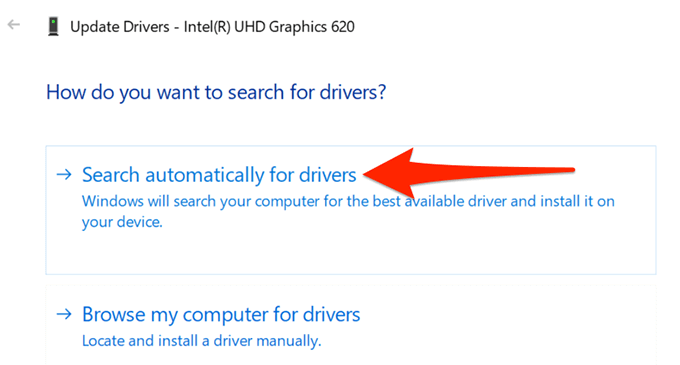
- Allow Windows 10 to find and install the latest graphics drivers on your computer.
- Reboot your computer when the drivers are installed.
Turn the Screen’s Power Saving Mode Off
If your video or graphics card comes from a reputed manufacturer, it’s likely a manufacturer tool is installed on your PC. This tool helps you set up various options for your card.
It’s possible that this tool has enabled the power saving mode for your graphics card. In this case, the mode automatically dims your screen after a certain time.
To fix this, simply turn off the power saving option in this utility. For the following example, we’ll use an Intel utility to disable the power saving mode.
- Access the Start menu, search for Intel Graphics Control Panel, and select that option in the results.
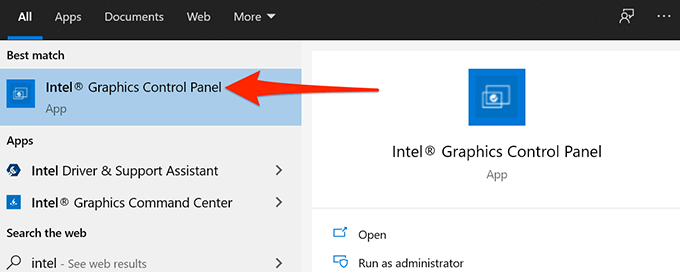
- Select Power on the main screen of the utility.
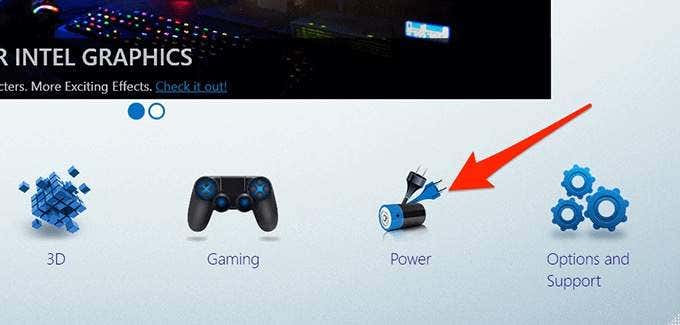
- Select On Battery from the left sidebar.
- On the right pane, under Display Power Saving Technology, select Disable.
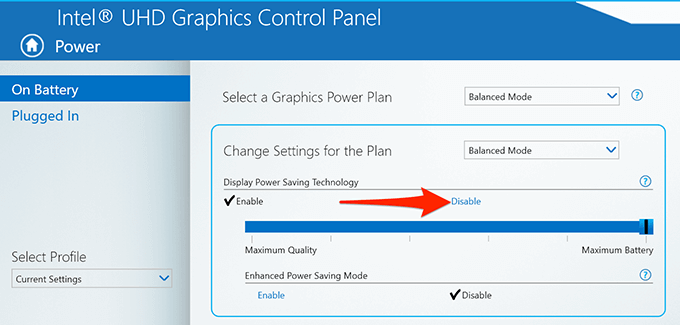
- Select Apply at the bottom to save your changes.
Your Windows 10 PC’s screen should hopefully no longer dim automatically. And if this is the case, please let us know what method worked for you in the comments below.


