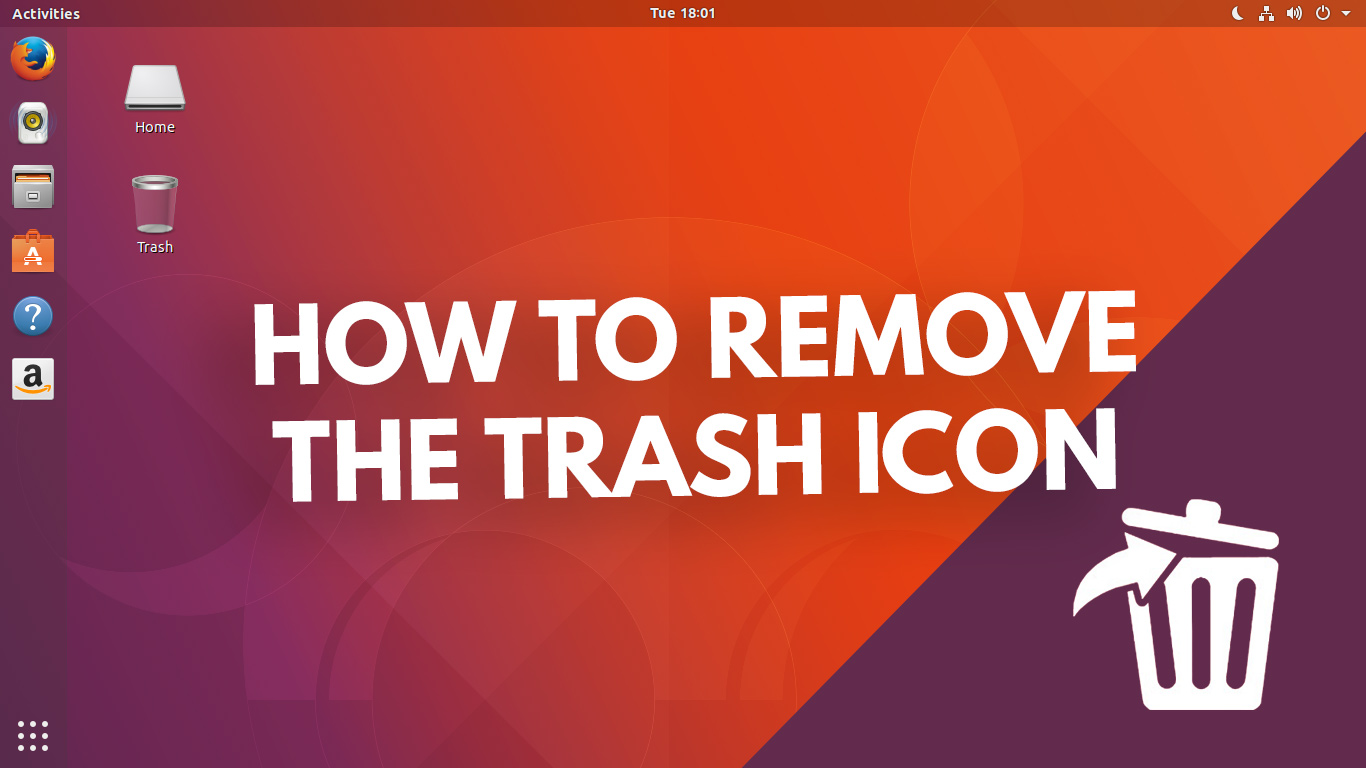
A trash can icon appears on the desktop of Ubuntu 18.04 LTS and up by default, but not everyone likes it being there.
Thankfully it’s easy to remove the trash icon from the Ubuntu desktop, as well as the ‘Home’ folder that shows in more recent versions of the distro.
How? Well, read on to find out!
Contents
Remove Trash Icon from Ubuntu
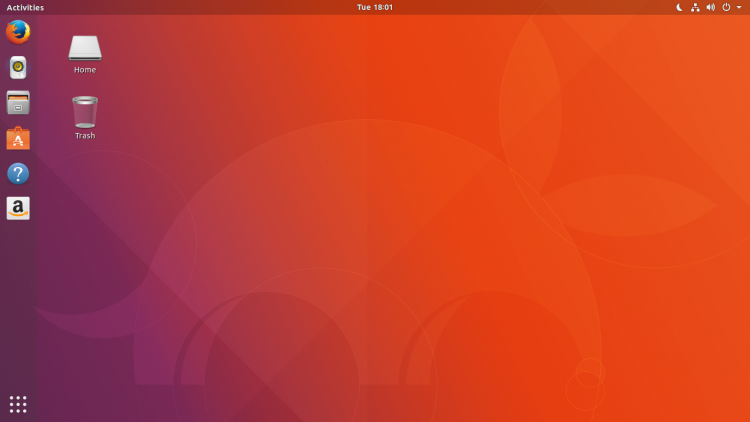
Ubuntu’s decision to put a trash shortcut on the desktop makes a lot of sense, putting this useful icon in an easy-to-reach place that users see (and thus check) regularly.
The good news is that it is relatively easy to remove (hide) the trash can from the Ubuntu desktop, you just need to know the right places to poke (or the right command to run).
But do keep in mind that if you remove the trash can icon from the Ubuntu 18.04 LTS desktop you will only be able to access the trash folder through Nautilus, the default file manager.
If you run Ubuntu 19.10 or later you have more choice as you can add a trash icon shortcut to the Ubuntu Dock.
The exact method to remove the trash icon will depend on which version of Ubuntu you use. There are also multiple ways to do it, including via the GNOME Tweaks app and via the command line.
We show you both methods below.
Use GNOME Tweaks to Remove Trash Icon
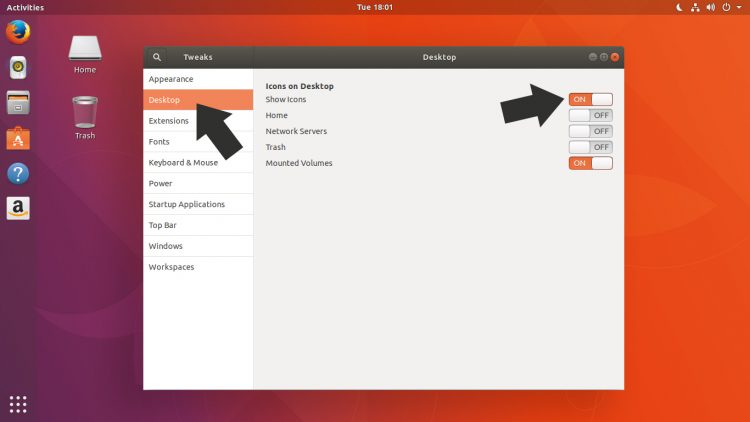
I never get tired of recommending the GNOME Tweaks app as it is an indispensable tool for anyone who likes to customise the Ubuntu desktop to better their needs.
You can install GNOME Tweaks in Ubuntu for free, straight from the Ubuntu Software tool. Just search for the app by name, or press the button below to jump straight to the installation page for it:
Follow the on-screen instructions listed in Ubuntu Software to install GNOME Tweaks in Ubuntu. Once done follow these steps to remove the trash icon from Ubuntu 18.04 LTS:
- Open GNOME Tweaks
- Select ‘Desktop’ from the sidebar
- Turn off the trash icon setting
That’s it; the icon will no longer show on the desktop.
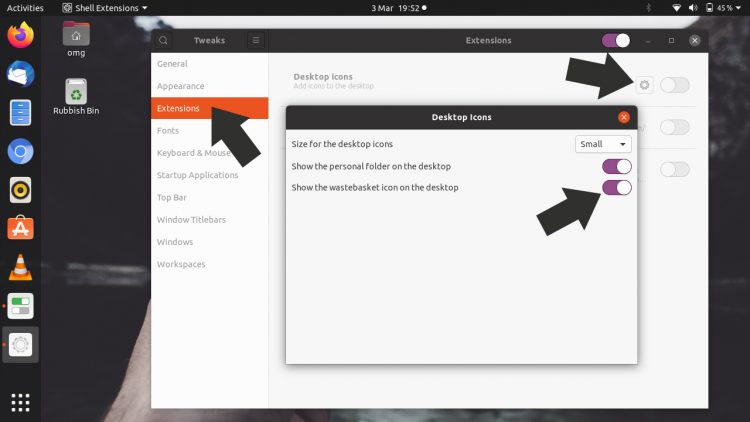
In Ubuntu 19.04 or later you need to do the following steps instead:
- Open GNOME Tweaks
- Select ‘Extensions’ from the sidebar
- Click cog icon next to ‘Desktop Icons’
- Turn off ‘show the wastebasket icon on the desktop’
That’s it; the icon will no longer show on the desktop.
Use Terminal to Remove Trash Icon
It’s also possible to achieve the same steps as above using the command line.
To remove the trash icon from the Ubuntu 18.04 LTS desktop open up a new terminal window or tab and type in this command:
gsettings set org.gnome.nautilus.desktop trash-icon-visible false
To remove the trash icon from the Ubuntu 19.10 (or later) desktop open a new terminal window or tab and enter this command:
gsettings set org.gnome.shell.extensions.desktop-icons show-trash false
The change takes effect instantly; you will no longer see a trash can (or a rubbish bin, recycle bin, or wastebasket if you prefer) on the Ubuntu desktop by default.
How to ADD a Trash Icon?
Let’s say change your mind and you want to add a trash can to your Ubuntu desktop in the future. How do you do it?
Just re-run the same commands listed about but replace false at the end of the command with true. This will restore the trash icon back to the desktop,
You can also do it using a GUI method too:
- Open GNOME Tweaks
- Select ‘Desktop’ in the sidebar
- Turn on the ‘trash icon’ setting
The change takes effect instantly.
Removing the home folder icon
Ubuntu 18.04 LTS only shows a trash icon by default, but later versions also put a Home folder icon on the desktop.
Using GNOME Tweaks > Extensions > Desktop Icons > Settings you can disable the ‘personal folder’ icon setting in Ubuntu 19.04 and above.
Alternatively, you can use the terminal to do it.
To remove the Home folder icon through the command line run:
gsettings set org.gnome.shell.extensions.desktop-icons show-home false
How To
ubuntu basics

