Windows Defender, which is one part of the Windows Security suite of tools, is an antivirus Windows 10 App that comes pre-installed on Windows 10 computers. Its purpose is to keep your system secure from spyware, malware, and viruses.
Running in the background, Windows Defender monitors your computer in real-time and takes cleanup actions when it finds security issues. It updates virus definitions regularly to safeguard your computer.
For those who want more control over updates, Windows Defender enables users to customize options if they want to temporarily disable real-time protection or add processes, files, or folders.

You can also choose to run an on-demand scan for individual endpoints. Once you define the parameters for the scan, such as location or type, it will run immediately.
If you click on a suspicious link or want to be sure you didn’t expose your computer to anything malicious, you can run an on-demand scan rather than wait for a scheduled one.
Run Windows Defender Antivirus on your own schedule or on-demand at any time. In this article, we will discuss:
- Full Scan vs Quick Scans
- Quick Scans
- Full Scans
- Custom Scans
- Offline Scans
- Add or Remove Exclusions
- Schedule Updates with Task Scheduler
- Set Triggers
- How to Find Scan Results
Contents
Full Scan vs Quick Scans
Windows Defender runs two types of scans. Whether you set it up on a schedule or on-demand, you can choose to run a quick or full scan in the settings.
A quick scan looks for malicious threats in the areas that are most likely to be the subject of attacks such as memory and common locations.

A full scan is more thorough and checks every file, folder, task, and process on your computer. The more you have on your computer, the longer the scan will take.
You can use your computer while a full scan is running, but it will take the scan longer and could slow down your system.
Run full scans at night when you are not using the computer to avoid interference.
Quick Scans
- Start by launching the Windows Defender security app on your Window 10 PC.
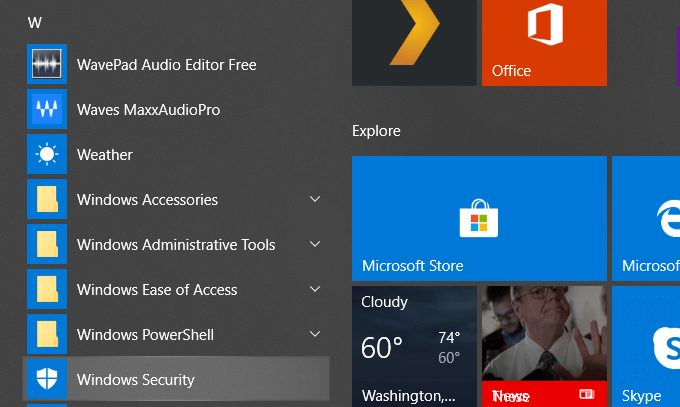
- Search for Windows Security in the lower left-hand corner of your desktop. Or you can scroll through your apps and click on it.
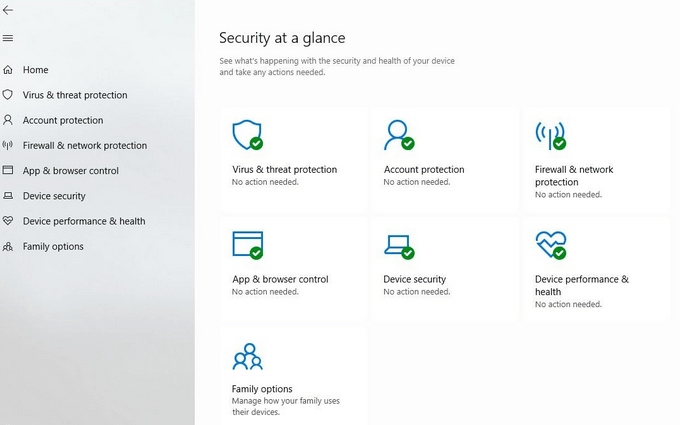
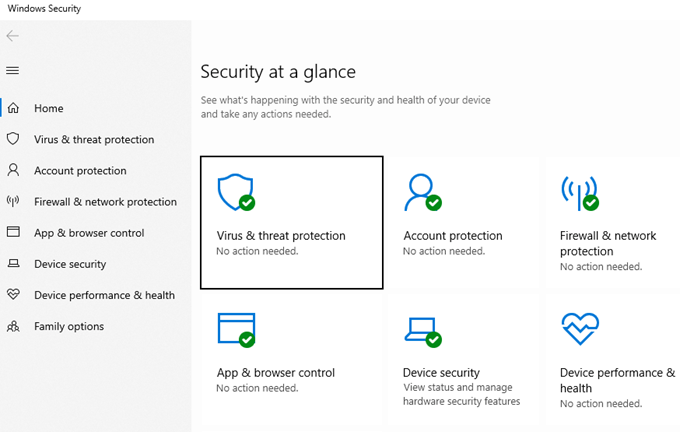
- This will bring you to the Security at a glance section.
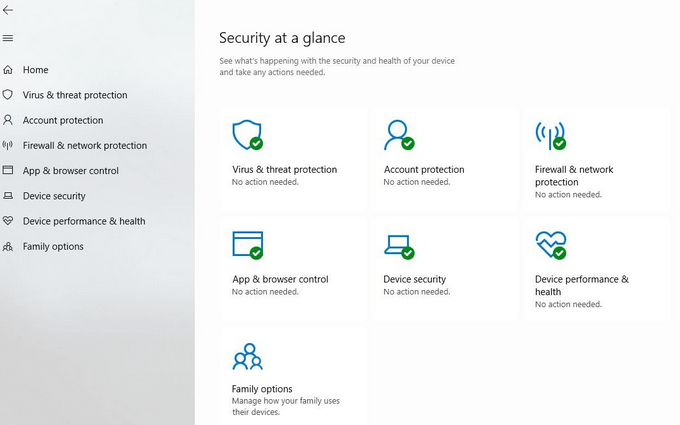
- This is where you will perform most of your security actions. To manually start an on-demand scan, click on Virus & threat protection and then Quick scan.
Most of the scans you will need to do will be quick scans. Windows will check the memory and common locations where viruses are most likely to infect. It will also let you know when the scan is complete and identify anything that looks suspicious. You can then delete or quarantine the malicious content.
Or you can act on any of the other recommendations to remove or lock the threats so that they can’t hurt your computer. If you haven’t updated your Virus & threat protection settings in a while, you should.
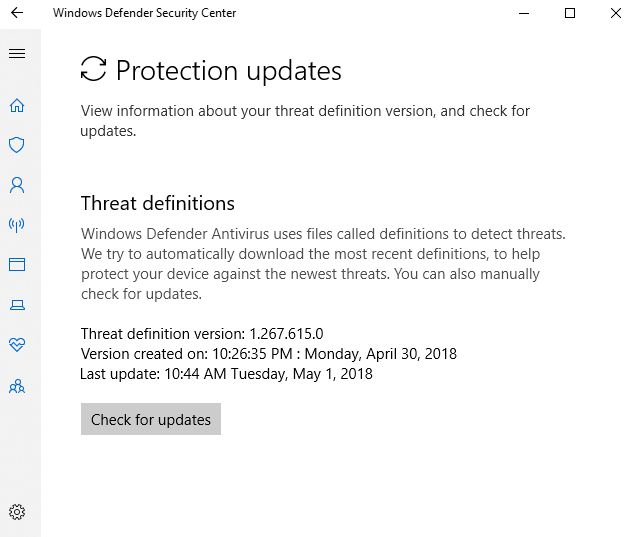
Windows Defender detects threats to your computer by files called definitions. When Microsoft finds new viruses, malware, or spyware, they add it to a list. Click on Check for updates under Virus and Threat Protection Updates.
Having the most up-to-date list will help keep your computer safe from malicious files that can wreak havoc on your machine.
Full Scans
Periodically it is a good idea to run a full scan, ideally overnight when you are not using the computer. Full scans take much longer because they check every process, folder, task, and file.
Follow the steps outlined above to go to the Virus and threat protection screen and then click on Scan options.
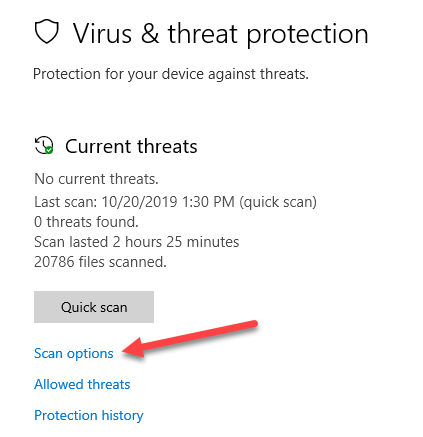
The larger your hard drive, the more memory you have installed, the number of applications and amount of data you have on your computer, the longer this scan will take.
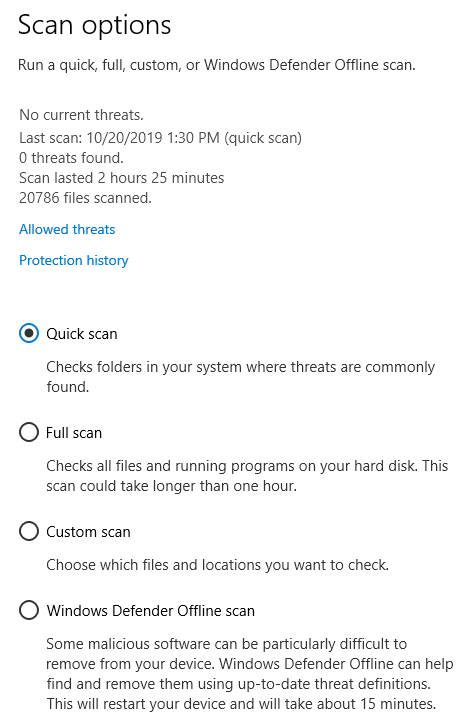
Choose Full scan to check all the files and processes on your hard drive, and then click on Scan now.
Custom Scans
If you suspect a specific file or folder has been compromised, follow the steps above to get to the Advanced scan screen.
- Choose the Custom option. Select the location of the files or folders you want to check.
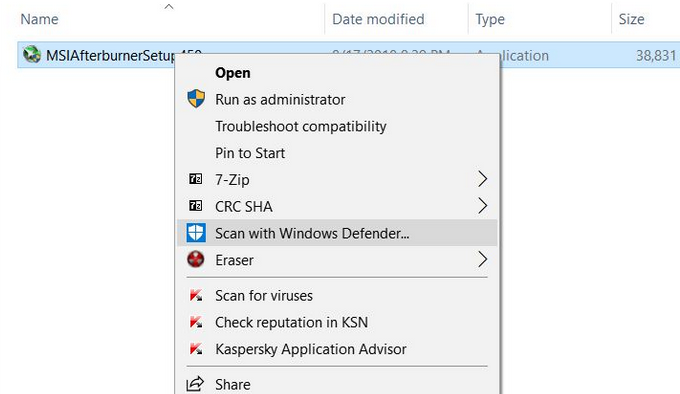
- Or you can use File Explorer. Locate the file you want to scan and right-click on it. Select the option that says Scan with Windows Defender.

Offline Scans
Sometimes computers can get infected with malware that is difficult to remove. You will need to boot an antivirus in a safe environment before the operating system is loaded.
Windows Defender’s offline is the antivirus solution to perform malware scans from outside of Windows. Use the Offline method if your browser was hijacked or a threat has compromised your Internet connection.
Add Or Remove Exclusions
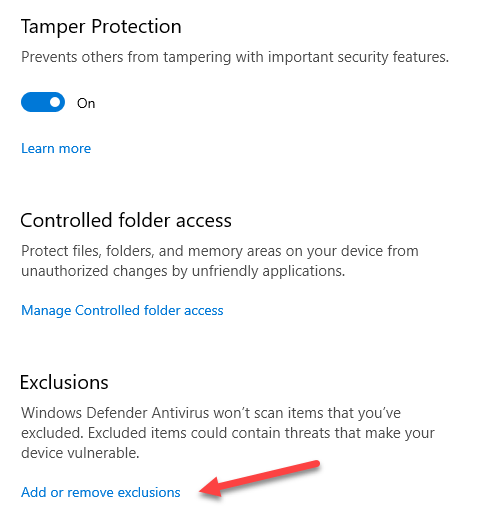
To exclude any file or folder from a scan, click Manage settings from the Virus & threat protection settings screen and then scroll down to click on Add or remove exclusions.
If there is already an exclusion, you can delete it by clicking Remove an exclusion.
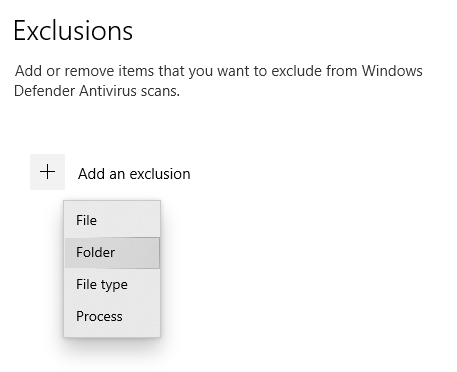
If a file, process or folder was falsely identified as a virus, click the + symbol and select the file or folder to exclude it from scans.
Schedule Updates With Task Scheduler
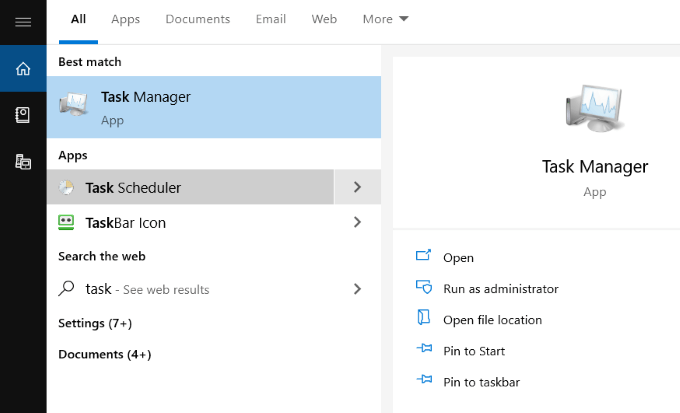
- To change when your scans run, type tasks into the search bar.
- Locate and click on Task Scheduler.
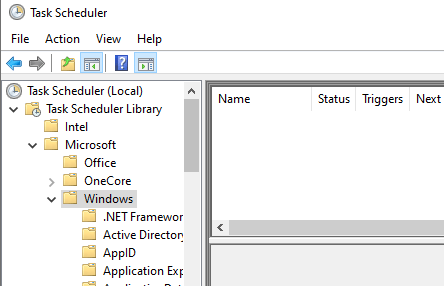
- Once you open Task Scheduler, from the top left-hand corner, open the folder called Task Schedule Library.
- Click on Microsoft and scroll down to Windows.
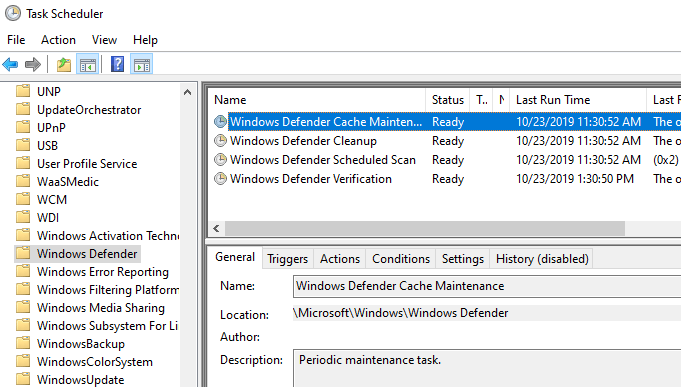
- Scroll down and click on Windows Defender in the left menu to see the schedules you are currently using.
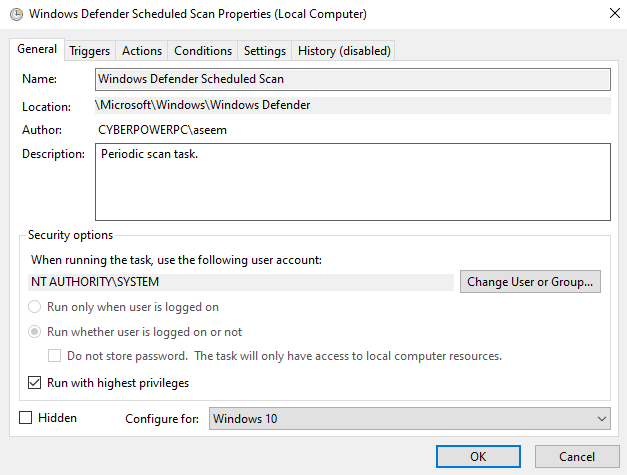
- Double-click on Windows Defender Scheduled Scan (shown in the screenshot above). Another box will open with several options. The settings in the popup will enable you to customize the criteria for your scans. These settings are called Triggers.
Set Triggers
Click on Triggers and then New to open a new trigger. The options available to customize are:
- On schedule
- At startup
- On idle
- On an event
- At task creation/modification
- On connection to a user session
- On disconnect from a user session
- On workstation lock
- On workstation unlock
Choose which trigger you want to use to start your scan from the options above.
The next step is to decide how often you want to run the scan from the following options:
- One time
- Daily
- Weekly
- Monthly
For the Daily option, you will be prompted to select the start date and time. If you want to Synchronize across all time zones, tick off the box.
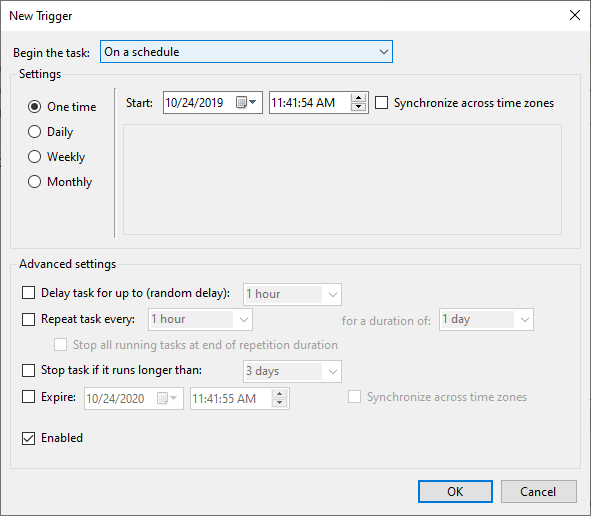
Under Advanced settings, you can choose to:
- Delay the task
- Repeat the task
- Stop the task
Use these Advanced settings to customize exactly when and under what circumstances your scans run. Click OK to save your settings.
The new task will now show up under Trigger. You can edit or delete it any time. If you find that scans slow down your computer while working, set them to run at night when you are not.
How to Find Scan Results
The results are recorded when you run a Windows Defender scan. To view them, open the Windows Security app by searching for Defender from the Start menu.
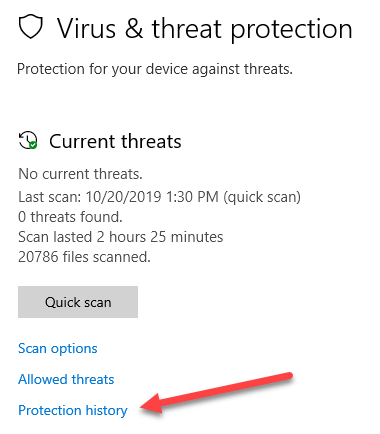
- Click Virus & threat protection and then Protection history.
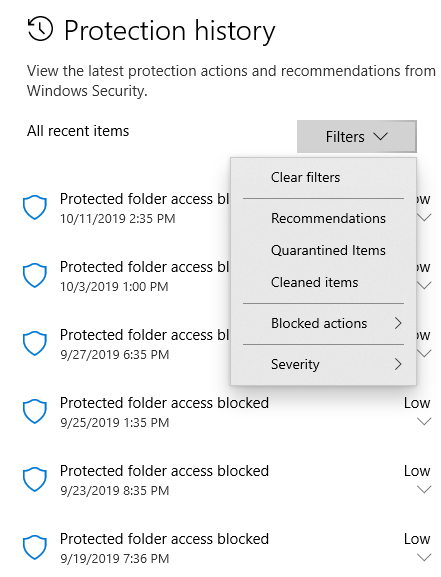
- To see only cleaned items or quarantined items, click on the Filters drop down. By default, you will see all items that have been blocked, cleaned or quarantined to prevent them from running on your computer.
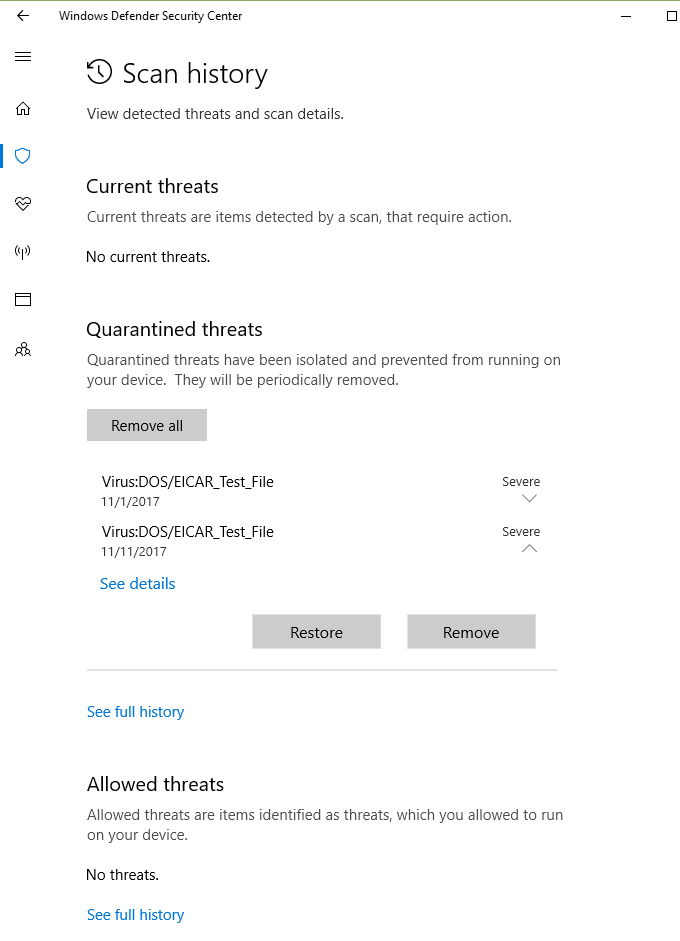
- Click on See details or the drop down arrow to view a list of all threats, if any, that were found on your computer. Highlight each item to review it. Windows Defender assigns a warning level to threats to help you evaluate each item and decide what to do with it.
- Check the box next to the threat and either Remove or Restore it. Microsoft recommends not restoring anything with a high or severe threat rating.
Windows Defender scans your device regularly to keep it safe from malicious threats with its real-time protection.
As explained above, users can also choose to run on-demand scans and customize a schedule based on the time and frequency that works best for them.

