Collaboration is important in many work spaces. Since most projects require files to be accessed by a lot of users, collaborative setups have become necessary.
Microsoft Excel is one is just one of the many programs used by companies worldwide. As such, the need for shared workbooks is crucial.

In this post, you’ll learn how you and your team can collaborate using Excel 2016 and other versions of Excel online.
Contents
If you have a local area connection, all users in the network can have access to any file. Not only that, any changes made to the file can be tracked. You can also set which users would have access to the file.
Start by saving the file in a location that can be accessed by everyone in your group. You can then set your file for collaboration.
Office 365 users will find the Shared Workbook feature hidden by default. This is because Microsoft encourages users to share workbooks online.
Here’s how you enable the feature. If you’re using an older version of Excel, you can skip to the succeeding section – Sharing a Document.
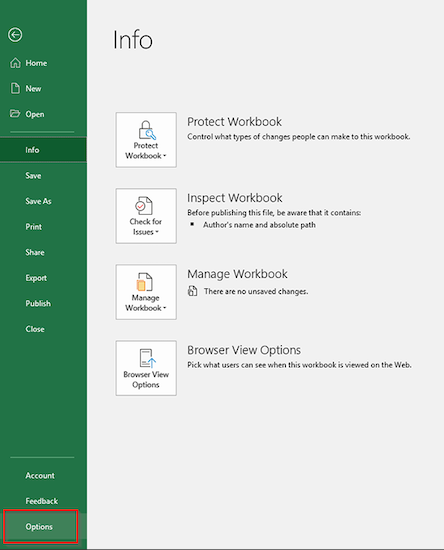
- Go to File > Options > Quick Access Toolbar.
- Under the Choose Commands From drop-down menu, select All Commands. Scroll through the list until you see Share Workbook (Legacy) and select that item.
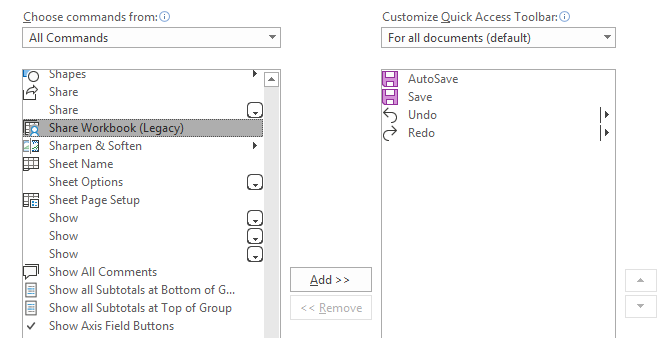
- Click the Add button.
- Do the same for the following commands:
- Track Changes (Legacy)
- Protect Sharing (Legacy)
- Compare and Merge Workbooks
- Click OK when you’re done.
Sharing a Document
- On the Review tab, click the Share Workbook button.
Those who followed the steps in the Adding Back Shared Workbook Feature section will find the Share Workbook button (along with the other commands you added) in the Quick Access Toolbar instead.
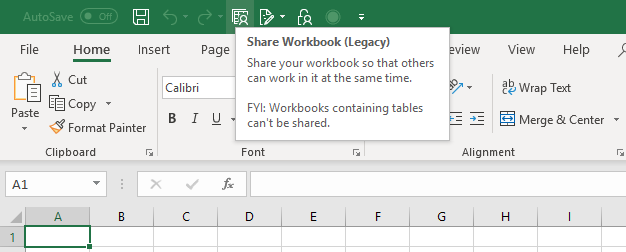
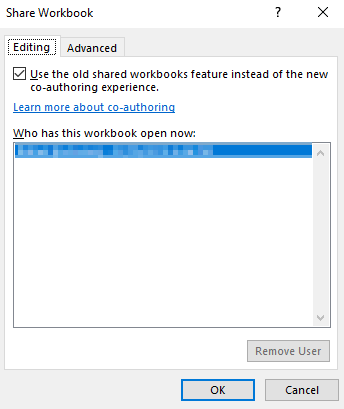
- This will prompt a dialog box to appear. Tick the option that enables the shared workbooks feature.
- Head over to the Advanced tab and enable Track Changes and other settings you might want to turn on.
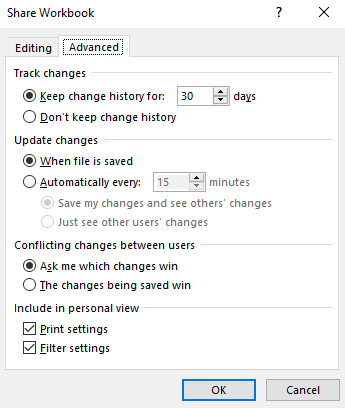
Protect Your File
The steps above give everyone access to your file. But it also gives everyone administrative access by default. Protecting your file means access to the file will be limited and tracked.
- Go to the Review tab and click the Protect and Share Workbook button.
- Tick the Sharing With Track Changes check box.
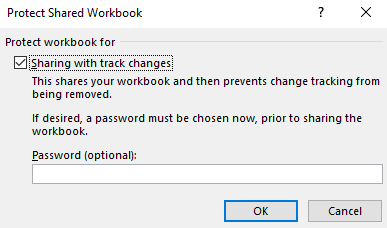
- You should also create a password otherwise anyone can revert the workbook to its original settings.
- Save your changes and exit.
While working offline is a great solution, you’re hampered by the necessity for a shared local drive. Working online is clearly the better choice. Here’s how you do it.
Using OneDrive
- Open the file and go to File > Share > Save to Cloud.
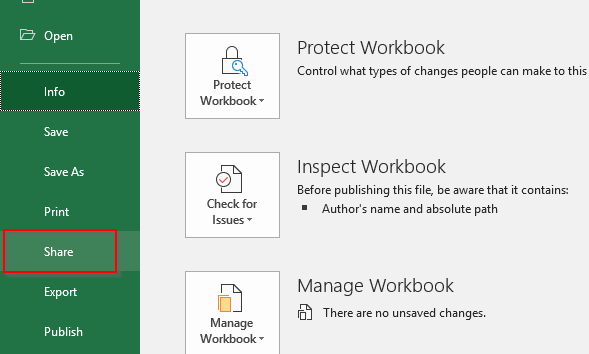
- Invite people you’d want to collaborate with by entering their email address. You can also set the permission settings.
- Click Share when you’re finished.
Using Google Drive
Google Drive is probably the easiest way to work on a project simultaneously. Anyone with a Google account can access files and edit as needed.
- Log into your account and go to Google Drive.
- Once you’re in, you can create a new file or upload an existing one.
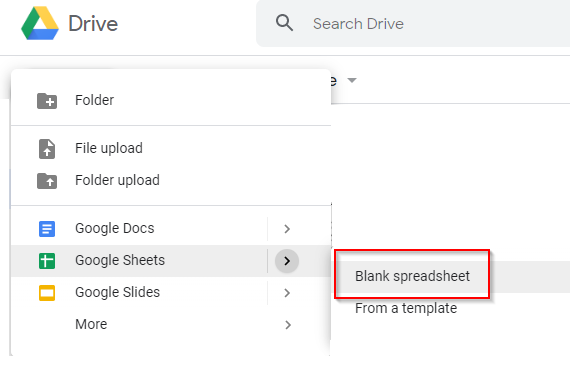
- Once your document has been created or uploaded, click the Share button on the upper-right corner of the worksheet.
This will give you the option to share the spreadsheet by entering an
email address or by sharing a link to your colleagues.
All changes are automatically tracked and saved. You can work on the document together in real-time which is very convenient.


