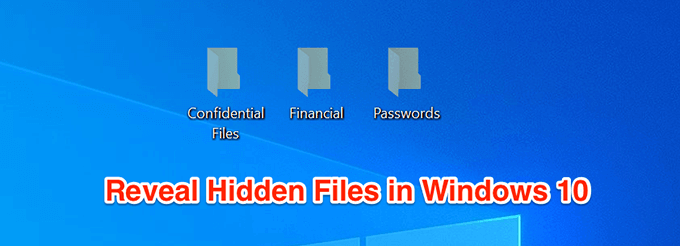
If you don’t already know, your computer has many more files than what you normally see in the File Explorer. Many of these files are hidden by your system for certain reasons. However, if you wish to access them, you can get your machine to show hidden files in Windows 10.
Once you’ve made the hidden files visible using any of the methods, you’ll find them available ready to use in your folders with File Explorer.

Contents
Use File Explorer To Show Hidden Files In Windows 10
The easiest way to show hidden files in Windows 10 is to enable an option in the File Explorer utility. It’ll then make all of the hidden files visible to you on your screen and it only takes turning on a single option in the tool.
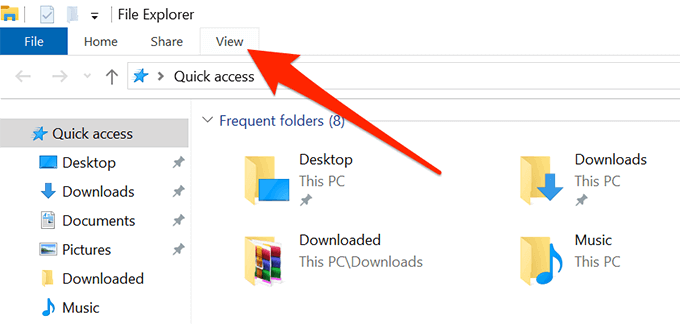
- Open any folder on your PC and it’ll launch the File Explorer utility. Then click on the View tab at the top to manage how the tool shows your files.
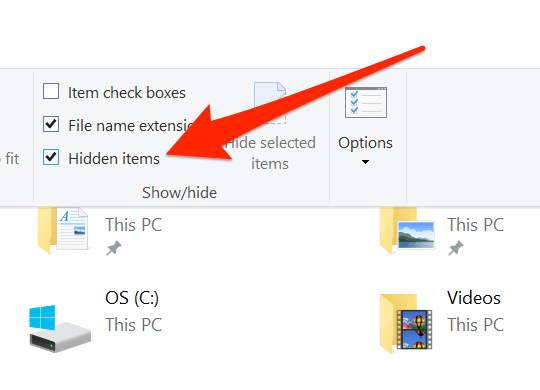
- Once you’re there, look towards the section that says Show/hide. There’s an option here that says Hidden items. It’ll be deselected by default and you need to select it to enable it.
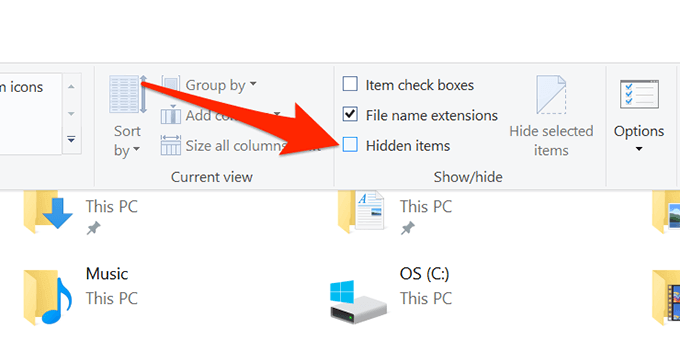
- Once it’s enabled, you’ll be able to see the hidden files available on your computer. You might want to move to the folder where there are hidden files if you don’t see anything in the current folder.
Use Control Panel To Show Hidden Files In Windows 10
If you’re someone who likes to use the traditional Control Panel utility to change your settings, you’ll be glad to know you can use it as well to show hidden files on your Windows 10 computer. Once again, it only requires enabling a single option.
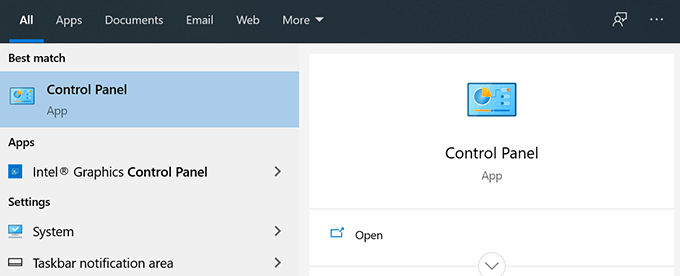
- Launch Control Panel by searching for and clicking on it in the Cortana search box.
- When it opens, select Large icons from the View by option at the top. Then find and click on the option that says File Explorer Options.
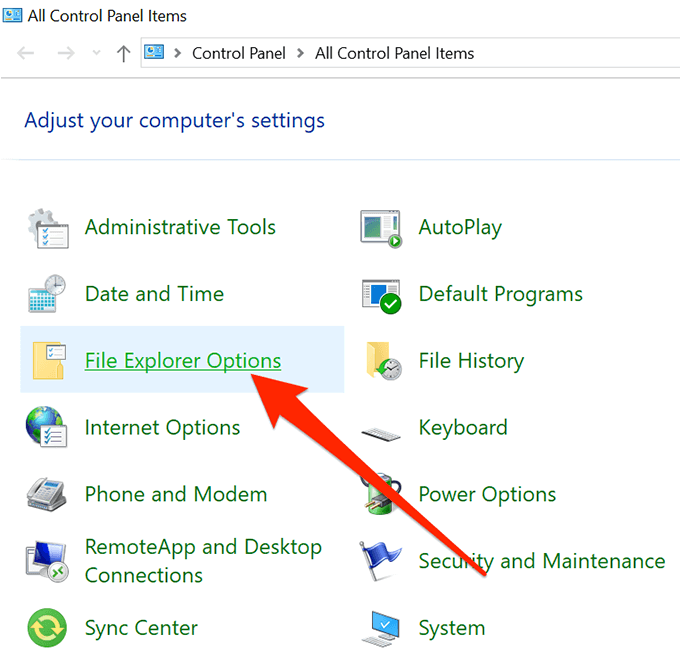
- Click on the View tab at the top to change your File Explorer view settings.
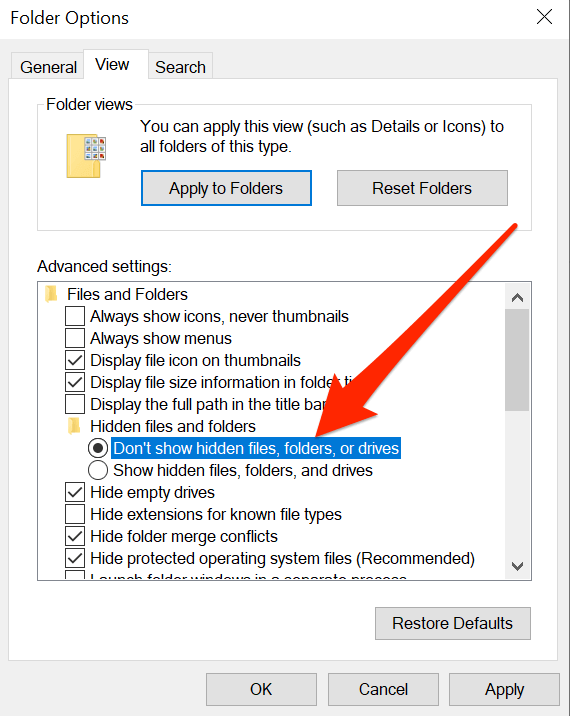
- You’ll find an option that says Show hidden files, folders, and drives on your screen. Enable this option to show hidden files and then click on Apply followed by OK.

Edit a Registry Key To Enable Hidden Files In Windows 10
You’ll probably not want to use a registry method for a task like showing hidden files but if that’s what you prefer for your tasks, you can use it and make all of your hidden files visible in your file manager.
- Press the Windows + R keys at the same time, type regedit in the box on your screen, and press Enter.
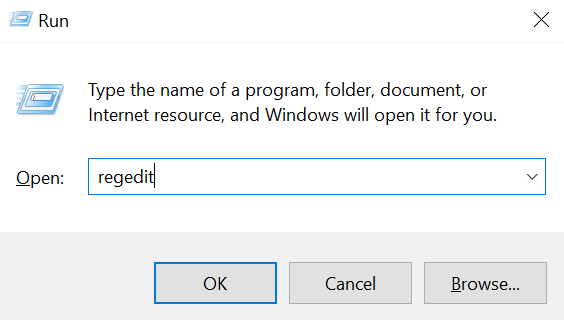
- When it opens, navigate to the following path.
HKEY_CURRENT_USERSoftwareMicrosoftWindowsCurrentVersionExplorerAdvanced
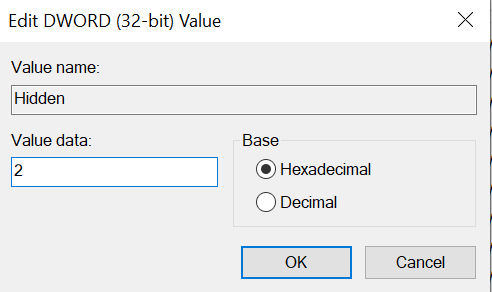
- On the right-hand side, you’ll find several options you can change. You want to find the one that says Hidden and double-click on it to open it.
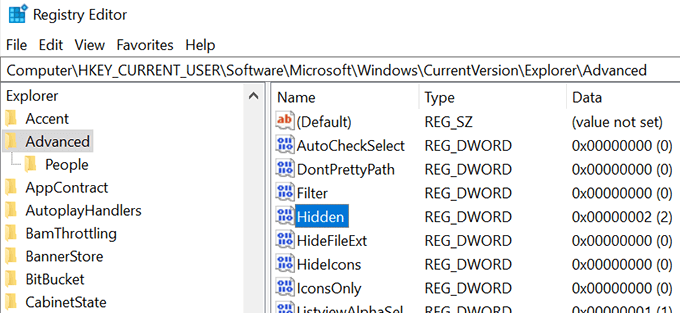
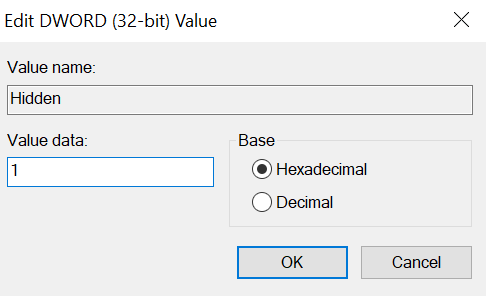
- By default, the entry should have a value of 2 which keeps your hidden files hidden. You need to change this value to 1 to show hidden files on your Windows 10 computer. Make the change and click on OK.
Recognizing Hidden Files In Windows 10
If this is your first time enabling and accessing hidden files on your machine, you’ll probably have no idea what these files look like. Even though these files are exactly the same as any other files on your computer, these look a bit different than the regular files when you view them in the Explorer.
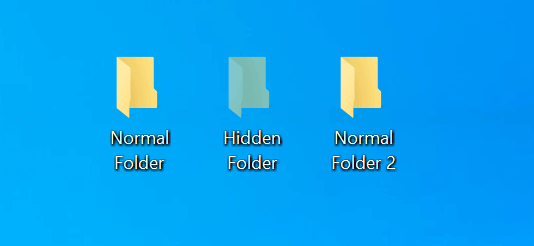
After enabling the option to show hidden files, you’ll see these files with a more light color to their icons. If you’re looking at a hidden folder, you’ll see that its icon doesn’t look as solid as that of a regular folder.
Recognizing hidden files and folders amidst all the regular ones shouldn’t be too difficult as their appearance makes it really easy for you to find them.
Hiding Files In Windows 10
If you’re done with what you wanted to do with your hidden files, you might want to disable them again on your computer. This way, they won’t come in your way when you’re working with the regular files on your computer.
Hiding back the hidden files is pretty easy actually in Windows 10. All you need to do is disable an option in the method that you used to enable these files and you’ll be all set.
- If you used the File Explorer method to show hidden files, open a File Explorer window, click on the View tab at the top, and untick the box that says Hidden items.
- If you went for the Control Panel method, go up to the File Explorer Options box and then select the option that says Don’t show hidden files, folders, or drives. Then click on Apply followed by OK.
- Windows Registry method users need to simply change the value of the Hidden entry to 2 and you should be all set. It’ll disable the option that shows hidden files on your PC.
Why Certain Files Are Always Hidden
If you’re anything like us, you’ll probably be curious to find out exactly why your computer hides certain files on your system. While those of you hiding their own files will have their own reasons for doing so, Microsoft actually only has a single reason for it: to prevent any accidental damage to your computer.
Most files that are hidden by default are actually your core system files. They’re hidden to ensure they don’t get deleted or modified. Since these are core files, even a bit of a modification to them may lead to the malfunction of the overall system.
Wrap Up
If you used any of these methods to unhide your files, we’d like to know what those files were and why you chose to unhide them. We await your response in the comments below.

