Windows 10 comes with a lot of features that help boost your productivity. One of those is the ability to split the screen in Windows 10 with very little effort.
As with most Windows 10 features, there are several ways to accomplish the same thing. The approach you choose depends on whether you prefer using your keyboard or your mouse.

Let’s take a look at the ways you can split the screen in Windows 10, as well as third party apps that help you do it more gracefully.
Also, check out our YouTube video from our network site where we walk you through the different options and you can watch it in action.
Contents
How to Split the Screen in Windows 10
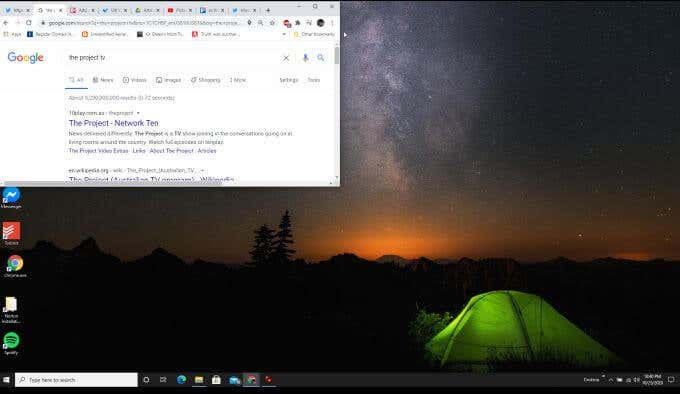
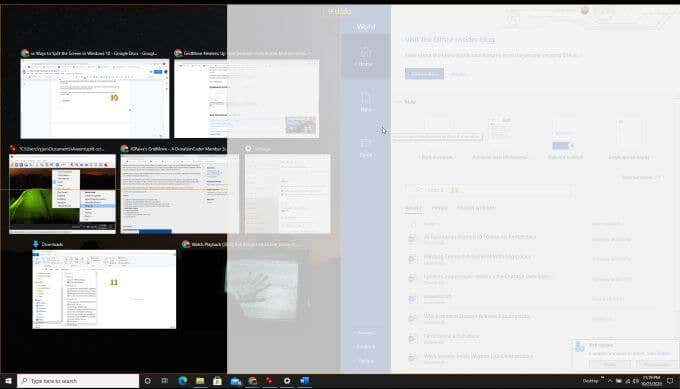
The fastest way to split your screen is to grab one window and slide it to one edge of your screen (the left or right). This will automatically size the window to fill only half the screen.
In the other half of the screen, you’ll see all of your current open windows. You can select one to fill the other half of the screen.
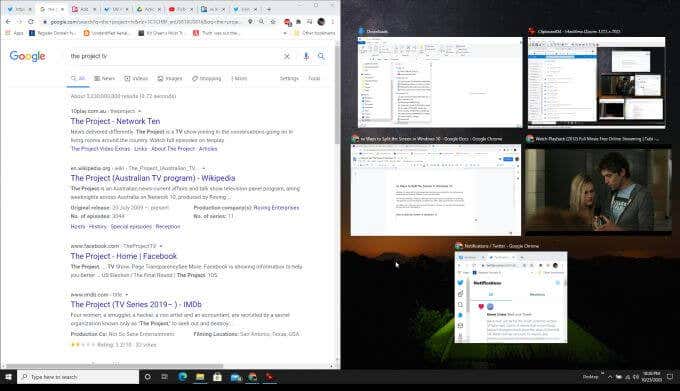
In just a few clicks, you’ve split the screen. You can still resize these windows if you want them to fill three-quarters and one-quarter of the screen. You aren’t limited to making the split-screen half-and-half.
If you prefer using your keyboard to do this:
- Select the first window, then select the Windows key.
- Press the Left or Right arrow key.
- This will fill the left or right half of the screen with the window you’ve selected.
- Repeat this process for a second window but select the other Left or Right key to fill the other half of the screen.
How to Split Your Screen in Four Windows
You aren’t limited to a 50/50 screen split either. You can split a screen four ways by combining the process above with a second click of the up or down arrow.
Here’s how it works.
Repeat the process above, but after selecting the Left key, follow it by the Up or Down arrow key to move the window to the upper or lower corner of that side of the screen.
Repeat this with additional screens, pressing Windows-Left-Down, Windows-Right-Up and Windows-Right-Down to fill the other corners of the screen.
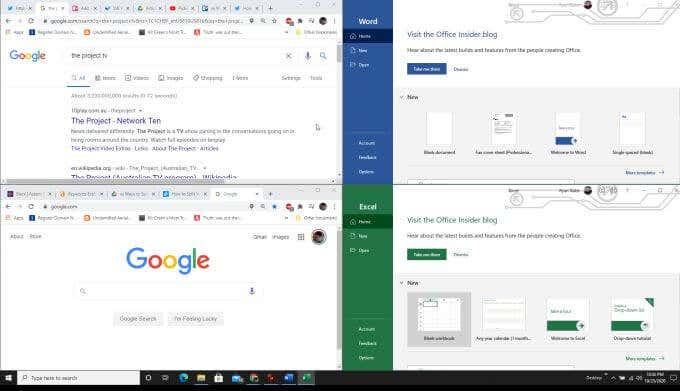
Note: This four-window feature only works with the 2020 update to Windows 10, so make sure you’ve installed the latest Windows updates if this doesn’t appear to be working for you.
How to Enable Windows Snap Assist
If you find that Windows Snap Assist isn’t working at all for you and you’ve made sure you’ve installed the latest Windows Updates, you may need to enable the Snap Assist feature.
To enable Windows Snap Assist:
- Select the Start menu and type Settings, then select the Settings app.
- Select the System icon and then select Multitasking from the left menu.
- Make sure the Snap windows toggle is turned on, and the three checkboxes under it are enabled.
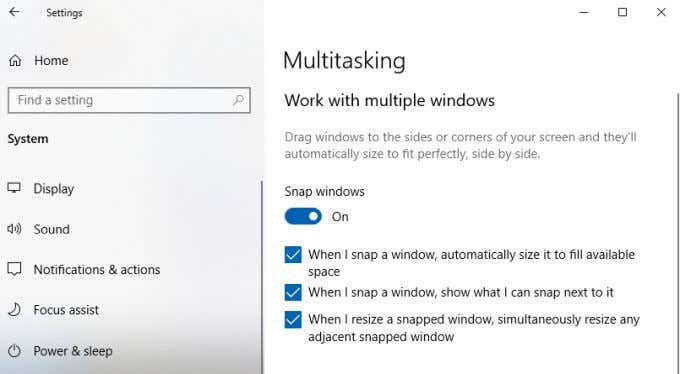
Once these are enabled, all of the Windows snap features listed above should work as described.
Use Third-Party Apps to Split Screen in Windows 10
Before Microsoft updated Windows Snap Assist with additional features (like allowing splitting windows across four quadrants of the screen), there were a lot of apps that provided that functionality.
Many of those apps really aren’t necessary anymore, but a few do extend the features beyond those currently offered by Windows 10 Snap Assist.
The following are some of the most useful apps you can use to split your screen in more creative ways.
1. GridMove
When you install GridMove, it basically enhances Windows Snap assist by letting you choose from different templates for the snap areas.
After installation, just right click on the app icon in the taskbar and select Templates to see a list of templates you can choose from.
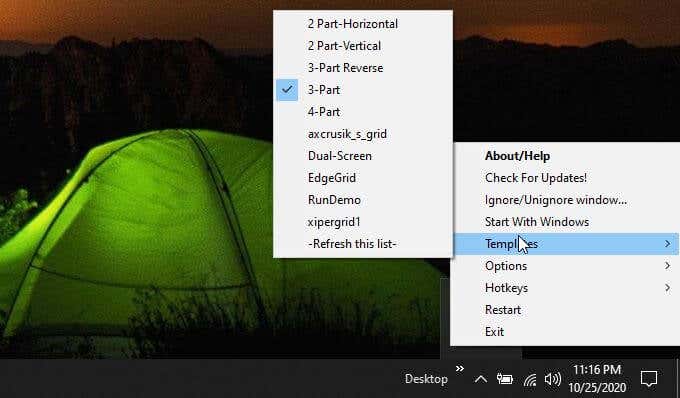
When you slide a window to any edge of the screen, GridMove takes over and displays an orange grid. Just slide the window into any of those boxes and it’ll fill that box to the edges.
You can repeat this for as many windows as you like until all of the GridMove boxes are filled.
GridMove also works on multiple monitors, so you’ll see available boxes across all your screens that you can move the window to.
2. AquaSnap
The multitasking app called AquaSnap offers a variety of useful windows snap features included with its free version.
Install the app and you’ll see the icon appear at the lower right corner of the task bar. Right-click the icon so access the Settings area.

You can change a lot about how windows appear (transparent or otherwise), and how windows will snap when you adjust them to any edge of the screen.
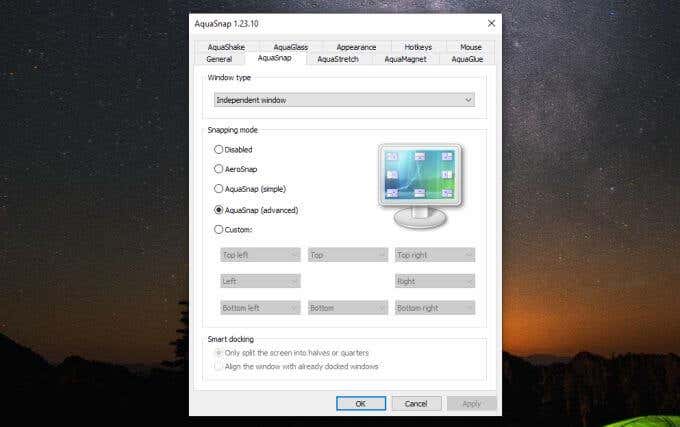
However, by default, the app will do the job well. Just grab any window you want to snap and slide it to any edge or corner of the screen.
You’ll see a small icon appear showing you how the window will snap. Corners will snap the window to a quarter size at that corner of the screen. Side or top snaps will fill that half of the screen with that window.
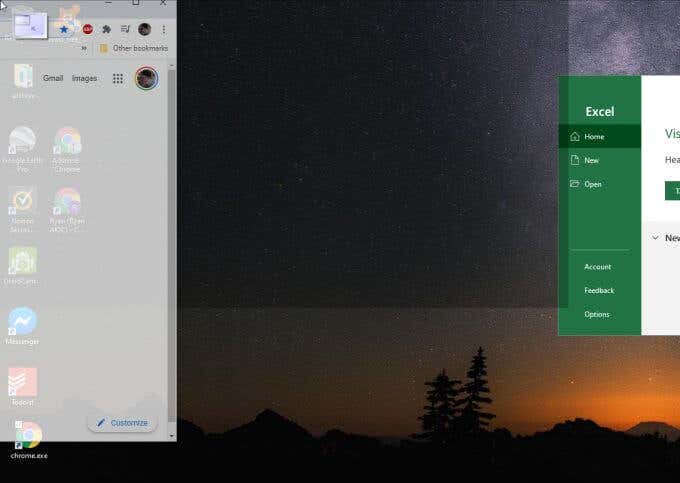
This saves a bit of time over the Windows option since you don’t have to use any keyboard keys. It also only requires one mouse movement rather than several mouse movements and keyboard clicks to adjust to the corners of the screen.
Split Screen in Windows 10 However You Like
The apps listed above are two free apps that can enhance the snap assist feature in Windows 10. Most of the other apps on the market are not free, and for most people the additional features aren’t really worth the extra cost.
Whichever approach you choose, learning how to snap windows to either the sides or corners of the screen can dramatically improve your productivity. It lets you monitor multiple online apps, compare data, or multitask in ways that wouldn’t be possible without this feature.
So, give Windows Snap Assist a try, and if it isn’t quite good enough, install the free apps and give them a test run to see if they do what you need. And if you don’t like Snap Assist at all, it’s possible to disable it.

