Do you keep receiving a “program can’t start because MSVCR120.dll is missing” error while attempting to launch an application in Windows 10? Typically, the reason for that lies with a corrupt or missing Visual C++ Redistributable installation.
The Visual C++ Redistributable package contains crucial runtime components for programs built using C++ to work correctly. Although there are many versions of the package, the MSVCR120.dll file is specific to the Visual C++ 2013 Redistributable.


The list of troubleshooting methods that follow should help you fix the MSVCR120.dll missing error on Windows.
Contents
- 1 1. Install Microsoft Visual C++ 2013 Redistributable
- 2 2. Repair Microsoft Visual C++ 2013 Redistributable
- 3 3. Copy MSVCR120.dll to Program Folder
- 4 4. Repair or Re-install Program
- 5 5. Update Program
- 6 6. Install Windows 10 Updates
- 7 7. Run the System File Checker
- 8 8. Scan for Computer Viruses
- 9 Lost and Found
1. Install Microsoft Visual C++ 2013 Redistributable
Programs that depend on the Visual C++ 2013 Redistributable will automatically add the package’s relevant components to your computer during installation.
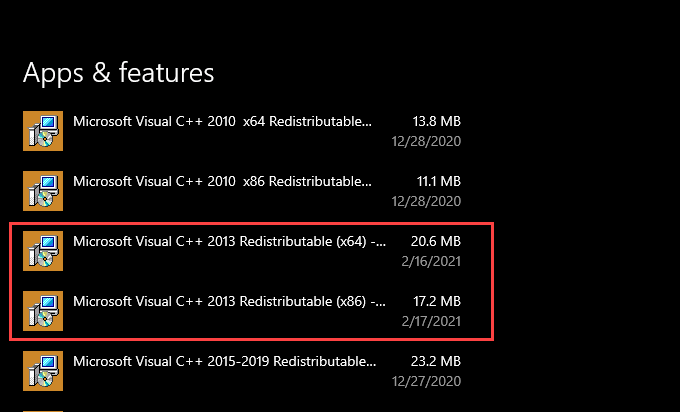
To confirm, head over to Start > Settings > Apps > Apps & feature. Then, scroll down and check for Microsoft Visual C++ 2013 Redistributable. You should see separate listings—(x64) and (x86)—of the same package unless you run a 32-bit version of Windows.
If you can’t locate the Visual C++ 2013 Redistributable, you must install it manually. Visit the Visual C++ Redistributable Packages for Visual Studio 2013 page at the official Microsoft website, select Download, and grab the vredist_x64.exe and vcredist_x86.exe installers.
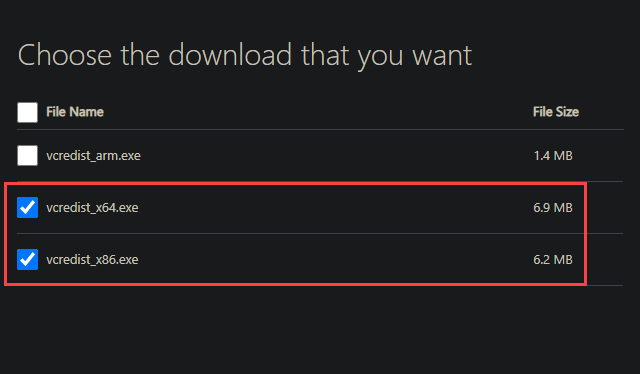
Follow by running both installers one after the other to install the Visual C++ 2013 Redistributable. Next, reboot your computer and check if the “MSVCR120.dll is missing” error recurs.
Alternatively, you can use the Visual C++ 2013 Redistributable installers from the installation source of the program causing the ‘msvcr120.dll is missing’ error. They should be present within a folder labeled VCRedist.
2. Repair Microsoft Visual C++ 2013 Redistributable
If the Microsoft Visual C++ 2013 Redistributable is present on your computer, you must repair it to rule out issues caused by file corruption.
Start by selecting Microsoft Visual C++ 2013 Redistributable (x64) from within the Apps section of the Settings app and choose Modify.
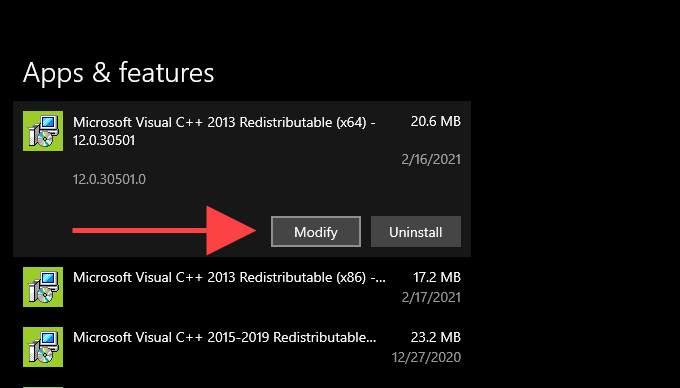
On the Modify Setup wizard that shows up, select Repair and wait for it to repair the installation. Then, repeat what you just did for Microsoft Visual C++ 2013 Redistributable (x86).
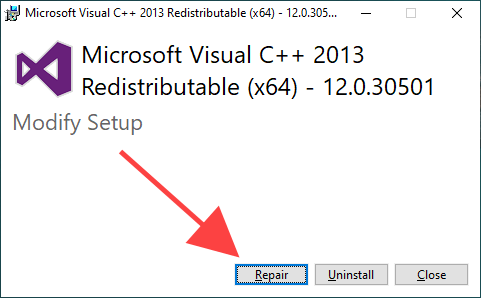
If you encounter any issues while repairing the Visual C++ 2013 Redistributable, use the Uninstall option to remove both packages from your computer. Next, download new installers and use them to reinstall the Visual C++ 2013 Redistributable from scratch.
3. Copy MSVCR120.dll to Program Folder
In some instances, copying the MSVCR120.dll file to a problematic program’s installation directory can help eliminate the “MSVCR120.dll is missing” error.
You should find a 64-bit and a 32-bit version of the MSVCR120.dll file located within the following directories:
- Local Disk (C:) > Windows > System32 — 64-bit version
- Local Disk (C:) > Windows > SysWOW64 — 32-bit version
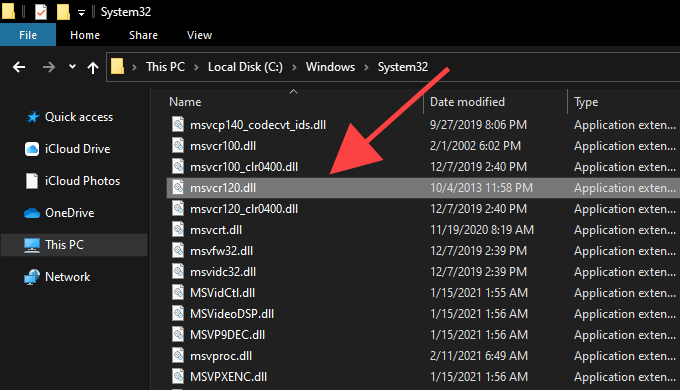
Depending on the program’s version, copy and paste the MSVCR120.dll file into the root of its installation folder. Programs located under the Program Files (x86) folder, for example, run in 32-bit, so you must use the MSVCR120.dll file from SysWOW64.
Note: If you use a 32-bit version of Windows 10, you must use the MSVCR120.dll file from the System32 folder.
4. Repair or Re-install Program
If you still keep receiving the “MSVCR120.dll is missing” error on your computer, try repairing or reinstalling the program that causes it to show up. Hopefully, that should take care of issues stopping it from working with the Visual C++ 2013 Redistributable.
Go to Start > Settings > Apps. Then, select the program and pick Modify to repair it. If the option appears grayed out, remove the program and reinstall it instead.
5. Update Program
It’s also a good idea to update the program. Obtain the latest version of the application installer—via the developer’s website, for example—and use it to update or reinstall the program.
6. Install Windows 10 Updates
The latest Windows 10 updates contain fewer bugs and glitches that could prevent programs from locating the Visual C++ 2013 Redistributable runtime components. If you haven’t updated your computer in a while, you should do that now.
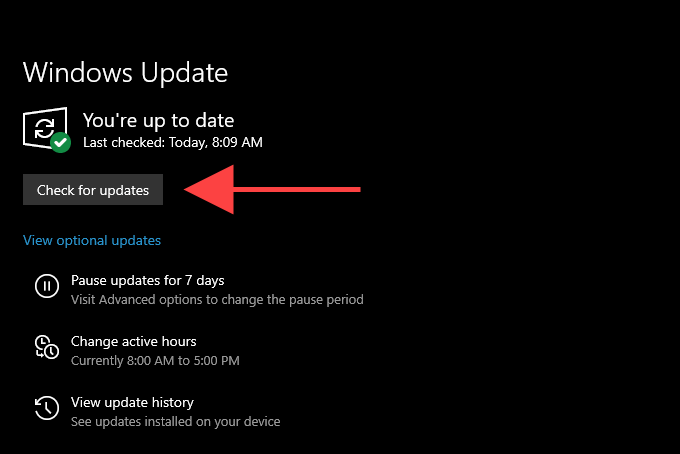
Open the Start menu and go to Settings > Update & Security. Then, select Check for updates and select Download and Install to apply any updates.
7. Run the System File Checker
Although the Visual C++ 2013 Redistributable isn’t a part of Windows 10, you should check and fix any system-related errors using the System File Checker regardless.
Press Windows+S to open Windows Search, type cmd, and select Run as administrator. Then, type sfc /scannow into the elevated Command Prompt console and press Enter.

An SFC scan usually takes several minutes to complete. If it appears to get stuck, do be patient, and it should start moving again after a while.
Additionally, you can run a DISM (Deployment Image Servicing and Management) scan and use the Check Disk (chkdsk) to fix additional errors on your computer.
8. Scan for Computer Viruses
No luck yet? You should remove the possibility of a malware infection by scanning for computer viruses.
Try using Windows 10’s native Windows Security tool. You can bring it up by selecting the Windows Security icon on the system tray. Once it shows up, select Virus & threat protection, pick Scan options, switch to Full scan, and choose Scan.
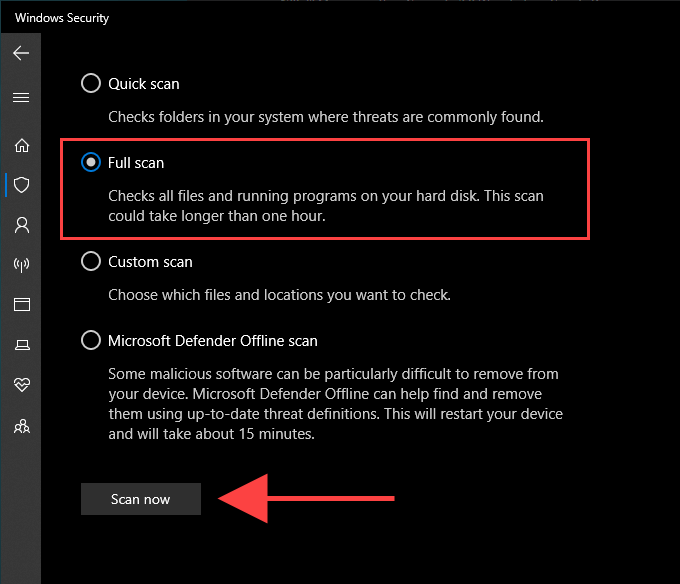
If Windows Security fails to detect anything, you should continue scanning with a dedicated malware removal tool. The free version of Malwarebytes is an excellent choice and does an outstanding job at ridding your computer of viruses.
Lost and Found
In most cases, installing or repairing the Visual C++ 2013 Redistributable should permanently take care of the “MSVCR120.dll is missing” issue.
If you continue to receive the error despite working your way through the rest of the suggestions, you should consider resetting Windows 10 to factory defaults. That may resolve any underlying issues causing the error to show up. But only go ahead after weighing the pros and cons of a lengthy operating system reset procedure.


