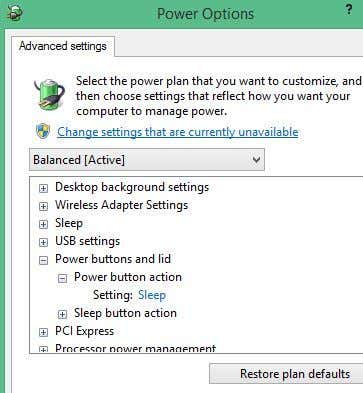
Previously, I had written an article about Windows 7 not going to sleep mode properly. One would think this problem would be fixed in the latest version of Windows operating system: Windows 10. Unfortunately, this is not the case. Actually, it seems to be an issue with certain versions of Windows 10.
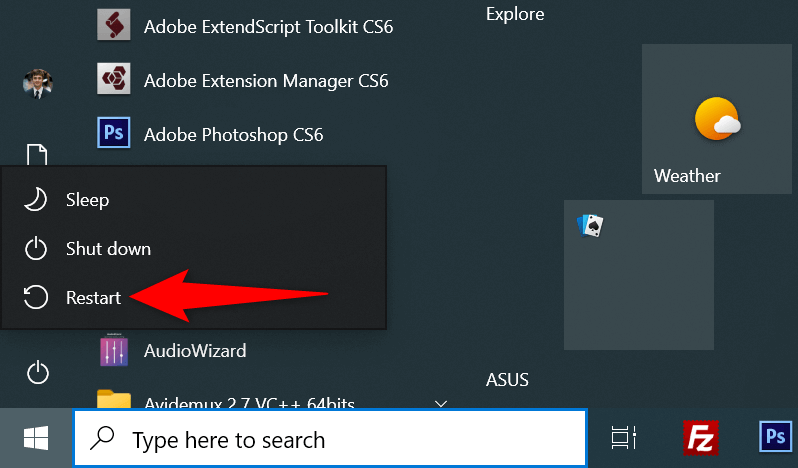
Once I upgraded to the newest version of Windows 10, the computer simply wouldn’t sleep! Now let me clarify a little. The computer will go to sleep if I manually press the Power button (I have it set so that the power button puts the computer to sleep) or choose the Sleep option from the Start menu.
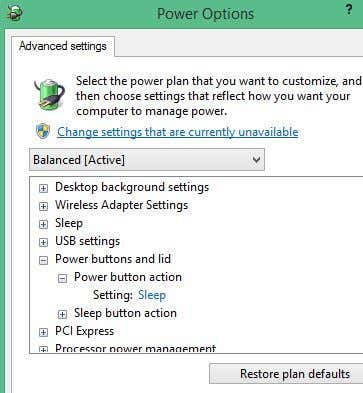
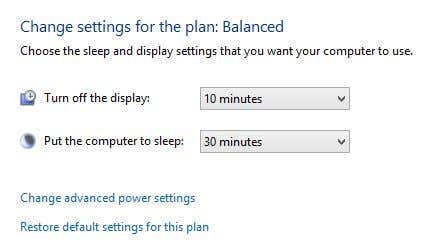
The problem with sleep in Windows 10 is the setting where you set the time after which the computer should automatically go to sleep. I had it setup so that the computer should sleep after 30 minutes. However, this never happens!
Unfortunately, there are a lot of different reasons why this could be happening, so you kind of have to go through each option below and try it out. Before we change any settings, however, you can generate a power report, which if you’re lucky, might just tell you what’s preventing the computer from sleeping.
Contents
Generate Power Report
The power report you generate in Windows 10 can sometimes tell you what is preventing the computer from going to sleep. I ran it and got some useful info. To run the power report, open an administrative command prompt and type in the following command:
powercfg.exe /energy

It’ll take about a minute or so to run and after it finishes, it’ll tell you how many errors and warnings were found. Hopefully, if you’re having this sleep problem on your Windows 10 machine, you’ll have some errors!
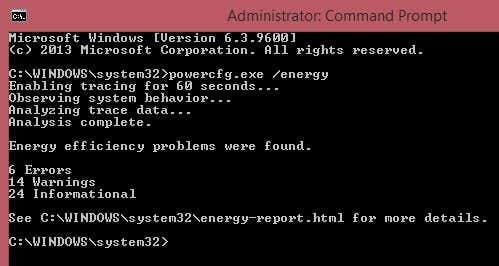
As you can see, I had 6 errors and 14 warnings. The errors is really the only section you have to look at. In order to view the report, you have to go to C:WindowsSystem32 and open the energy-report.html file in your browser. However, for some odd reason, the file would not load in any browser when I tried to open it from that directory, so I just copied the report to my desktop and then opened it and it worked fine.

The first error is the one that seems to be causing my PC sleep issues:
System Availability Requests:System Required Request
The device or driver has made a request to prevent the system from automatically entering sleep.
Driver Name FileSystemsrvnet
The report is useful because it clearly tells you whether something is preventing the computer from entering sleep or not. The other 5 errors clearly state that they won’t prevent the computer from going to sleep.
Below, I talk about how to fix the SRVNET error, which is the most common error that prevents a computer from sleeping. However, you could have a power report like the one below:
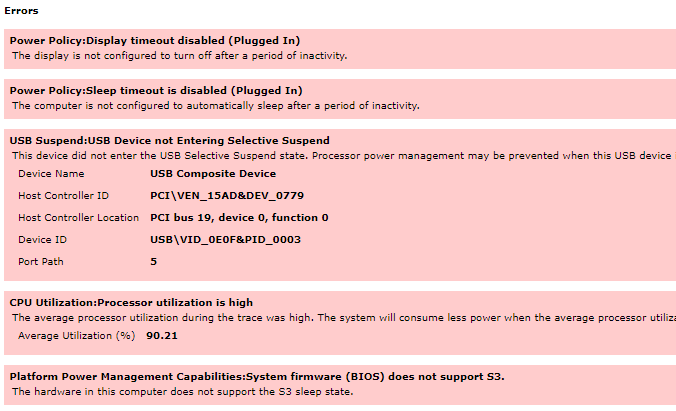
Here there are a couple of issues. Firstly, the computer is not set to sleep or turn off the display when plugged in. Next, there is a USB device that is not entering Selective Suspend state, which will prevent the PC from sleeping.
Lastly, the hardware of the computer does not support the S3 sleep state, which means there is nothing you can do about it. If the hardware doesn’t support a sleep state, then your only option is to update the BIOS and hope that the setting appears.
Network Adapter
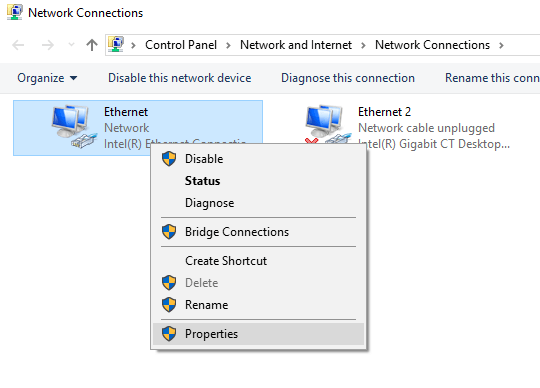
One other major component that can prevent a computer from sleeping is the network card. Firstly, you should update the driver for the network card and see if that fixes the problem. If not, you need to go to Control Panel, click on Network and Sharing Center, then click on Change adapter settings.
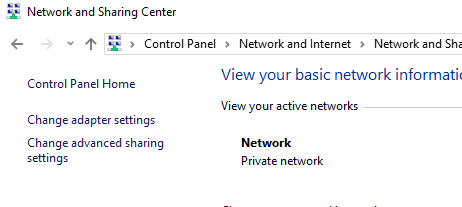
Right-click on the active network adapter(s) and choose Properties. If you have more than one active network adapter, then follow the procedure below for all of them.
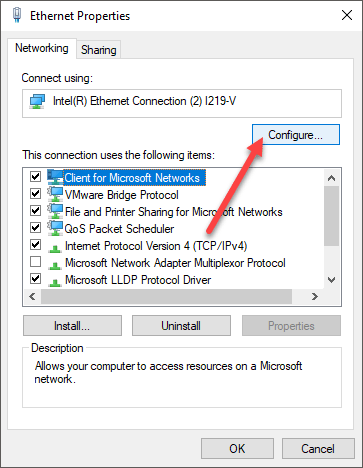
Click on the Configure button up at the top on the Ethernet properties dialog box.
Finally, click on the Power Management tab and make sure the Allow the computer to turn off this device to save power box is checked.
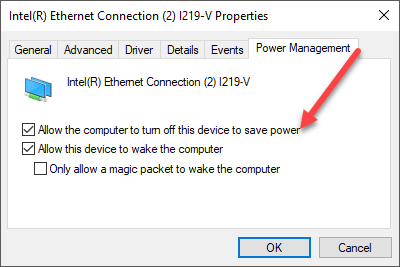
This will allow the computer to turn off the network adapter when the computer is set to go to sleep. If you have any other kind of specialty hardware installed on your system, follow the same procedure for those components.
Fixing SRVNET Active Remote Request
So how do you fix this particular issue? There are a couple of things you can try. We’ll start with the easier stuff and move on to the more technical solutions. Try them in order and check your system after each method to see if it fixed the sleeping issue in Windows 10.
Method 1 – HomeGroup
The first thing you can do is to go ahead and remove yourself from the Windows HomeGroup, if you happen to be joined to one. Apparently, the HomeGroup can become corrupt or misconfigured in some way and it will cause the computer to think there is an active remote request to the computer. This means it’ll never sleep.
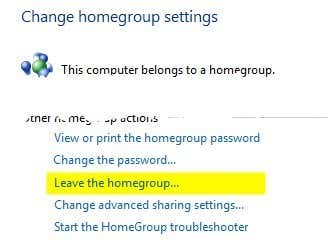
To leave a HomeGroup, open Control Panel and click on HomeGroup. Then scroll down and click on the Leave the homegroup link. If you really need to use a HomeGroup, then you can also leave it and create a new one on all of the computers that are part of the HomeGroup. This will also reset it and hopefully fix the issue.
Method 2 – Media Streaming
The second thing you can try is to turn off media streaming. Media Streaming is a feature that lets you turn your computer into a kind of local media server whereby people can access pictures, videos, music over the network. To turn off media streaming, go to Control Panel again, click on Network and Sharing Center (or Network & Internet, if not using icons). Then click on Change Advanced Sharing Settings in the left hand column.

Now scroll down to the Media Streaming section and click on the Choose media streaming options link.
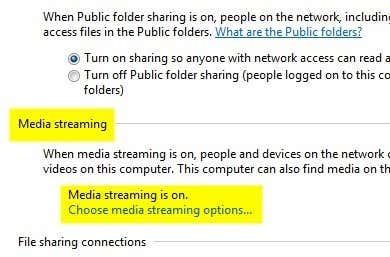
Now go ahead and click on the Block All button at the top right. Then click Ok at the bottom and that will turn off media streaming.

Try to restart your computer and check to see if it goes to sleep at the appropriate time. If it doesn’t then read on!
Method 3 – Check Driver in Device Manager
The SRVNET driver is normally network related. This can either be remote network connections, which we tried to disable in the two methods above, or it could be the network card itself on the computer. Most network cards have power management and wake-on-lan options. The first thing you’ll want to do is update the driver for your network card by downloading it from the card manufacturer’s website.
Next, go to Device Manager, expand Network adapters and then right-click on the network card and choose Properties to bring up the properties dialog box.
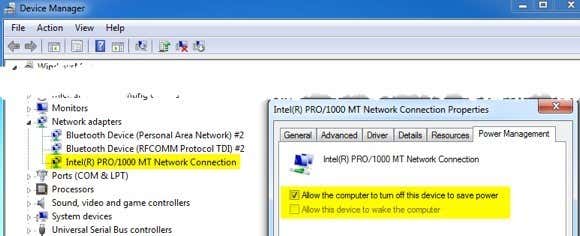
Now the settings you want to change or take a look at can reside in one of two places. Either on the Advanced tab in the Property box or in the Power Management tab. If you don’t have the Power Management tab, then click on Advanced and there should be a property in the listbox called Power Saving Mode or something similar.
Make sure the Allow the computer to turn off this device to save power is checked. If Allow this device to wake the computer is checked, go ahead and uncheck it and see if that solves the issue.
Method 4 – Override SRVNET
The last thing you can do is to simply override SRVNET in the operating system. This means that even if there are remote connections to the computer, they will simply be overridden and the computer will be allowed to sleep. This basically allows the computer to sleep with remote opens on the system.
You’ll need to open an administrative command prompt and type in the following command:
powercfg /requestsoverride DRIVER srvnet System

Your computer should definitely go to sleep at this point if nothing else worked! The command should not cause any issues with your computer, but if you do find something is amiss, you can undo the above command with the following:
powercfg /requestsoverride DRIVER srvnet
If you’re still having issues with your Windows 10 machine going to sleep, let us know in the comments what you tried and what your setup is like. Hopefully this guide will fix the issue for most users. Enjoy!

