There is a little known feature in word that allows you to gather groups of text and/or graphics from different locations in a Word document and then paste all of that text into another location.
It is called the Spike and it is different in than the Clipboard, which allows you work with only one copied set of text at a time. The Spike is named after an old-fashioned paper holder onto which people poked papers as they were done with them. You may still see the old-fashioned version of the Spike in use in some retail stores.
NOTE: The Spike feature is available in versions of Word from 97 through 2016.
How to Use Spike in Word
To gather information into the Spike in Word, simply select the text you want to add and press Ctrl + F3. This cuts the information from your document and places it into the Spike. You can continue to cut parts of your document and Word will continue to add the cut text to the Spike.
NOTE: When you use the Spike, you are cutting or removing text from its original location, NOT copying text.
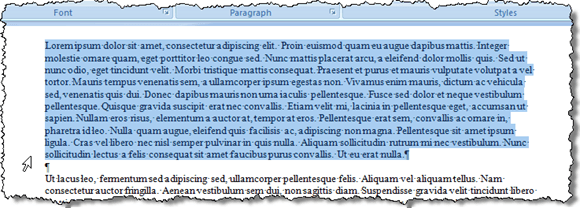
To paste the collected text, place the insertion point at the location in the current document, a new document, or another existing document where you want to paste the text. Press Ctrl + Shift + F3 to paste the text from the Spike at the insertion point. All the information in the Spike (not just the last text you cut into there) is pasted into your document at the insertion point.
Pressing Ctrl + Shift + F3 also erases all the information in the Spike. If you don’t want to clear the Spike when you paste the contents of it, place the insertion point where you want to paste the contents, type “spike” (without the quotes), and press F3.
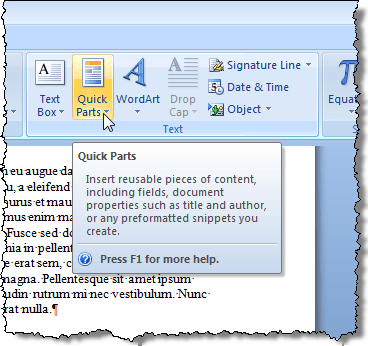
You can also view the contents of the Spike without pasting the contents or emptying the Spike. To do this in Word 2007 and later, click the Insert tab on the ribbon and find the Quick Parts button in the Text section.
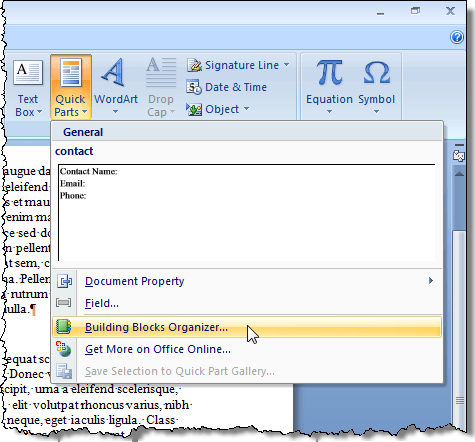
Click the arrow on the Quick Parts button and select Building Blocks Organizer, if you are using Word 2007, or AutoText, if you are using Word 2010, from the drop-down menu.
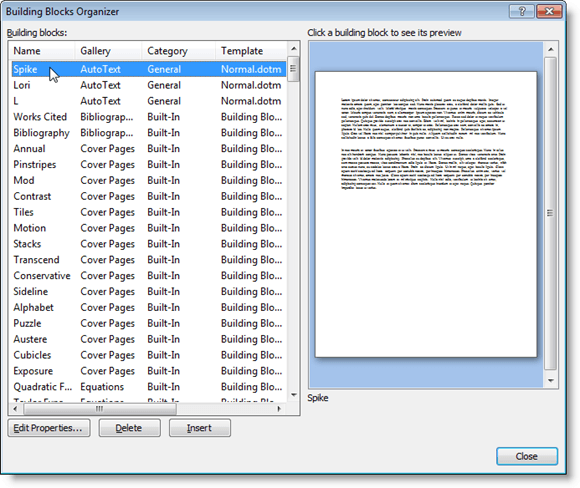
In Word 2007, the Building Blocks Organizer dialog box displays. Click the Spike in the list on the left to display a preview of the text and/or graphics the Spike currently contains.
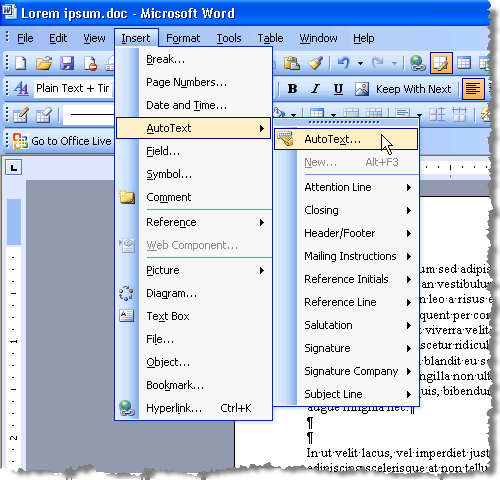
To view the contents of the Spike, if you are using Word 2003 or earlier, select AutoText | AutoText from the Insert menu.
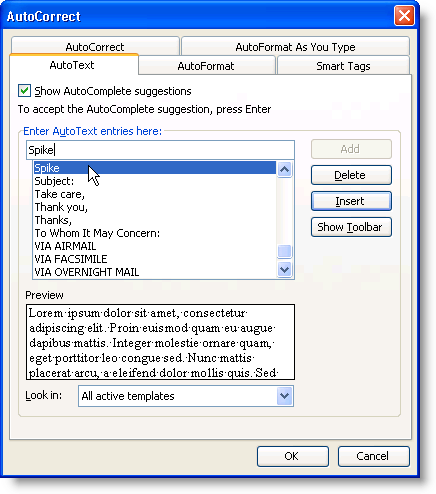
The AutoCorrect dialog box displays. On the AutoText tab, type “spike” (without the quotes) in the Enter AutoText entries here edit box to quickly find the Spike in the list. The Spike is automatically selected once it is found and you can see the contents of the Spike in the Preview box below the list of AutoText entries.
You may have noticed that when you pasted the contents of the Spike, there was an extra blank line between each item you added to the Spike. That’s due to Smart Paragraph Selection.
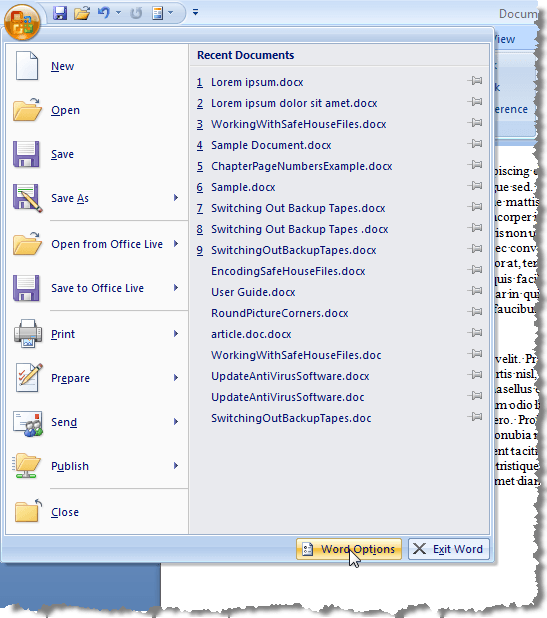
With Smart Paragraph Selection enabled, it’s impossible to select a paragraph without grabbing that final paragraph mark as well. You might want to turn off Smart Paragraph Selection to avoid creating blank lines between each of the items on the Spike. To do this in Word 2007, select Word Options from the Office menu.
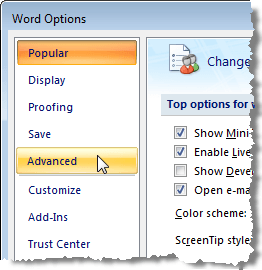
On the Word Options dialog box, click Advanced in the list on the left.
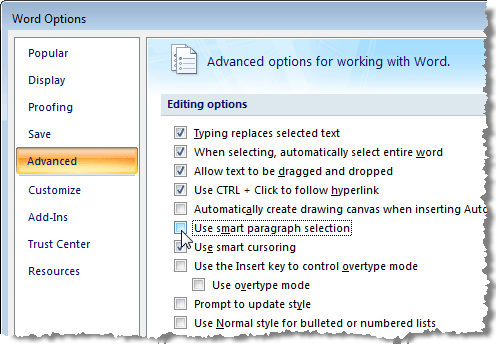
In the Editing options section on the right, select the Use smart paragraph selection check box so there is no check mark in the check box.
Click OK to close the Word Options dialog box.
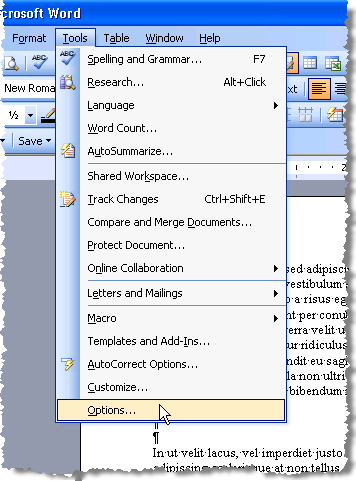
To turn off Smart Paragraph Selection in Word 2003 or earlier, select Options from the Tools menu.
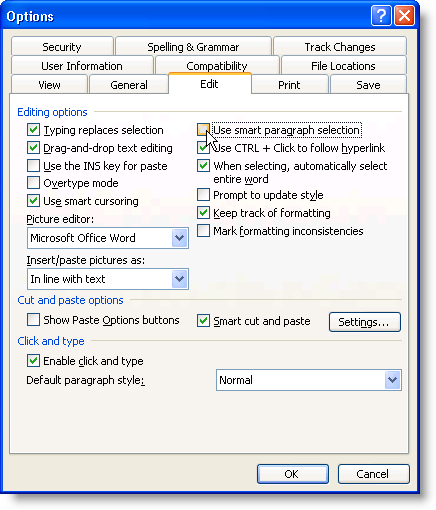
On the Options dialog box, click the Edit tab. In the Editing options section, select the Use smart paragraph selection check box so there is no check mark in the check box.
Click OK to close the Options dialog box.
The Spike is a useful feature if you need to quickly and easily rearrange and move non-contiguous text or create a new document from pieces of another document. Enjoy!


