When you switch on a Windows PC, a number of hidden system services and processes kick into action. These processes determine how Windows appears on your screen, how your device connects to your local network, how you access connected devices, sign into Windows, and more. Without them, your PC won’t work.
One of the more unusual processes that you’ll see in Windows 10 is the lockapp.exe process. This isn’t just any old executable file, as lockapp.exe is responsible for drawing part of the lock screen (the screen you’ll see before you sign in). If you’re curious to learn more about this system process, here’s what you’ll need to know.


Contents
What Is lockapp.exe and Is It Safe?
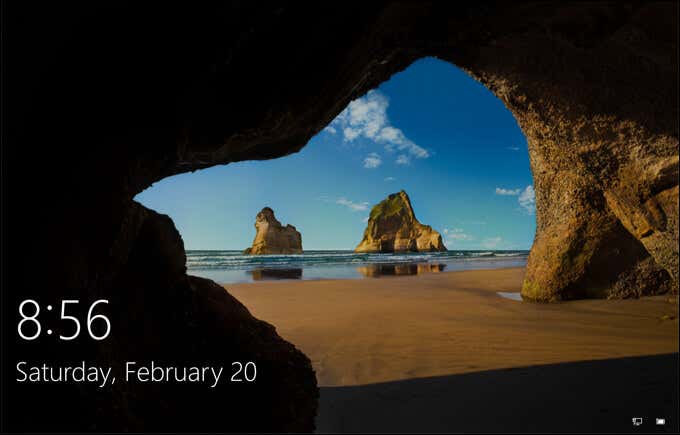
When you first load your Windows 10 PC, you won’t immediately see a sign in prompt—you’ll see a background, a clock, and the date, as well as any other status items you’ve added, including your network connectivity and battery levels. This is the lock screen, which is nothing more than a glamorous splash screen for your PC.
The lockapp.exe process is what generates and controls this screen. It doesn’t do much else and shouldn’t really cause much trouble to your system. While some users have reported high CPU and RAM usage from time to time, this is very much an unusual situation, as lockapp.exe shouldn’t use much during normal usage.

When you sign in, lockapp.exe should be dormant or hidden, waiting until you lock your PC or sign out again. As a genuine system process, lockapp.exe is entirely safe, but in the rare event that malware is masquerading on your system with the same file name, you can check if it’s genuine by using the steps below.
Can lockapp.exe Cause High CPU, RAM or Other High System Resource Usage?
In normal usage, the lockapp.exe process should use a very limited amount of your system resources—we’re talking a few megabytes of RAM here and there. CPU usage is also likely to be limited during the sign-in process, and should be zero once you’ve signed in.
This is because lockapp.exe is either in “suspended” mode once you sign in (meaning it isn’t actively running) or it’s stopped and hidden completely. You can check this yourself using the Task Manager, but it should be the same for all Windows 10 users.
Troubleshooting lockapp.exe Issues on Windows 10
However, there are reports online that lockapp.exe causes some CPU and RAM issues. This is unusual and could be caused by a bug or corrupt system files. If you suspect your system files are corrupted, you can run the System File Checker (SFC) tool.
- To do this, right-click the Start menu and select the Windows PowerShell (Admin) option.
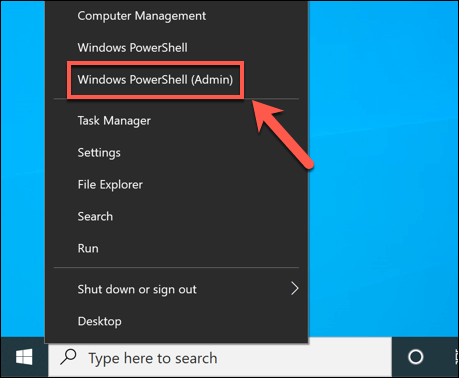
- In the new PowerShell window, type sfc /scannow and select the Enter key on your keyboard.

The SFC tool will take some time to complete a scan of your system. If it detects any corrupt files, it’ll use a reserved snapshot of your system files to restore them. You may need to restart your PC once this is done.
If SFC doesn’t detect corrupt files, but your system is out-of-date, you might be missing out on important bug fixes. To resolve this, you’ll need to check for any updates.
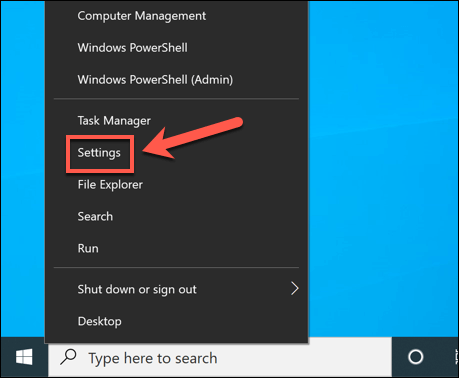
- You can check for updates in Windows Settings. Right-click the Start menu and select Settings to open this menu.
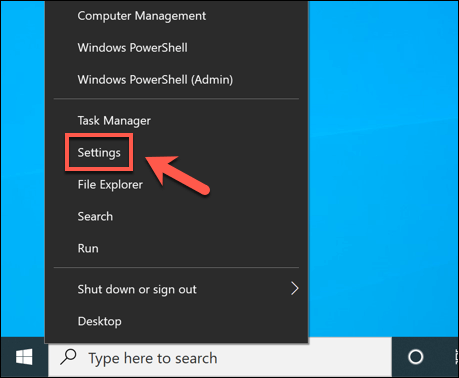
- In the Windows Settings menu, you’ll need to select Update & Security > Windows Update to view your update options. If there are any available updates, select the appropriate option to download and install them. Otherwise, select Check for Updates to begin a search.
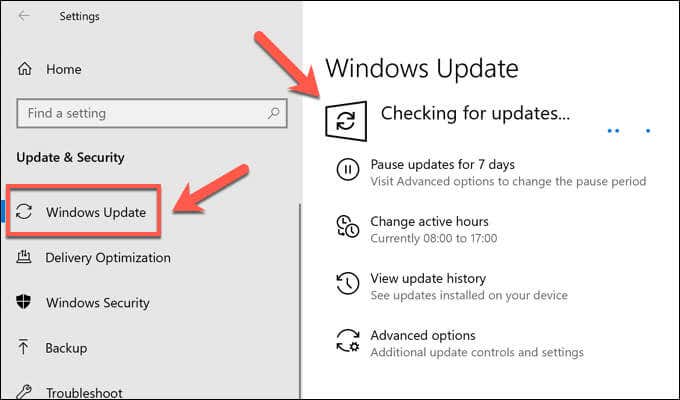
If there are any available system updates, follow the on-screen instructions to download and install them, then restart your PC to apply them in full. While this isn’t guaranteed to resolve any issues with the lock screen overlay, it will ensure you have the most recent available bug fixes installed.
How to Disable lockapp.exe on Windows 10
While lockapp.exe is a system process, it isn’t as important as dwm.exe and other critical processes. Disabling it will take you straight to the login prompt.
- To disable the lockapp.exe process, you’ll need to create a new Windows Registry entry. To do this, right-click the Start menu and select Run.
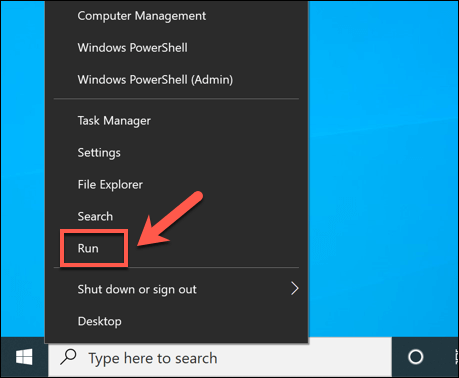
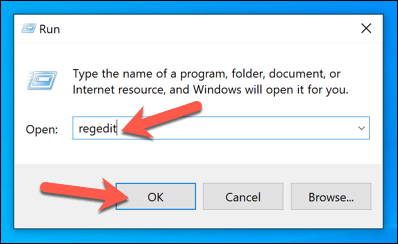
- In the Run dialog box, type regedit, then select OK.
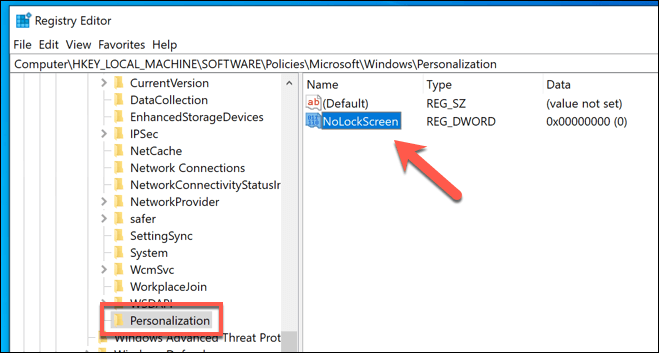
- Using the registry editor, locate the HKEY_LOCAL_MACHINESOFTWAREPoliciesMicrosoftWindowsPersonalization key. If it isn’t there, create it by right-clicking the Windows key, then selecting New > Key. Once you’ve located (or created) this key, right-click the white pane on the right, selecting New > DWORD (32-bit) value from the list. Name the new value NoLockScreen.
- Double-click the new value, then type 1 in the Value data box. Select OK to save.
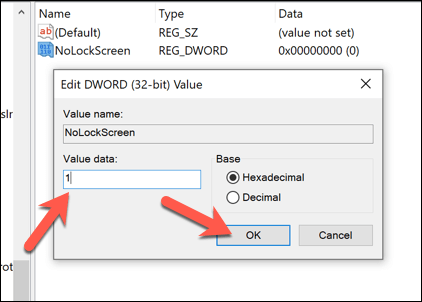
Once saved, the lock screen overlay will be disabled and lockapp.exe won’t activate. The next time you lock your PC or sign in, you’ll be presented with the sign in prompt directly—the overlay won’t appear.
Configuring the Lock Screen
The lock screen is configurable, allowing you to add certain notifications, such as the number of unread emails in your inbox. To configure this, you’ll need to use Windows Settings.
- Right-click the Start menu and select Settings to begin.
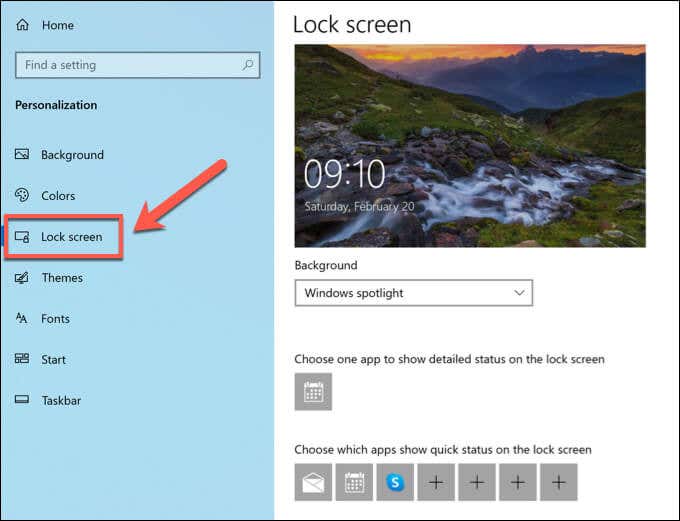
- In the Settings menu, select Personalization > Lock screen. From here, you can change the lock screen background and add other apps to view their “quick status” notifications. This could include your calendar, inbox, news app, and more.
How to Check Whether lockapp.exe Is Genuine
Windows 10 is better at protecting users from malware that pretends to be genuine system processes than earlier Windows versions, but it isn’t impossible that malware like this could infect your PC. If you want to check that lockapp.exe is genuine and safe to run, you can do so using Task Manager.
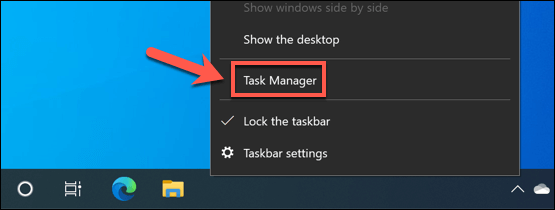
- To launch Task Manager, right-click the Start menu and select Task Manager.
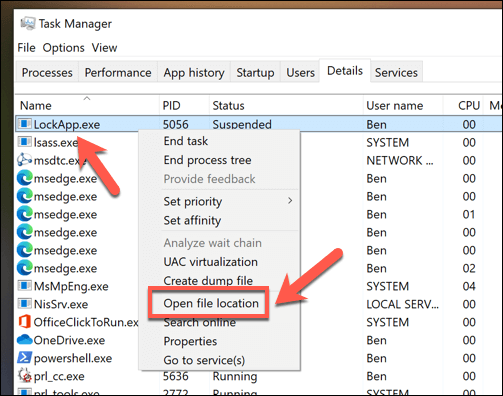
- In the Details tab of the Task Manager window, find the lockapp.exe process. Right-click it, then select Open file location.
- If the lockapp.exe process running on your PC is genuine, Windows will open the C:WindowsSystemAppsMicrosoft.Lockapp_ folder, with the underscore in the folder name followed by a series of numbers and letters that could change, depending on your version of Windows (e.g. Microsoft.Lockapp_cw5n1h2txyewy).
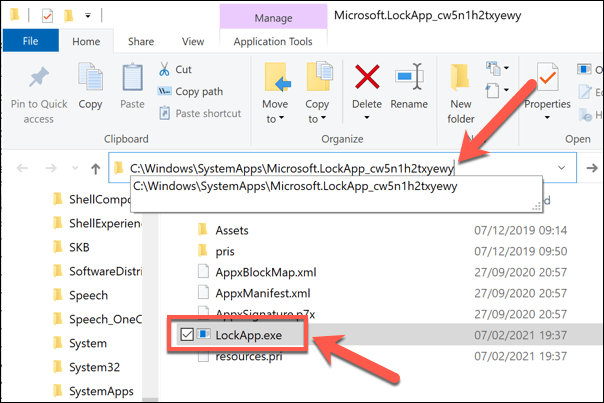
However, if the location opened in File Manager isn’t in the C:WindowsSystemApps folder, you can probably assume that the process is rogue. You’ll need to check and remove the malware from your PC before you can safely begin using it again.
Protecting and Maintaining a Windows 10 Installation
Lockapp.exe is a legitimate Windows 10 system process, just like ntoskrnl.exe and others. Disabling it shouldn’t cause issues, but if your PC is unstable, there are other steps you’ll need to take to protect and maintain your system. You can start by keeping your PC updated and checking your PC for malware on a regular basis.
If your PC is still having issues, it’s probably time to consider starting again with a fresh Windows 10 installation. Of course, high CPU and RAM issues could point to struggling hardware, so if you’re facing a slowdown, it might be time to invest in some new PC upgrades to get your PC running smoothly again.

