While certain elements of the Windows operating system (such as the system kernel) are vital for it to work, other parts are less important. If you’re trying to lower your system resources, you may wish to consider disabling some unnecessary system services and processes, although you’ll need to understand them first.
One fairly simple-to-understand process is SearchUI.exe. As the name suggests, SearchUI.exe (or SearchApp.exe) is a component of Windows 10’s search features—in particular, the search tool that was originally part of the Cortana personal assistant. Here’s everything you need to know about it.

Contents
What Is SearchUI.exe (or SearchApp.exe) and Should You Disable It?
SearchUI.exe is the process that allows the search bar on your taskbar to work. SearchUI.exe was previously combined with Cortana, the Windows 10 personal assistant, but was removed from Cortana in the Windows 19 19H1 update in April 2019 and renamed SearchApp.exe to distinguish it from other components.
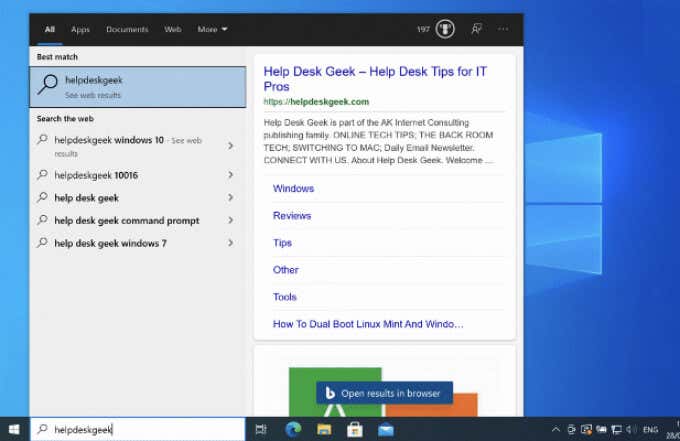
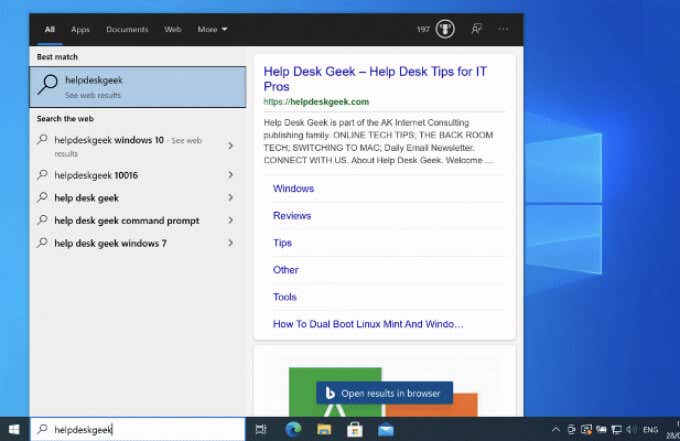
As it stands now, SearchApp.exe is a typically low-resource process that sits in the background. It uses some resources, however, to ensure that when you press the search bar in the bottom left, the search menu appears almost instantly, allowing you to search your PC or the web, open certain apps, or change your PC settings.
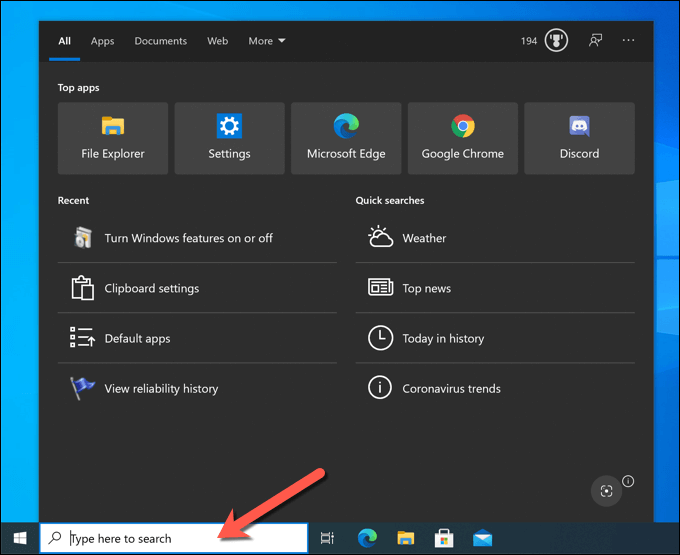
This is a very basic search tool that relies on other processes (such as the Windows Search Indexer) to manage file indexing or web searches, allowing Windows to quickly pull up files and installed apps when you search for them. As a Windows system process, SearchApp.exe (or SearchUI.exe) is entirely safe to run and use.
If you’d prefer to disable the search tool, however, you can. You can hide it from view, ensuring that the process runs but doesn’t use any of your system resources. Alternatively, you can stop the process from running, ensuring that the search feature is disabled (either temporarily or permanently).
How to Hide the Search Bar on Windows 10
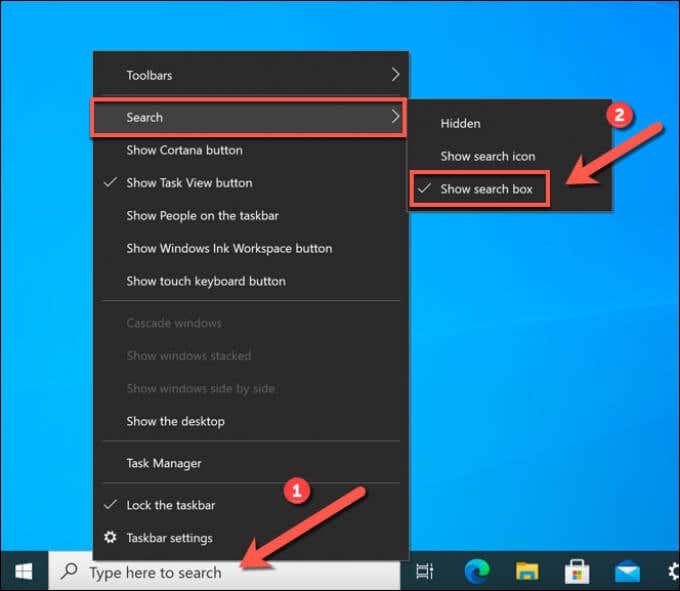
Before you consider disabling SearchApp.exe (or SearchUI.exe) on Windows, you may prefer to hide the search bar instead. This ensures that Windows’ search features remain active and available, but the search bar itself is hidden. The SearchApp.exe (or SearchUI.exe) process will remain paused but enabled.
- To do this, right-click the search bar (or the taskbar) and select Search > Hidden from the menu.
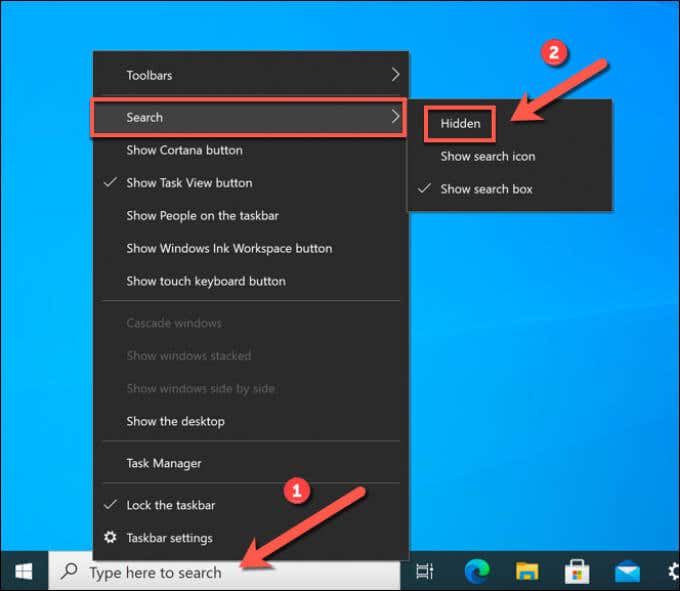
- To re-enable the search bar at any point, right-click the taskbar and select Search > Show search box. Alternatively, select Search > Show search icon to keep it hidden from view while allowing the search feature to remain accessible with a smaller icon.
How to Manually Stop the Windows 10 Search Bar Process
The Windows 10 search bar (SearchApp.exe or SearchUI.exe) is always running on your PC, even if you hide the search bar from view. Should it become unstable at any point, however, you’ll need to stop the process and restart it.
For instance, if the search menu itself repeatedly freezes, you may need to end the process to fix the problem. You can do this using Windows Task Manager or by using Windows PowerShell.
Using Task Manager
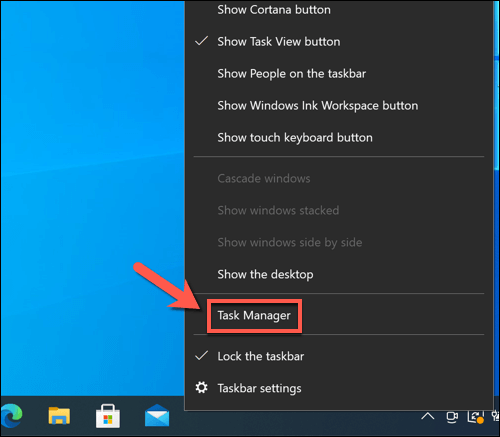
- To stop SearchApp.exe (or SearchUI.exe) using the Task Manager, you’ll need to open a new Task Manager window. Right-click the taskbar and select Task Manager to do this.
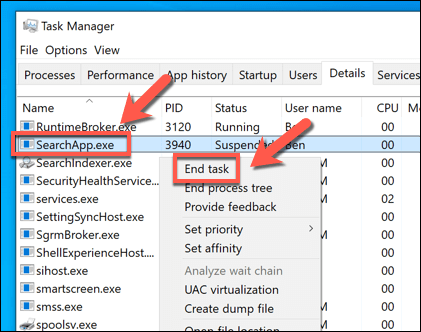
- In the Details tab of the Task Manager window, search for either SearchApp.exe or SearchUI.exe. The app name will vary, depending on your version of Windows 10. Once you’ve located the app, right-click it and select the End Task option.
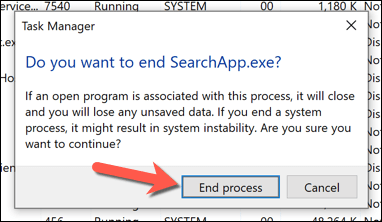
- Task Manager will ask you to confirm that you want to stop the process—select End process to do this.
- Once you’ve ended the running process, select the search bar again. Windows will reopen the SearchApp.exe (or SearchUI.exe) process, restoring the search bar’s functions.

Using Windows PowerShell
Another way to quickly disable a broken search bar process on Windows 10 is to use the Windows PowerShell.
- To do this, right-click the Start menu and select the Windows PowerShell (Admin) option.
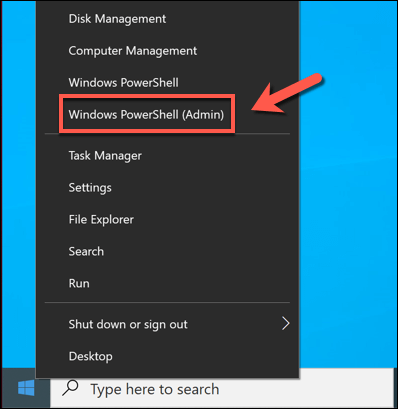
- In the new PowerShell window, type taskkill /f /im SearchUI.exe (if your version of Windows uses the SearchUI.exe process) or taskkill /f /im SearchApp.exe (if your version of Windows uses SearchApp.exe), then select the Enter key on your keyboard.

- Running the taskkill command will end the search bar process. To restore it, select the search bar—Windows will restart the process automatically.

How to Disable SearchApp.exe or SearchUI.exe on Windows 10
The steps above should help you to hide or stop the running search bar process—but only temporarily. If you want to stop SearchApp.exe or SearchUI.exe from running, you’ll need to use the Windows PowerShell to take ownership of and then rename the executable file to stop it running.
Disabling the Search Bar Process
- To do this, right-click the Start menu and select the Windows PowerShell (Admin) option.
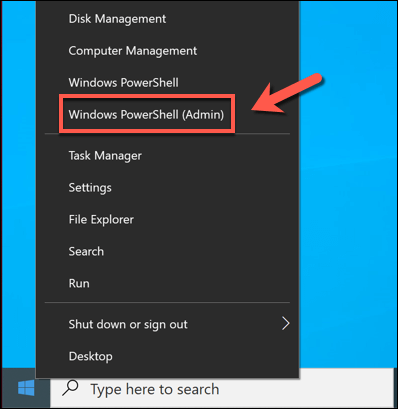
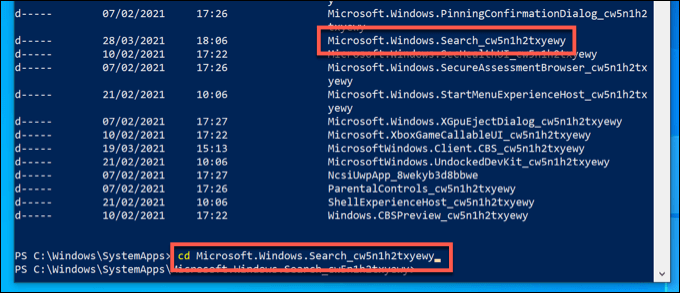
- In the new PowerShell window, type cd C:WindowsSystemApps and select Enter to move to the SystemApps directory. Once there, type ls to view a list of sub-folders. Look through the list and identify whether you have a Microsoft.Windows.Cortana_cw5n1h2txyewy or Microsoft.Windows.Search_cw5n1h2txyewy folder listed.
Type cd Microsoft.Windows.Cortana_cw5n1h2txyewy or cd Microsoft.Windows.Search_cw5n1h2txyewy (followed by Enter) to move into the correct folder at this point.
- Once PowerShell is in the correct folder, type the following commands in sequence to take ownership of the SearchApp.exe (or SearchUI.exe) file and rename it.
If you’re in the Microsoft.Windows.Cortana_cw5n1h2txyewy folder, replace file.exe with SearchUI.exe.
If you’re in the Microsoft.Windows.Search_cw5n1h2txyewy folder, replace file.exe with SearchApp.exe instead. Run these commands in sequence to complete the process:
- takeown /f file.exe
- icacls file.exe /grant administrators:F
- taskkill /f /im file.exe
- mv file.exe file-old.exe
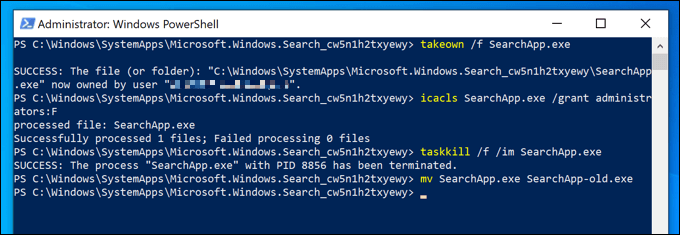
- With the SearchApp.exe (or SearchUI.exe) process stopped and renamed, the search bar will no longer function. You’ll need to follow the steps above to enter the correct folder, then type mv SearchApp-old.exe SearchApp.exe or mv SearchUI-old.exe SearchUI.exe, depending on your version of Windows.
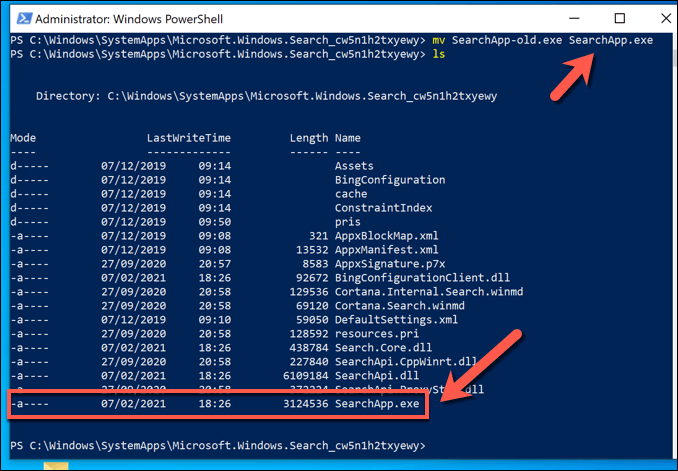
Running these commands will stop Windows from opening the search bar process—in effect, disabling it completely. Unfortunately, it isn’t possible (at present) to remove the app using Windows PowerShell or other tools, so this remains the best method for stopping it from working on your PC.
Resolving Search Issues on Windows 10
If you prefer to use the Windows search bar to search your PC or the web, you’ll need to leave the SearchUI.exe process running on your PC. If you’d prefer to limit the amount of data Microsoft records on you, however, it may be best to disable it fully using the methods listed above.
If you’re running into search issues on Windows 10, you might need to troubleshoot the problem by rebuilding your search index. If that doesn’t work, you may need to look at further troubleshooting steps, such as using the Windows Troubleshooter or advanced commands like SFC to restore your system files.

