The Microsoft Windows Search Indexer, which shows up as SearchIndexer.exe in your task manager, has a pretty useful job. It makes your searches in Windows go much faster. However, you’ve probably typed its executable name into Google because the program seems to be eating up CPU and RAM resources in a way that’s worrying.
If you’re concerned that SearchIndexer.exe is misbehaving or affecting the performance of your computer, stick around right to the end of this article and we’ll lay all your doubts to rest.


Contents
- 1 What Does The Windows Search Indexer Do?
- 2 Search Indexer Is a Windows Service
- 3 Customizing the Windows Search Indexer
- 4 Customizations That Reduce Search Indexer’s Footprint
- 5 Manually Rebuilding Your Search Index
- 6 Disable Search Indexer for Better Performance
- 7 Can You Remove Windows Search Indexer?
What Does The Windows Search Indexer Do?
Windows 10 has a pretty powerful search utility. All you have to do is start typing what you’re looking for and the results appear almost instantly. This is only possible because the Windows Search Indexer is always running in the background.
It watches for changes to common file locations, installed applications and other activity that’s likely to be something a user will search for. It then builds an index of all those items so that it can rapidly give you results.

Search Indexer Is a Windows Service
The executable you sometimes see in task manager is part of a Windows service called WSearch. If you go to the list of services in Task Manager, you’ll see it there, sitting in the background and doing its thing. This means you don’t have anything to worry about in terms of security.
The Windows search indexer is not a piece of malware and is doing what it’s supposed to. You should of course always have a good antivirus package installed and run regular scans, but in this case it’s not a rogue program sneaking in through the back door.
Customizing the Windows Search Indexer
While most users will never have a reason to mess with the Search Indexer, but it is actually possible to change what it indexes and how it behaves.
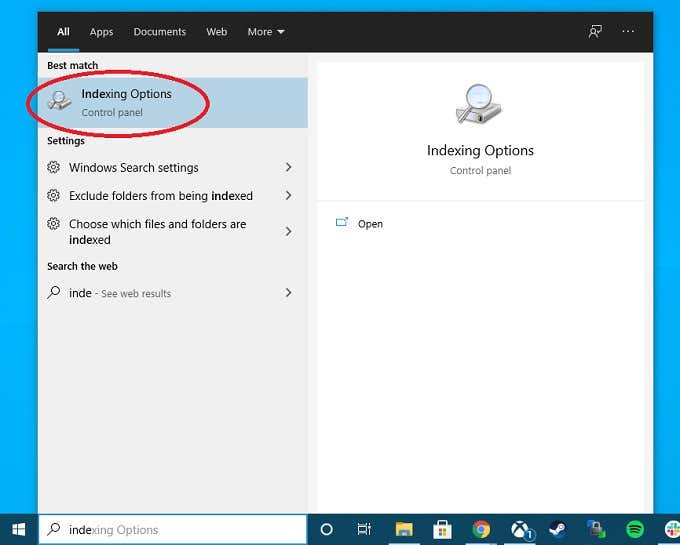
1.To access these settings, open the Start Menu and search for Indexing Options. You can also find this setting in the Control Panel, but (ironically) the fastest way to get there is by using Windows search.
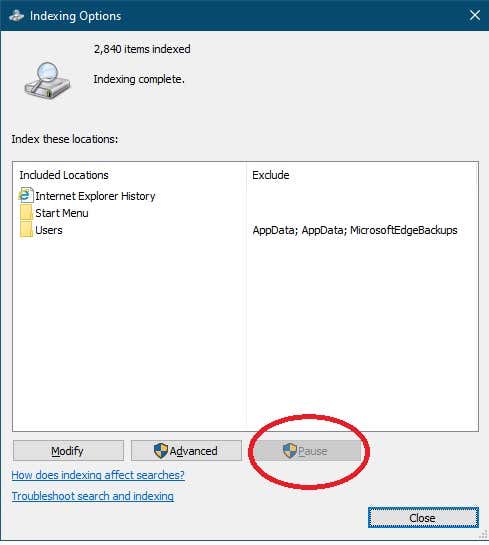
Once the Indexing Options window is open, you have a few different ways you can change the way the Indexer does its job.
The Pause button will only be available while the Indexer is running. This is useful for those situations where the Indexer is interfering with your computer’s performance at an inconvenient time and you just want it to chill out for a bit.
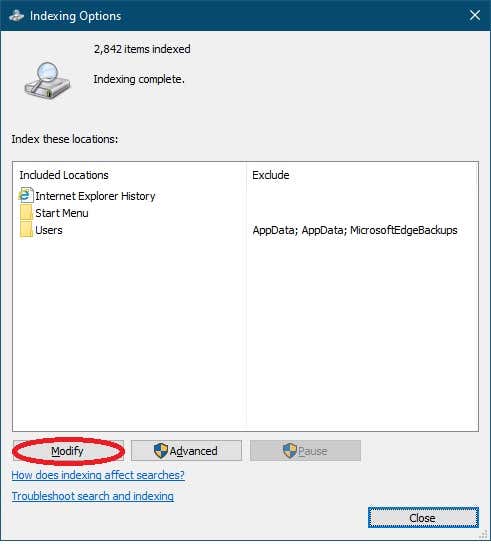
The Modify button lets you add or remove locations for indexing. Perhaps you have an external drive with documents you need to search frequently. If you add it to the list of places the indexer should watch then you can search it quickly in future.
Finally the Advanced button will lead you to more finely-tuned options, which can have a big impact on how much of a bother Search Indexer is to you. There’s a lot to unpack here, so we’ll go through the options and what they do in turn.
Customizations That Reduce Search Indexer’s Footprint
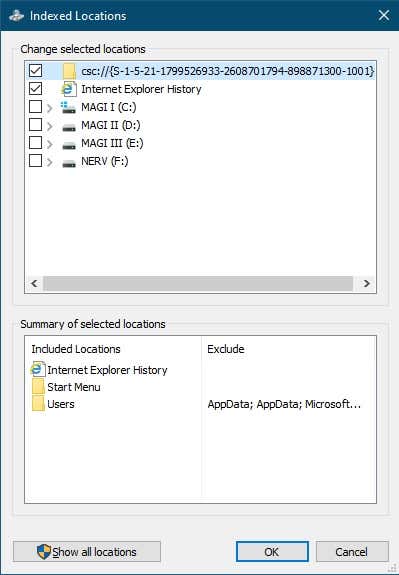
The first place you might want to visit when trying to reduce how much RAM, CPU and hard drive bandwidth the program takes up is the Modify button under Indexing Options. This will show you the locations that are currently being indexed. By removing locations that you have no interest in searching, Indexer will finish its processing more quickly.
It can also be helpful to uncheck locations that are on slow disks, for obvious reasons.
Under the Advanced options found in Indexing options, we can modify even more aspects of how the indexer works.
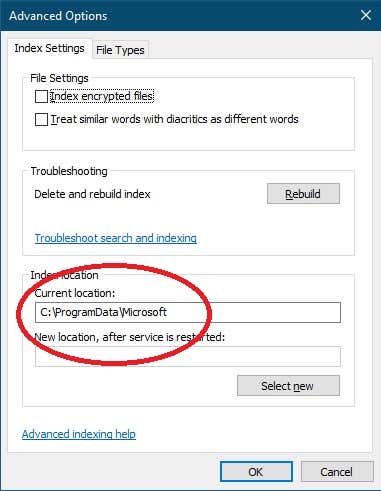
One interesting option is to change where the search index is located. Moving it to a secondary drive or to a fast SSD can remove it from competition with the rest of the operating system. This isn’t likely to make much of a difference in most cases, but you can try it to see if that’s the root of poor performance for you.
The other area that can help reduce how much time and resources the Search Indexer uses is File Types. By limiting the file types that Indexer cares about, you can skip over a lot of the work.
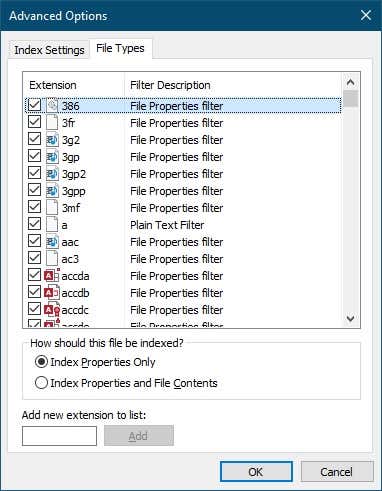
If your indexer is set to index file contents as well as file properties, you can try changing it to only index file properties. That should make a massive difference to how quickly Indexer does its thing and gets out of the way.
Manually Rebuilding Your Search Index
In some cases it’s not the Search Indexer software that’s the problem. Instead the index itself has somehow been corrupted. In this case you can force Search Indexer to completely rebuild the index. Simply select the Rebuild button shown below and confirm you want to rebuild the index. It can take a long time, but you can see the progress of the process in the main Indexing Options window.
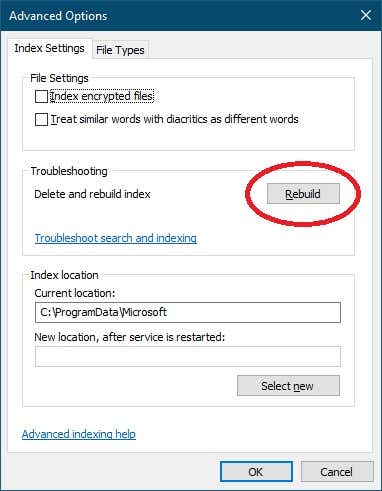
Rebuilding makes sense if you’ve made a lot of changes to the files on your drives recently. Because it can take a long time, you can start the rebuild before going to bed and have it run overnight.
Disable Search Indexer for Better Performance
So you don’t care about searching things in Windows and just want to tap as much performance from your system as possible at all times. While we don’t recommend completely disabling Search Indexer, you should be aware of the options available to you.
Check out Turn Off Indexing in Windows for Better Performance, where we show you how to disable Search Indexing and offer advice on the specific situations where it’s a good idea to do so.
Can You Remove Windows Search Indexer?
The short answer is that you can’t completely remove the Search Indexer. As a Windows component, you can only disable Search Index as we described in the previous section. There’s really no reason to remove it altogether anyway. If you disable it, the only impact that it has is to take up a small amount of disk space. So even if you could remove it altogether it wouldn’t be worth the effort.
We don’t recommend disabling Windows Search as a whole. It’s better to tune the service so that it’s impact is reduced in the rare cases where it’s eating too much of the resource pool.

There are a few situations where Search Indexer can be disabled for good reasons. For example, if you have a home media server running something like Plex and no one uses it as a day-to-day computer, you might as well disable Search Indexer, because it serves no purpose on that computer.
The same would go for low-spec Windows devices that are being used in embedded systems or any situations where you absolutely know that no one is going to be doing searches.
To sum up,Windows Search Indexer is not a virus, there’s nothing wrong with your computer and the software is doing an important job. It’s up to you whether you want to dial it way down or completely disable it, but Windows is much snappier and easy to use with a handy index of your files at hand.


