If you’re viewing this page on a Windows PC, then you’re already relying on several system processes to get you here. At the top is the Windows system kernel (ntoskrnl.exe) which allows software to interact with your PC hardware. Lower-level applications like Chrome (chrome.exe) use the kernel to display pages like this one.
Unfortunately, not every application and system service is reliable. Bugs, security holes, and high CPU usage are common, relying on regular Windows updates to fix. Ironically enough, Windows Update itself can cause high CPU and RAM usage through related services like waasmedic. Here’s what you need to know.

Contents
What Is the Waasmedic Service on Windows?
The wassmedic service (also known as the Windows Update Medic Service and Wassmedicagent.exe) is a background system service that handles part of the Windows Update process. Waasmedic is responsible for protecting Windows Update from being disabled or mishandled (by, for example, rogue malware infections).
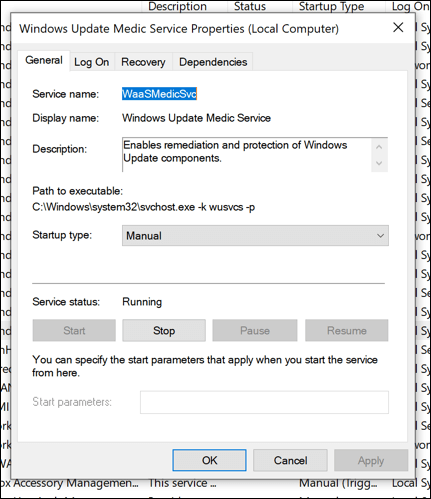
If you (or something else) tries to disable Windows Update, the wassmedic process will intervene to stop it. If any system processes related to Windows Update are disabled, wassmedic will restart them. You can’t easily disable it, as doing so bypasses the built-in protection for Windows Update in Windows 10.
If you’re worried about this process, don’t be—it’s entirely legitimate and forms part of the necessary components to help your PC run properly. It’s improbable that the running wassmedic or Windows Update processes on your PC are anything but the real deal, but if you’re unsure, make sure to check for possible malware.
What Causes Waasmedic High CPU, RAM, and Other System Resource Usage?
Windows is unlikely to call upon this small executable file without good cause. If you see waasmedic (or Windows Update) report high CPU, RAM, or other high system resource usage in Task Manager, it’s a sign that Windows Update is having trouble and might require further investigation and troubleshooting.
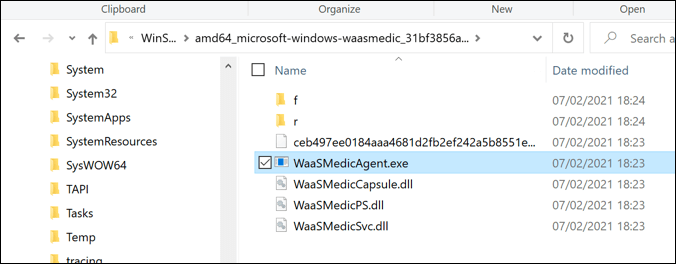
This is because the Windows Update Medic Service (as wassmedic is officially known as) is a service that monitors the “health” of the overall Windows Update service on your PC. If Windows Update runs into issues, waasmedic will attempt to repair it. It may restart Windows Update if it stopped unexpectedly, for instance.
Should waasmedic be reporting high CPU usage in Task Manager, it’s a sign that something behind-the-scenes is happening. A small increase is to be expected, but if you’re seeing high CPU usage over a prolonged period, you should check if Windows Update is working properly by following the steps below.
Most users may not even see waasmedic appear in Task Manager at all. If everything is working, the process may only appear when an action (such as repairing Windows Update) is being performed.
How to Troubleshoot Waasmedic on Windows
Windows Update is the focus of the wassmedic process. If you see waasmedic reporting high CPU usage or other issues, it’s almost certainly related to a problem with Windows Update on your PC.
Thankfully, there are some common troubleshooting steps you can follow to resolve this. First, you should (in the first instance) check if Windows Update is working and all available updates are installed. If you’re still having trouble, you can then use built-in tools to check the health of your system.
Check Windows Update is Running Properly
To check if Windows Update is working properly, here’s what you’ll need to do:
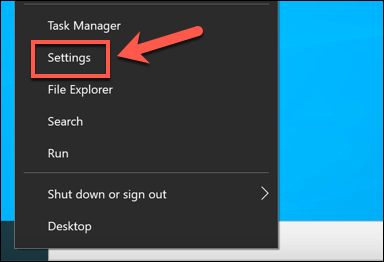
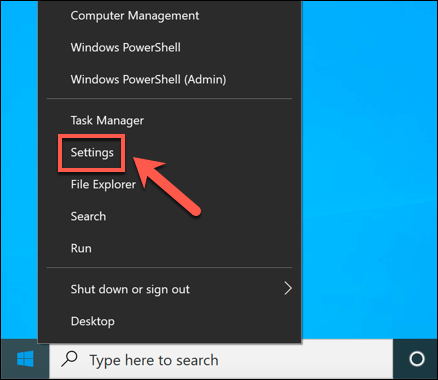
- Right-click the Start menu and select Settings.
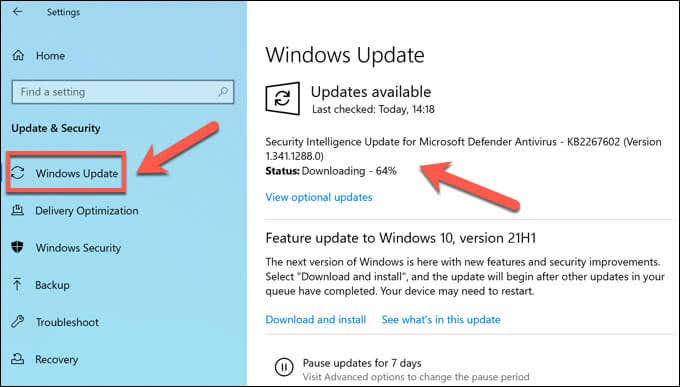
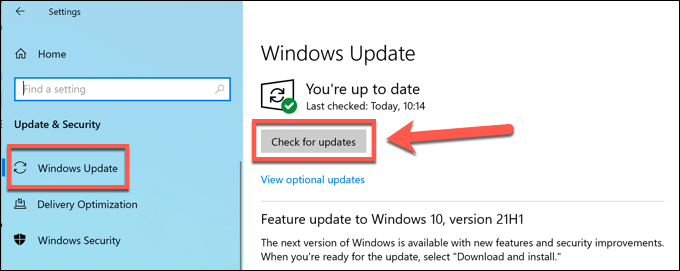
- In the Settings menu, select Update & Security > Windows Update. If Windows Update is working properly, Windows will search for and prompt you to install any available updates. Follow any additional on-screen instructions to do this.
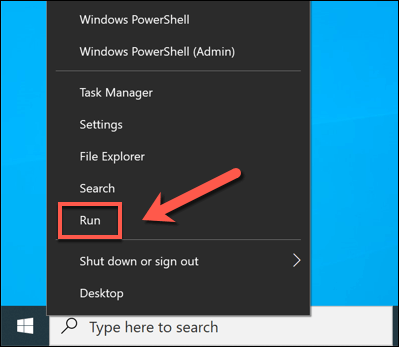
- If Windows Update isn’t working, right-click the Start menu and select Run.
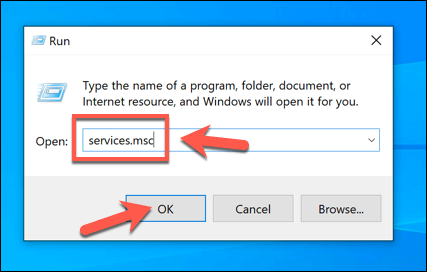
- In the Run box, type services.msc, then select OK to confirm.
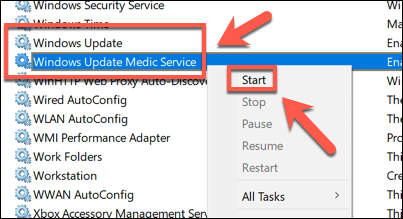
- In the Services window, scroll through and locate Windows Update and Windows Update Medic Service. If these services aren’t running, right-click each service and select Start. Otherwise, right-click each service and select Restart instead.
- Once the Windows Update services are running, return to the Windows Update menu in Windows Settings and check for new updates. If the system works, waasmedic should return to normal levels of system resource usage (typically extremely low).
Repair Windows with DISM and SFC
If you can’t fix Windows Update, or there’s a problem preventing you from restarting the Windows Update system services, your Windows system files may be corrupted. Windows includes built-in tools called DISM and SFC to help you repair this issue, but you’ll need to use the Windows PowerShell to use them.
If you want to repair your Windows system files, here’s what you’ll need to do:
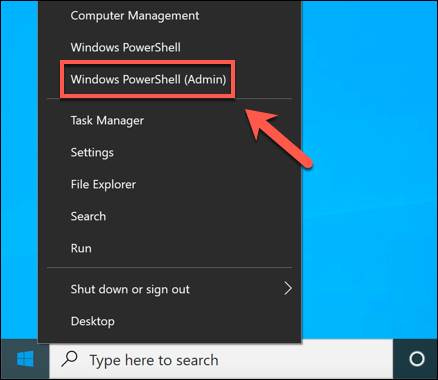
- First, you’ll need to open a new PowerShell window. Right-click the Start menu and select Windows PowerShell (Admin) to do this.
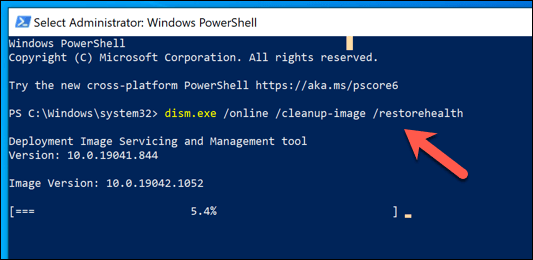
- In the new PowerShell window, type dism.exe /Online /Cleanup-image /Restorehealth and select the Enter key. Follow any additional on-screen instructions.
- Once the DISM tool has cleaned up your built-in Windows system image, you can repair your Windows system files using it. To do this, type sfc /scannow and select Enter.
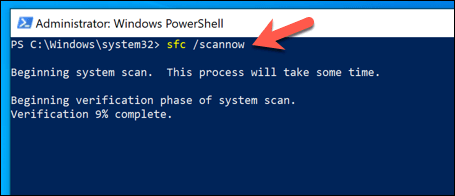
Allow some time for the SFC scan to complete and restart your PC once it’s done. Windows will automatically repair any files that are corrupted or missing. But if you’re still having issues, you may need to consider scanning for malware or resetting Windows entirely to ensure your Windows installation is stable and free of errors.
How to Disable the Windows Update Medic Service
Windows Update is one of several protected system services in Windows 10. Unlike earlier versions of Windows, you can’t stop Windows Update from checking or installing important updates. It’s considered critical for your PC’s security for these updates to install without additional interaction.
This means that you can’t disable the waasmedic service completely without using sketchy and unreliable software. While third-party tools do exist to disable it, we wouldn’t recommend you try them as we can’t guarantee that they’re safe to use.
Disabling Windows Update can also cause system instability and will leave your PC exposed to security issues. However, you can temporarily disable Windows Update for up to 35 days. This will limit system resource usage for waasmedic, allowing you to troubleshoot any problems with it.
How to Temporarily Disable Windows Update
- To disable Windows Update temporarily (and reduce waasmedic system resource usage), right-click the Start menu and select Settings.
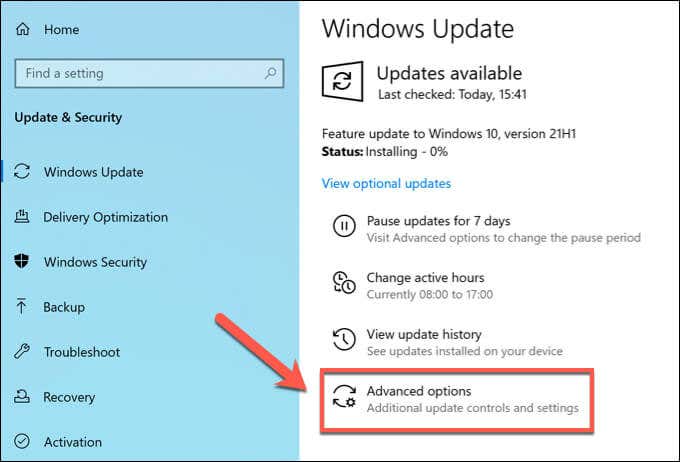
- In the Settings menu, select Update & Security > Windows Update > Advanced Options.
- In the Advanced Options menu, select how long you wish to pause all updates using the Pause Updates drop-down menu. Any changes you make will apply immediately.
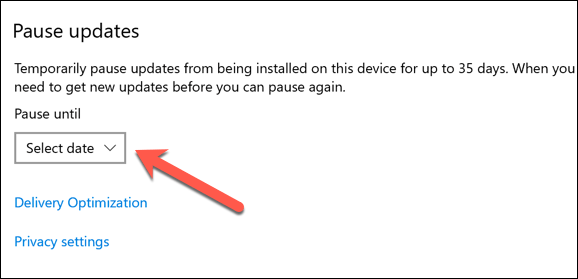
Once Windows Update is temporarily disabled, all system processes relating to Windows Update (including waasmedic) will stay inactive until the date for resuming updates passes or until you re-enable Windows Update manually.
Protecting Your Windows 10 PC
If you’re worried about the Windows Update Medic Service (waasmedic) on your Windows PC, don’t panic. It’s legitimate and included as a way to protect Windows Update from interruption. While you can use third-party tools to disable Windows Update, we don’t recommend it, although you can stop individual updates.
The waasmedic service is there to help, but it doesn’t fix everything. If Windows Update won’t install new updates, you can troubleshoot using some common troubleshooting steps, especially if the updates get stuck. If all else fails, don’t forget that you can wipe and reset Windows to restore your PC afterward.


