Perhaps you’ve heard the IT person at work talk about GPOs or user policies. Or, maybe, you would like to know how to have better control over your computer. In any case, the Windows 10 Group Policy Editor is the tool to use. With it, you can work with Group Policy Objects (GPO) to customize your computer’s functions and the user experience.
In a network environment, the Group Policy Editor is used to configure everything from what programs are allowed to run to desktop customization. It does this in partnership with the Active Directory. For the average Windows 10 user who doesn’t have Active Directory, we can still use Local Group Policy Objects (LGPOs) to configure our computers.

Where Do I Find the Windows 10 Group Policy Editor?
If you have Windows 10 Home edition, you don’t have the Group Policy Editor. It’s only included with Windows 10 Pro and Windows 10 Enterprise.
The actual program name is gpedit.msc and it’s generally located at C:WindowsSystem32gpedit.msc or %windir%System32gpedit.msc.
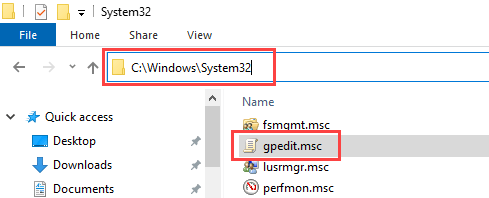
But you don’t have to open File Explorer to find it every time you want to use it. There are several ways to access the Group Policy Editor.
- Open the Start menu and search on gpedit.msc.
- Press Windows Key + R. Type gpedit.msc in the Run window and select OK.
- Create a shortcut to the gpedit.msc and place it on the desktop.
- In File Explorer, navigate to C:WindowsSystem32gpedit.msc.
- Right-click on gpedit.msc and select Create a shortcut.
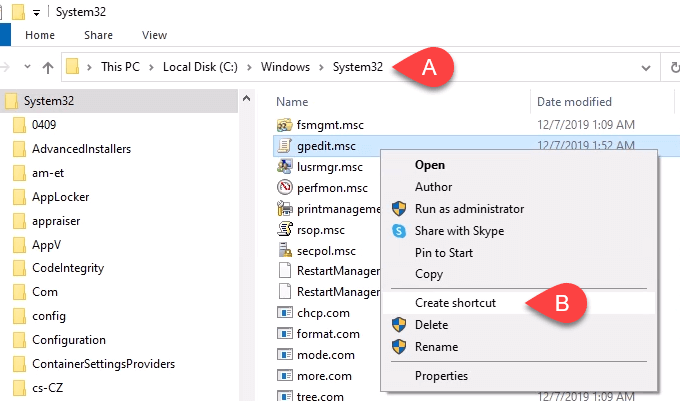
- A window will pop up that reads, “Windows can’t create a shortcut here. Do you want the shortcut to be placed on the desktop instead?” Select Yes. You can move the shortcut wherever you want after it’s created.

A Guided Tour Of The Windows 10 Group Policy Editor
Once you have the Group Policy Editor opened, you’ll notice two main categories on the left side of the window. There are Computer Configuration and User Configuration.
The policies in Computer Configuration will apply to the entire computer and affect the functioning of the computer and the operating system in general. These settings do not change depending on who is logged in to the computer.
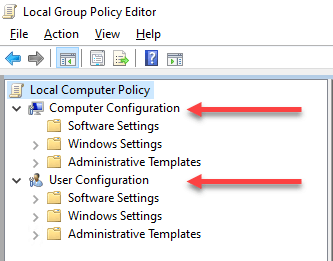
The policies in User Configuration apply to the users. The User Configuration policies are ideal for customizing the user’s desktop experience. If you are only changing the local group policy objects (LGPO), it will apply to all users on that computer.
If you are taking care of servers and applying the group policy in your Active Directory, the settings may apply to all or some users. It all depends on what level the policies are applied.
As you drill down into the different sections, you’ll see different areas for different applications or services. Make special note of what’s under the Administrative Templates sections in both Computer and User Configuration.
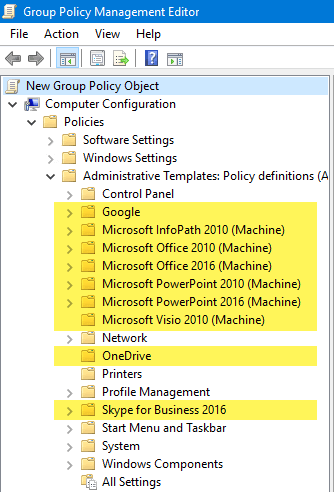
Administrative Templates can be added for many different apps you may install. For example, there is a large set of Administrative Templates for Microsoft Office that can be added to the Group Policy Editor. Even non-Microsoft companies, like Google, FoxIt PDF reader, and LogMeIn remote desktop access provide Administrative Templates for you to use. It’s a bit of a process to download and install them, but it’s not that hard.
There are far too many policies for us to go through them all and describe what they can do.
If you’d like to see all the Administrative Template policies available under either Computer or User Configurations, navigate to Administrative Templates > All Settings and select it. In the right-hand pane, you’ll see a long list of possible settings. In the image below, there are 2500 settings. There may be more on your computer or server.
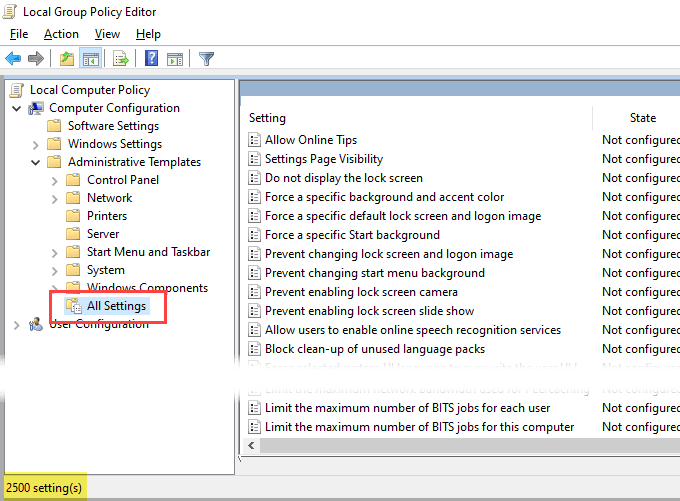
When this was written, there were over 4200 policies native to Windows. That’s not including the different Administrative Templates one can add.
If you’re interested in going further into all the Microsoft policies, you can download Microsoft’s Group Policy Settings Reference for Windows and Windows Server.
What Can I Do With the Windows 10 Group Policy Editor?
Think of the Group Policy Editor as your safe way to work in Windows Registry. Group Policy Editor won’t allow you to change everything you could in the Windows Registry, but it does allow you to change almost everything you’d want to change in Windows Registry.
Security policies are a great place to start. Let’s go through setting a policy to disable the Windows Command Prompt.
With the Group Policy Editor open:
- Navigate to User Configuration > System.
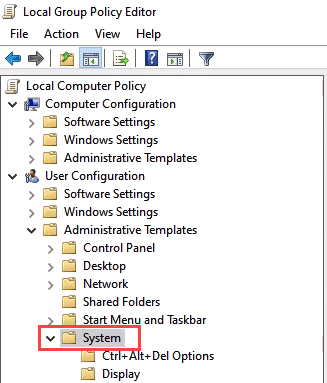
- In the right pane, select Prevent access to the command prompt. Open by double-clicking on it.
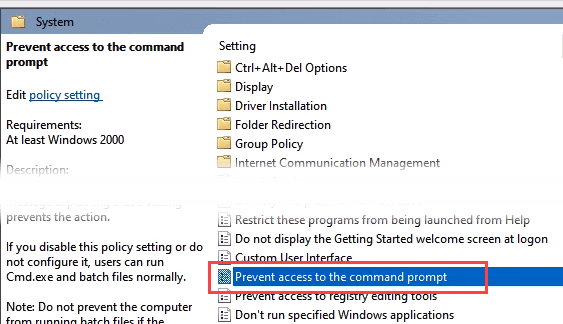
- To simply enable it, click on the Enabled radio button.
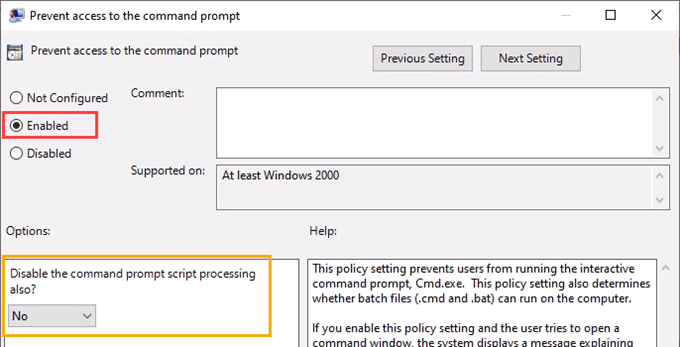
- This is optional. You can also prevent running batch scripts by changing the Disable the command prompt script processing also? from No to Yes.
Take a moment to read through the Help: section to fully understand what this setting can do. If you need to run batch files for system maintenance, do not turn this on.
While you’re in this area, check out other settings like Prevent access to registry editing tools and Run only specified Windows applications. These are good security settings to work with as well.
There are so many things you could do, and we have articles for you about many of them. We can show you the best way to disable Cortana, how to enable biometrics so Hello Fingerprint works, and how to set granular password policies for users. Get in there, take a look around and you’ll be pleasantly surprised how much you can control and customize your computer using the Windows 10 group policy editor

