Windows Explorer has a long history of stability issues, and the “File Explorer” rebranding in recent Windows iterations did little to improve things. So, it’s not uncommon to encounter random freezes and crashes with accompanying error messages such as “Windows Explorer is not responding” and “Windows Explorer has stopped working” when interacting with the file system on a PC.
Most complications with Windows Explorer or File Explorer are one-off instances that only show up while the operating system is under stress. But if you experience the same problem repeatedly, the troubleshooting tips below should allow you to sort it out.
Contents
- 1 Restart File Explorer
- 2 Reopen File Explorer
- 3 Disable Details and Preview Panes
- 4 Change Default File Explorer View
- 5 Clear Thumbnail Cache
- 6 Disable Thumbnail Previews
- 7 Set Display Scale and Layout to Defaults
- 8 Update or Roll Back Display Driver
- 9 Update Windows 10
- 10 Run Malware Scan
- 11 Disable Third-Party Shell Extensions
- 12 Reset File Associations
- 13 Run SFC Scan and DISM Tool
- 14 Windows Explorer Still Not Working: What Else?
Restart File Explorer
Restarting Windows Explorer (which continues to be the underlying process behind File Explorer) is a quick fix for minor system-related glitches that cause it to freeze or crash.
1. Right-click the taskbar and select the option labeled Task Manager. If the taskbar appears unresponsive, use the Shift + Ctrl + Esc keystroke to launch Task Manager.
2. Select More details to expand the default Task Manager view.
3. Under the Processes tab, locate and right-click Windows Explorer. Then, select Restart.
Reopen File Explorer
File management aside, File Explorer also powers the user interfaces behind elements such as the taskbar and desktop. So if it crashes completely (as in, you don’t see the taskbar and desktop), you must re-open it manually.
1. Press Shift + Ctrl + Esc to open Task Manager.
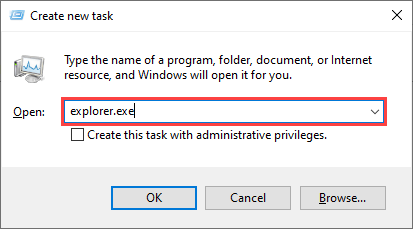
2. Open the File menu and select the Run new task option.
3. Type explorer.exe and select OK.
Disable Details and Preview Panes
If you only encounter the “Windows Explorer is not responding” or “Windows Explorer has stopped working” errors while selecting files and folders in File Explorer, try turning off the Details and Preview panes.
1. Open a new File Explorer window.
2. Select the View tab.
3. Inside the Panes group, deactivate both the Preview pane and Details pane.
4. Restart the Windows Explorer process via Task Manager.
5. Relaunch File Explorer and check if the issue persists. If so, move on with the rest of the fixes.
Change Default File Explorer View
If File Explorer freezes or crashes as soon as you open it, changing the default view from Quick access to This PC could prevent that. You won’t see a list of your recent files and folders anymore, but it does allow you to rule out issues caused by obsolete or broken entries within the File Explorer history.
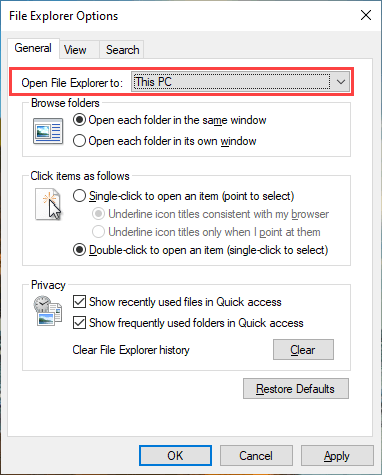
1. Press Windows + R to open the Run box. Then, type control folders and select OK. The File Explorer Options dialog should show up on the screen.
2. Under the General tab, open the pull-down menu next to Open File Explorer to and select This PC.
3. Select Apply > OK to save the changes.
If that helped, re-open the File Explorer Options dialog and select Clear to delete the File Explorer history. Then, change back the default view to Quick access. After that, the problem should not occur again.
Clear Thumbnail Cache
File Explorer displays thumbnail previews of files and folders. But an outdated thumbnail cache is another possible reason for freezes and crashes, so clearing it can help.
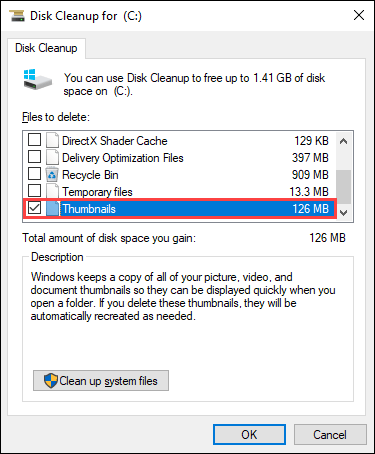
1. Press Windows + R, type cleanmgr into the Run box, and select OK.
2. Check the box next to Thumbnails.
3. Select OK.
Disable Thumbnail Previews
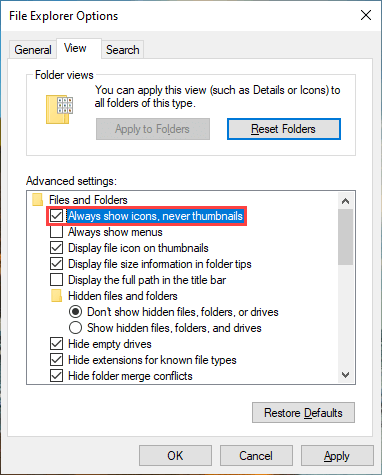
If clearing the thumbnail cache didn’t help, try turning off all thumbnail previews in File Explorer.
1. Open the File Explorer Options dialog and switch to the View tab.
2. Under Advanced settings, check the box next to Always show icons, never thumbnails.
3. Select Apply > OK.
Set Display Scale and Layout to Defaults
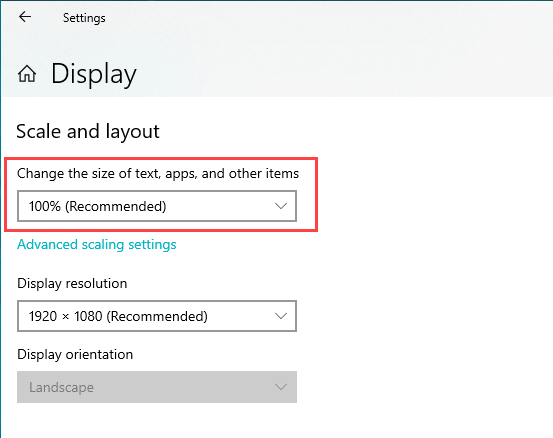
Using a larger display size for text and apps can also trigger the “Windows Explorer is not responding” and “Windows Explorer has stopped working” errors. It’s best to revert that to the default recommended setting.
1. Open the Start menu and go to Settings > System > Display.
2. Scroll down to the Scale and layout section.
3. Set Change the size of text, apps, and other items to 100% (Recommended).
Update or Roll Back Display Driver
An outdated display driver can result in all sorts of File Explorer-related issues. You can download and install the latest version of the driver by heading over to the video card manufacturer’s website – NVIDIA, AMD, or Intel.
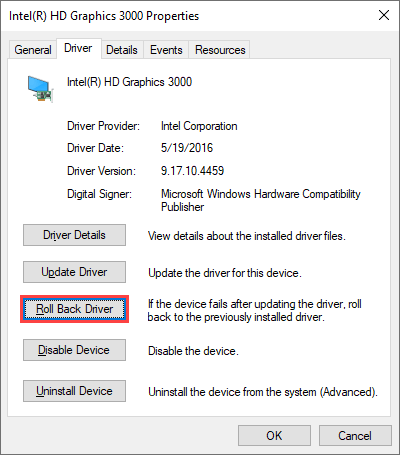
However, if the issue occurred right after a recent display driver update, you must roll it back.
1. Press Windows + X and select Device Manager.
2. Expand Display adapters.
3. Right-click the video card driver that you want to roll back and select Properties.
4. Switch to the Drivers tab.
5. Select Roll Back Driver.
Update Windows 10
Display drivers aside, File Explorer can also fail to respond or stop working due to an outdated version of Windows 10. If you haven’t updated the operating system recently, try doing that as soon as possible.
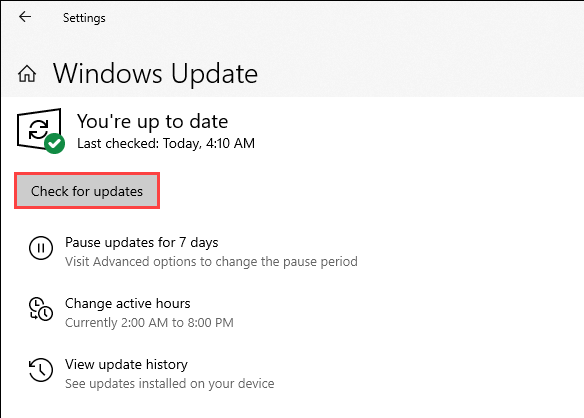
1. Go to Start > Settings > Update & Security > Windows Update.
2. Select Check for updates to scan for new updates.
3. Select Download and install to apply pending updates.
Additionally, check for and install any display-related drivers under View optional updates (if you see the option).
Run Malware Scan
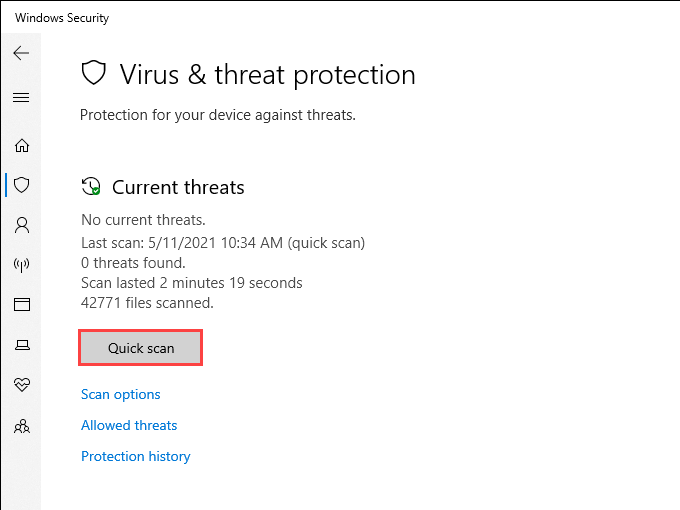
Malicious programs can induce all sorts of issues and prevent critical Windows components such as File Explorer from working correctly. If you don’t have a third-party antivirus solution on your computer, you can use Windows Security to remove malware instead.
1. Select Windows Security on the system tray.
2. Go to Virus & threat protection > Check for updates to install the latest antimalware definitions.
3. Select Quick scan.
If Windows Security fails to detect malware, select Scan options and follow up with a Full scan or a Microsoft Defender Offline scan.
Disable Third-Party Shell Extensions
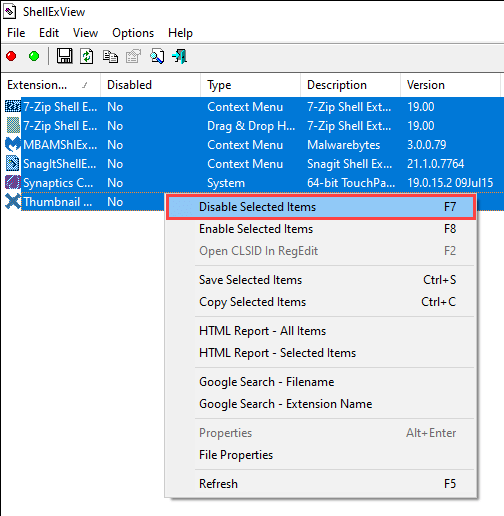
Does File Explorer freeze or crash only when right-clicking items? Conflicting contextual menu entries from third-party programs usually cause that. Use a program such as ShellExView to disable them.
1. Download and open ShellExView on your computer.
2. Open the Options menu and select Hide All Microsoft Extensions.
3. Select all third-party extensions and select Disable Selected Items.
If File Explorer begins to work correctly, re-activate each deactivated shell extension until you come across the problematic item. Then, update the related program (which could fix the issue), keep the extension disabled, or remove it from your computer.
Reset File Associations
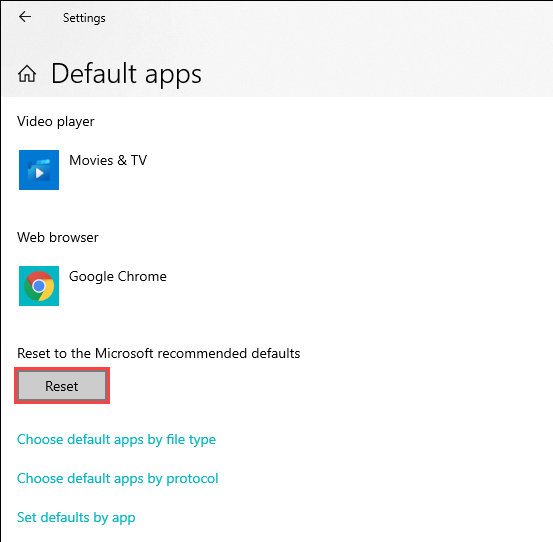
Incorrect, conflicting, or broken file associations in Windows 10 are another reason that results in File Explorer-related freezes and crashes. Try resetting them.
1. Open the Start menu and select Settings.
2. Go to Apps > Default Apps.
3. Select Reset.
Resetting file associations also revert default programs (such as the web browser) to Microsoft’s stock apps, so you may have to reconfigure your preferences.
Run SFC Scan and DISM Tool
If the “Windows Explorer is not responding” and “Windows Explorer has stopped working” errors continue to show up, it’s a good idea to run the System File Checker and the DISM (Deployment Image Servicing and Management) tool. That should fix File Explorer-related issues caused by corrupted system files.
Run System File Checker
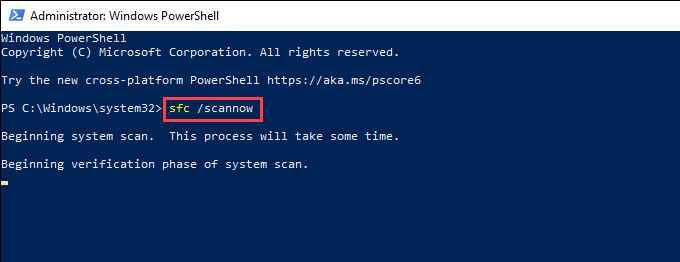
1. Press Windows + X to open the Power User Menu. Then, select Windows PowerShell (Admin).
2. Type the following command:
sfc /scannow
3. Press Enter to run the System File Checker.
For best results, repeat the SFC scan a total of three times.
Run DISM Tool
1. Open an elevated Windows PowerShell console.
2. Run the following command:
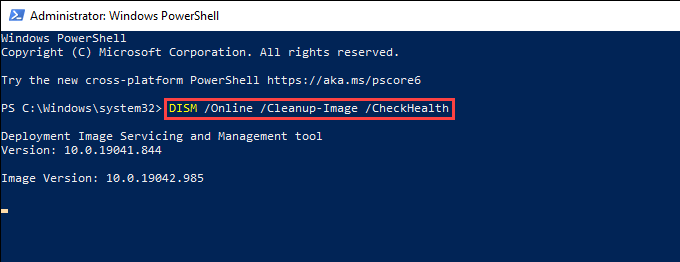
DISM /Online /Cleanup-Image /CheckHealth
3. If the DISM tool detects any issues, execute the two commands below:
DISM /Online /Cleanup-Image /ScanHealth
DISM /Online /Cleanup-Image /RestoreHealth
Windows Explorer Still Not Working: What Else?
The fixes above should’ve helped you resolve issues with File Explorer not responding. If not, here are several advanced fixes that you can try:
- Retry the fixes above after loading Windows 10 in Safe Mode
- Delete temporary files in Windows 10
- Perform a clean boot
- Use System Restore to revert Windows 10
- Restore Windows 10 to factory settings
Going forward, keeping the operating system updated is the best way to minimize potential File Explorer-related issues.


